Week 12 Reflection

Although I strolled into class a few minutes late, I was able to catch the remainder of the lecture presented by Indiana University’s Makerspace director. It’s really cool to see more areas conducive in instilling a sense of creativity within students open up in colleges around the nation. After the lecture, I was left with an immense sense of pride in the University of Illinois for creating the world’s first business school 3D printing lab. A place in which I, along with many of my fellow Illini, have utilized and continue to do so as a creative hub for various projects and personal endeavors. Particularly, I got to hear how my classmates have used the MakerLab and other resources on campus to help bring their projects to life. I was astonished by the creativity, ingenuity, and passion behind each groups’ progress report.

After each group presented a snippet of their project, we were left to stay in the MakerLab, go to the FabLab, or utilize any other resource to help aide the progression of our project. Since the Arduino is the base of our product, we went to the FabLab. During our time at the FabLab, we learned a lot more about the functionality of the ukulele tuner and made slight adjustments to our existing project. As Annie was heavily researching the Arduino facet of our project, I assisted Johnny in creating the outer piece of the tuner on Fusion 360. The process was quite tricky, but we are now one step closer to where we want to be in terms of design.

In the near future, I look forward to 3D printing the outer piece of the tuner and seeing it completed! Not to mention, I am beyond pumped to see my fellow classmates’ finished products. Also, I hope to continue utilizing the MakerLab and other resources on campus for future projects. Lastly, after having slight difficulty navigating Fusion 360, I want to create more objects to become fully proficient with the software.

Week 11 How-To and Summary

Week 11 was an exciting one for the digital makers, as it marked the last time we would be learning a new technology in our makerspace, the Digital Making Lab in the BIF. Week 11 was dedicated to using Meshmixer software in conjunction with two types of 3D sense scanners, the Sense 3D Scanner as well as the iPad mounted Structure Sensor. Some of the members of the course had a previous exposure to this technology during our build-a-printer event, however, it was a new learning experience for the majority of us. The scanner I used was the Structure Sensor, and it was rather intuitive to use. My partner simply did a 360 degree capture of my torso as I struck a pose. The scan was almost perfect, and the imperfections could be touched up in Meshmixer later. From there, I used the app connected to the scanner to e-mail the raw sensor data to myself.

Next comes the Meshmixing. This software by Autodesk allowed us to clean up the raw scanner data by patching any holes and smoothing strange bumps in our scan. There were a number of meshmixing tools that allowed us to do this, and Arielle, our guest speaker, was able to walk us through any issues. Meshmixer also allowed us to add additional shapes onto our scans, such as a base for our busts. After smoothing out of busts, we then saved them as .stl files, and transferred the files to an SD card so they could be loaded into our 3D printers. Most of the students prints took less than an hour.

Additionally, Arielle Rausin came in once again to speak to our class. She has had experience using the SenseScanner in her Digital Making project last year. Her project is one of the most successful projects to come out of UIUC’s makerspace. Last year, Arielle used one of Beckman’s Institutes scanners to scan and print a model of her wheelchair racing glove. By recreating the glove with 3D printer filament, Arielle was able to create a lightweight version of her glove, that was also more injury resistant. You can read more about her story at the following blog from last year’s digital making class: http://makerlab.illinois.edu/2015/06/09/meet-the-maker-arielle-rausin/

Additionally, her story has even made it to the new 3D printing course on Coursera. Here is a more recent interview from Arielle. It definitely inspiring to our class to hear how own projects can actually make a difference in the real world! There is even a group of students this semester working on an improvement to Arielle’s model.

Based on my classmates reflection posts, it was clear that we all saw a great deal of potential for this canning technology. By using the scanners, any real-life object could be reverse engineered into a file that could be manipulated. The process of reverse engineering could be applied to a number of sciences that want to create models of things they want to study. One particular story that jumped out to me was from the Geomagic Community Case Studies. This blog talks about how archeologist have used similar scanning technology to study the Easter Islands heads, one of the biggest mysteries of the archeological community.

The students of our class had many interesting ways to describe how the 3D scanners worked. A few students compared the scanners to Microsoft’s Xbox Kinect. Paige mentioned that printing her bust felt like she was being carved into Mount Rushmore, which I would pretty funny. Many students mentioned that getting the initial scan was rather easy, and that the meshmixing was the harder part of the day’s lesson. Specifically, meshmixing the base to our busts proved to be rather troublesome. Once that hurdle was overcome, printing our busts was a matter of hooking our files up to the Ultimakers and printing, something that has come as second nature to us at this point in the semester.


Mending a Broken Heart

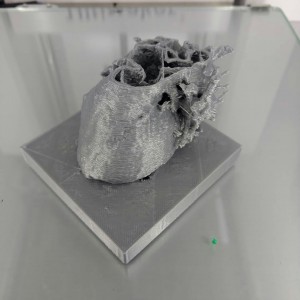
My first attempt at printing the heart is pictured below.

temp_regrann_1461537822243


Unfortunately, my print was unable to finish, so the superior vasculature is not visible. However, the print did successfully print the smaller collateral vessels of the pulmonary arteries. I also need to experiment with printing the heart without the base and instead printing with supports. The base really takes away from the final product in my opinion. I have printed the heart this past week on the taller Ultimaker Extended so I will see next week if the print turned out. It took about 6.5 hours to print the final product.

I will be collaborating with a group in Peoria this summer to figure out how to make models of the inside of the heart as well. I will hopefully be able to figure out a way to do this using free or open source software. https://twitter.com/GwendolynDerk/status/724360255656751104


Nick and Jack’s DJ Helmet: An Update

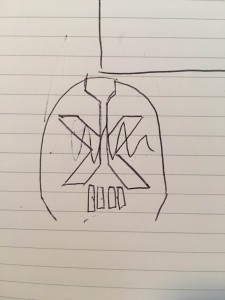
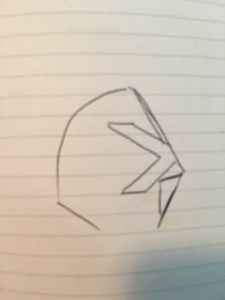
While final projects and exams in other classes have kept us busy over the past few weeks, Jack and I were able to get through the first step of the construction of our helmet: gluing stacks of foam together. On Monday, we plan on carving this foam into a helmet-like shape, and carve out the middle so that a head will be able to fit inside of it. The gluing and drying process took almost a full week. There were a few time lags as we had to find the right type of glue to insure the foam would stick and settle together properly. I had to make multiple trips to Menards to resupply on liquid nails, a tough adhesive, typically used in construction projects. Additionally, we have been drawing up some designs as to how we want the outer shell of the helmet to look. We rastered and cut some acrylic for the eyes of the mask, and plan on 3D printing a front grill. We also have been considering 3D printing additional parts such as ears/horns/headphones that we could attach to the sides. In the coming weeks we will be working and experimenting more with acrylic and 3D prints. We also plan on adding arduinos to the grill and front of the mask as well.


Here is a rough sketch of how we want the helmet to look (Jack has a more detailed drawing, my art skills are lacking):

IMG_4952(front view)

IMG_4951 (side view)


International Maker Labs: A makerspace directory

This week we learned about the new maker space starting up at Indiana University. Their space reminded me of the CU fab lab. There is an online directory of makerspaces around the world: http://spaces.makerspace.com/makerspace-directory


AND I didn’t see our maker space listed on the map! So I added it. The CU fab lab also needs to be added to the directory. This directory can allow local maker communities to unite into a larger international community. Now you can look up a maker space and 3D print where ever you go!

Week 12

This week we focused on working on our final semester projects. It was great to hear the progress of everyone’s work and to see what great ideas people had come up with and are pursuing. Gwen’s heart still fascinates me with its complexity and attention to detail. While Anjali’s idea of an artificial intelligence mini-robot is something I couldn’t even fathom of creating, but the video of the little robot we watched gave me better insight as to what was hoping to be created. I also really liked the idea of a ukelele tuner, I didn’t even know a ukelele needed to be tuned (as I am not musically talented). Whereas the idea of an expanding/retracting cup holder is a great idea for everyday use.

As mentioned before, Harina, Elaine and I will be working on a project to make an insert between your head and your glasses for laying down comfortably while still being able to use your glasses. Elaine has made an awesome second prototype built off of my first one that has little slits that would allow for the piece to stay put more easily. She had made it with the hard plastic as the Ninja flex had not arrived yet.

We were thinking that for our next version (which we will hopefully be printed with the ninja flex material) we need to make the object more dense, as it would have more give due to its flexibility when being leaned against. We believe that increasing the density of the object will allow for more comfort while keeping your glasses in place. In addition to making it denser, we were wondering if instead of slits we should change the shape completely. The shape would be reformed from a hot dog-like shape to more of an egg with a hole through the middle. Of course it would still be ergonomically designed, but it will just take more testing. We will keep everyone updated on how these changes affects our project!

3D Sense Scanner and Meshmixer

We learned how we can scan objects (and even ourselves) to create 3D models which we can print. We scanned and printed busts of ourselves. In order to get the scan, the model needed to keep absolutely still as the scanner moved around the person. The model must be kept in the center of the visual field at all times or the scanner would lose track of what it was scanning. Every surface angle needs to be captured. If there are any holes that were not captured in the scanning process, these can be filled in and smoothed out in Meshmixer. Meshmixer is useful for modifying your 3D model and preparing it to be “printer ready.” The object must be on a completely flat surface, otherwise extensive supports will be required to print.


While printing a bust of yourself is not exactly that useful, this technology could be very useful if you wanted to print an object or part that you already had. Instead of redesigning the object from scratch, you could simply scan the object. I may try that this summer with one of the medical school’s skeletons.

20160411_151942

Week 11– Scanning Technologies

This week for class we worked on 3D scanning and printing using two types of scanning technologies. One was on the ipad and used the camera and a piece of add on hardware and software to scan. The other was through propriety scanning hardware and software called geomagic.

The way the 3D scanning software works is it uses laser triangulation. Geomagic uses short-midrange laser triangulation and how it does that is the laser configuration scans across object, the sensor then picks up on reflections from all different angles, and it uses trig to finish up filling in any empty spaces.

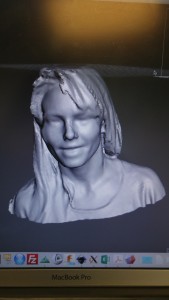
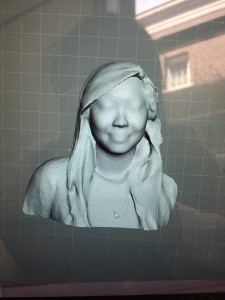
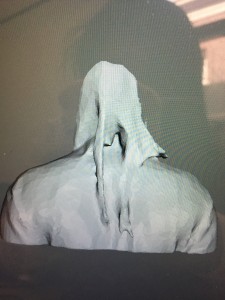
I tried both the technologies and found that my hair (and the back of the chair) was where the real issues were when it came to using Geomagic. The ipad was able to scan the human head much better if you had a long sheet of flat hair. Both my partner and I could not get scanned using Geomagic but the IPad worked. When Harina put her hair in a braid, Geomagic worked. It is a much trickier technology to handle than I previously thought. The scans turn out pretty accurate though. I am interested in seeing how accurate scanning of a person versus an object is. I noticed there were two features through Geomagic so I would love to explore how scanning these two subjects affect the accuracy of the final STL file.


IMG_6788 IMG_6789

What we used to process the scans was Autodesk meshmixer—this is the software that is able to process the STL file that Geomagic saves it as. It was a surprisingly accurate scan. The only thing I wished I could see more nuances with were my eyes. I would say the capture was fairly accurate to how I looked that day. It was able to capture ruffles in my hair and specific details in my clothing so I was pretty impressed with the Ipad scan. Looking at my partner’s scan, I noticed it captured the details of her braid which was pretty impressive. It lost her glasses though. I would love to see how scanning technology improves as software gets more and more accurate.

Ariel also came in to talk about some more practical applications of 3D scanning besides just printing a scan of our bust. She used the scanning technology to get an accurate scan of the grip she uses for Paralympic wheelchair events. I could see scanning being very useful in the medical industry for customization of products. It would be a much faster fix if every hospital had a 3D printer to make custom casts or crutches.

Week 10– Back to the FabLab

Week 10:

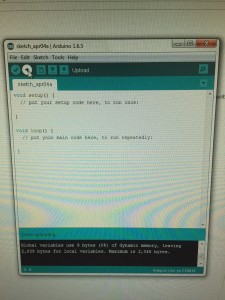
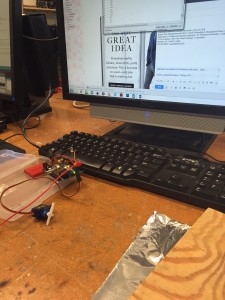
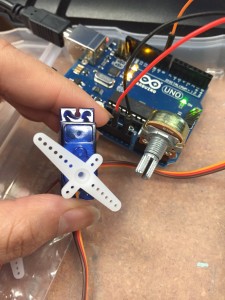
This week for class we worked on Arduinos! Arduinos are “an open-source computer hardware and software company, project and user community that designs and manufactures microcontroller-based kits for building digital devices and interactive objects that can sense and control the physical world.” In other words, the Arduino boards we used in class are tiny microcontrollers that can be programmed to do things like turn a motor 360 degrees or turn an LED on and off.

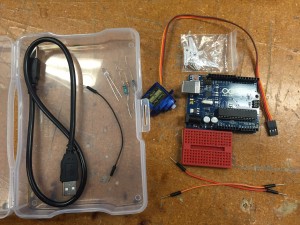
This is what all the components look like:

IMG_6691

IMG_6696IMG_6692

You connect the arduino board to the computer and you use wires to connect Input output pins. There are 5 volt power to the reactor. You can turn the pin on and off.
Arduino is the name of the tiny computer and also the language that we will be writing in

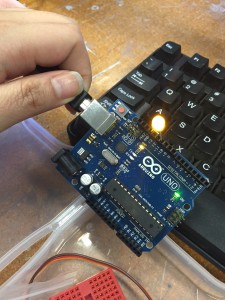
The first thing we programmed was to turn LED on and off. The certain pattern comes from turning signal on and off in a certain manner.

IMG_6698IMG_6700

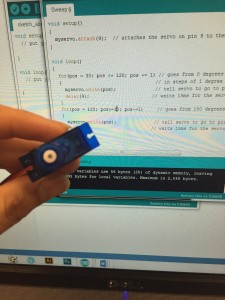
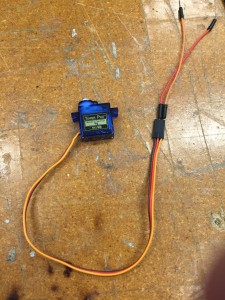
Second piece that we programmed was the Servo motor. Servos are controlled motors. You connect the servo motor with the three long cables. Power is red, ground is brown, and signal is orange. That means the red cable is connected to the 5V, ground is connected to 0V of power and signal is where you write the program and how the servo motor receives the signal. We were able to program the motor to spin in 360 degrees and then again between the degrees of 20-120 degrees. The practical application would be programming a children’s toy to be able to spin in a limited number of degrees so the children’s doll doesn’t look like the exorcist.

IMG_6697IMG_6699

Other applications of the simple CPU is a smart cutting board. We will be using the Arduino (or the more advanced Galileo) for our tuning piece.


The Uncanny Valley

This week we ventured into the world of 3D scanning and took scans of ourselves from the shoulders up. Honestly, my mind was blown. I had no idea that something so detailed could come from an iPad and a $300 add on. What I thought was even more interesting was that apparently the hardware inside the scanner was just a reworked version of the Xbox Kinect.

The scanning process was simple enough. One person sat in a chair and the other person walked around them to capture from all angles. Then the point cloud (the raw data coming off the sensor) was sent to a server in the cloud to be fully processed, and the final model was then downloaded back to the device. The whole process took less than five minutes. After getting the scanned model, all we have is a starting point. It very likely has some errors in it due to noise from the scan, and it’s our job to clean it up. We used a program called Meshmixer by Autodesk that had lots of great features for cleaning up the scan.

Unfortunately, I don’t have any pictures of my scan, but it actually turned out fairly decent. There was just one major flaw on the back of my head where my hairline brushing up against the collar of my jacket messed it up, but it was relatively easy to fix.

Once it was all cleaned up and ready to print, I took a good look at it, and the model was definitely in the “Uncanny Valley”, a term used to describe objects that look almost human like, but are just artificial enough to be creepy. It was honestly a bit disconcerting to look at a full 3D rendering of myself. However, I feel that as this technology improves and the scans get closer to real life, people will stop viewing a 3D model of themselves, and look at it as more of a “3D picture”. There are so many great applications for a cheap, accurate, full body 3D scan. From inserting yourself into your favorite movie or video game, to a doctor being able to remotely diagnose a whole host of ailments, the applications are boundless.