Pew! Pew! Lasers!

This week was quite interesting. Contrary to what the title of this post my imply, we were not shooting lasers, we were using them to etch!

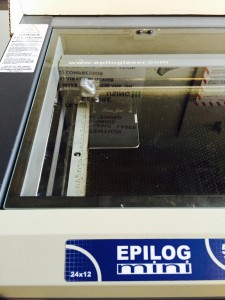
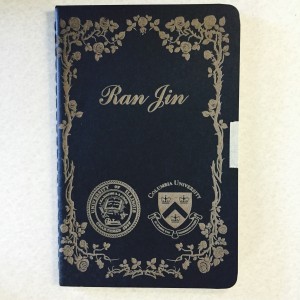
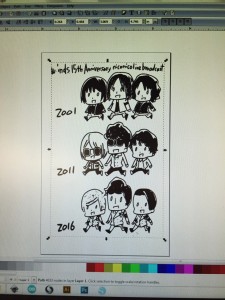
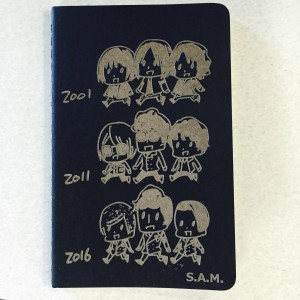
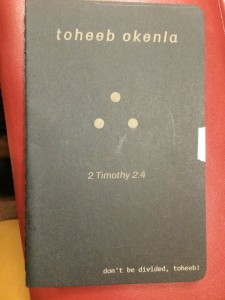
This week, I was in the lasers group and we learned about using lasers to print images. The week was pretty brief, we were able to learn about the lasers and its capabilities and then we were able to use illustrator or a different 3rd party editor to make our images. We learned that the best images that work with the lasers are flat ones with not many gradients. So we were directed to choose silhouettes so that the printing could be easier. I chose to print on a small notebook (below)!

13010277_1149351878432780_782707863_o

Lasering is really cool because stuff that might take hours and hours of workmanship can be accomplished in a couple minutes. The majority of the work is done on software and the rest the laser handles. I think this can make a lot of design and printing processes much faster

I don’t know if this means much to me, maybe because the work wasn’t really hands on, but I found it really cool though.

Week 10 – CU Fab Lab

Sadly, this was our last experience at the CU Fab Lab. Even more sadly, I was sick for our second visit and so this was only my second time going. However, I got to work with arduinos this time, and since that is something that I have always wanted to do, I was very excited. Actually, working with arduinos is basically the type of work I hope to go into after graduating. Being able to work with my hands and physically build something while also being able to use my programming knowledge is how I describe my dream job.

A lot of what we did on Monday was just to understand the basics of the program and the types of things you can do with arduinos. We talked about controlling LEDs, Using variable resistors, and controlling a servo. It seemed like a lot of people had trouble not with the actual board but with the coding, which is understandable for people who have never experienced programming. I tried helping those around me with some of coding, since I knew a bit about the language we were coding in. It was a really cool experience, and I was even able to combine all of the little projects we did into one big contraption using the variable and touch resistors to control the servo and the led at the same time.

Towards the end, we talked about creative ways to use some of the things we had learned, including making a big touchpad out of aluminum foil. After seeing an arduino firsthand after I’ve heard so many things about them, I think I am fully convinced to go out and buy one for myself so I can continue playing around with it and hopefully do some #digitalmaking in my freetime.

Week 10: Reflection (Laser)

It was our last time to have an exciting class session in the FabLab this week. We were assigned to laser & cutting station this time. The FabLab allowed me to know lots of creative and interesting topics that I have not tried before. Through the creating and making process, I not only learned the steps to complete the desired work but also understood the functions of the machines.

The first step to in laser cutting is to select appropriate images, such as black & white pictures or logos with fewer color layers. The reason why we choose those typical pictures is that we want to have clear shapes and outliers for laser engraver. The platform used to modify the images is called Inkscape, which it is very similar to the software we manipulated in Textile and Fabric station last time. It is convenient to execute different tools to change shapes, add texts and modify colors. Everything is straightforward and easy for a beginner unless you have unique/completed requirement on the projects. Then, after preparing and designing the pictures, we need to decide the material for the laser. I choose notebook laser because I would like to have a personalized and special notebook for collection purpose. I also design another notebook with cartoon characters for my friend. With the help of people from FabLab, I quickly laser the pictures on two notebooks which only take less than two minutes. I am so surprised about the speed of the laser process. The most difficult thing in this working station is to know how to run the Epilog Mini (Legacy) because there are some strict safety rules we need to pay attention to.

FullSizeRender 4  FullSizeRender 2IMG_3019 IMG_3020FullSizeRender

The whole workshop only took one and half hours, so we are able to exchange the work and help each other on designing cool images. I really enjoy the process to laser a notebook by myself. Thanks for the FabLab, I have this unique and valuable time to learn how to use technology to create amazing staffs.

Week 10 Reflection

This past week’s class marked our third and final session in Champaign-Urbana’s Fab Lab. After completing the embroidery and laser-cutting workshops previously, I was lucky enough to have the Arduino workshop as my last rotation. Funnily enough, this workshop was the most relevant to my semester project since it requires the use of an Arduino.

At first, I was extremely excited to assemble an Arduino! However, this feeling of excitement quickly dissipated as soon as this was handed to me:

Arduino


The kit made me extremely nervous! It looked quite complicated. Luckily, one of my friends provided me with the guidance I needed in order to assemble the Arduino. To my surprise, It wasn’t as difficult as I thought it would have been. In fact, I became fascinated by the whole functionality of the Arduino. From a software perspective, I thought it was really cool how minor changes in the the programming language amounted in changes to the Arduino itself. For example, if I increased the delay on a line of code and re-uploaded it, the Arduino would take on these changes. Check it out below!

language


All in all, I really enjoyed this past week’s session at the Fab Lab! It drove my interest in coding by a great deal. Going forward, I hope to use this newfound knowledge and fascination towards my semester project. After this workshop, my group members and I have a better idea as to how to go about bringing it to life.

Digital Embroidery

Our last class meeting in the Fab Lab for the semester had me exploring the digital embroidery section of the lab. I have not had my hands on a sewing machine since 7th grade Home Ec, so I was a bit hesitant to start sewing, however the gurus at the lab were helpful as always. I have always wanted to put iron-on patches on my backpack, so I took this opportunity to make a patch using the badge from my fraternity, Sigma Chi. I choose a simplified version of the shield, and designed it with white and blue to go for an “old school” look. I think my retro design looks like one that could’ve been worn on the backpacks of students decades ago. Transporting the design to the printer was extremely easy, and once I got my hands on the sewing machine muscle memory kicked in, and I was actually craftier with the machine than I thought I would be. My stitching turned out like this:

IMG_4912

I attempted to turn it into an iron on patch by gluing iron-on paper to the backside of my patch. Unfortunately, the ironing didn’t work well with the type of backpack I had. To make sure the patch stayed secure, I hooked my backpack onto the machine and sewed some outer stitches for reinforcement.

This experience was important to me because it showed how computers can be used to create perfectly sized stitches and patches using vectors. Anytime I want to customize a piece of clothing I own, I can bring it into the Fab Lab to add my own logos or designs. This is especially important for those who are less fortunate and rely on making/sewing their own clothes rather than buying new articles of clothing. With Fab Labs popping up all over the world and growing in popularity, I am sure that there will be an increase consumers fixing up their old clothes rather than pouring their money into buying new outfits. Additionally, this technology opens up the field of fashion design. Aspiring fashion designers have the ability to digitally make designs and patterns using their computers, and go into places like the Fab Lab and see their ideas come to life in a matter of minutes. I am sure that this technology’s impact will be felt by major clothing manufacturers around the world. Personally, I will be sure to use the right materials with one another. I struggled with attaching my design to my backpack because my backpack was beaded and old. Perhaps a different type of threading would have worked better with my backpack. Another problem I have found with my creations this semester is that I find myself getting so eager to bring them to life,that I rush through important parts of the making process and mess them up. I learned to be more careful and focused while working with the sewing machine this past week.

Week 10: CU-FabLab Laser Cutting

This week marks our final week at the CU FabLab, where we had spent 3 wonderful weeks learning from the professionals in the lab.

Laser cutting was this week’s theme, and the variety of application of it was honestly mind blowing! With the lasers, we could print designs on notebooks, pieces of acrylic plastic, or wood, which also happens to be my medium of choice.

I wanted to make a keychain for my best friend, whose birthday was this week. The process itself was relatively simple: Find a picture, open it in the program, vector it, clean up anything else that you don’t want, draw a 0.01 border around it so that the laser knows where to cut, save as a pdf and bring it over to the printer! While the safety precautions can seem pretty overwhelming, it’s basically turning on many machines to ensure that there is continuous airflow to prevent anything from spontaneously combusting since the laser was essentially burning the wood.

Of course, being such a lover of the game Neko Atsume, I couldn’t resist printing some cute keychains for myself as well.

Keychain

I’m glad to have been able to learn about laser cutting/printing, since I now know how to utilize a resource for creating professional looking art designs that require etching. Our organization had wanted to do something similar to this but the sheer cost to do this commercially was too high. Now I’m glad I’ll be able to help them out since I can definitely go back to the lab to do it myself.

Week 10 Reflection

This past class we had our final session in the Champaign FabLab. I got to work in the final station with Duncan and the lasers. With the lasers, we were able to print designs on notebooks, pieces of acrylic plastic, or even wood. I chose to make myself a name tag with a reference from Mean Girls that nobody understood. 2016-04-04 16.05.13

I actually do have a name tag for being a board member on the Student Organization Resource Fee (SORF) Board that is wood cut by laser printing, and it’s really cool! I found this type of printing fascinating with how easy it was to make very cool looking and professional designs, espeecially for acrylic pieces. Despite the many safety precautions necessary to manage the printer, designing was easy!

Going forward, I now have a resource if I need to make very professional looking notebooks, name tags, wood designs, or acrylic pieces. I will not be using these tools for my final semester project, but learning how to use them helps me think about the maker concept even more.

Later in the week, I stopped by the MakerLab to print a prototype of my final project (glasses cushion for when you lay in bed with your glasses on). I think when I had transferred the design from Fusion360 to Cura I had accidentally scaled my design too small. We also did not have any of the flexible material I had planned to work with in the lab so I had to use the hard plastic. However my object somewhat works, but falls out of place easily. It also would be better if I had scaled it more properly. This is a part of the prototype process though, improving the design until it’s ready to be launched.