Week 12 Semester Project Update: Better Late than Never

While I was very indecisive about what my final project would actually amount to, Abhiniti and I decided to move on with what she dubbed “project mood shirt”.

Essentially, this would read the temperature and humidity of the person wearing the shirt, and based upon the heat index of that level of temperature and humidity, light up a set LED on the shirt to indicate whether the person is too cold, normal, or overheated. One use of this may be to roughly and instantly monitor potential overheating during the summer or during exercise, or, in more severe cases, if a person is becoming too cold, for example during the winter, and is on the way to hypothermia.

Below is the video I took during the final stage of coding the shirt. While it was taken before most of my progress was made, it is essentially the entire circuit that will be sewn into the shirt.

Last Weekly Reflection

This week Josh, Annie, and I have begun wrapping up our final project which we will be presenting tomorrow. The Tunalele actually works! After many weeks of stressing out over how difficult this would be to execute, we finally have a working product. Josh and I were still focusing on the design this week while Annie (with the help of Colton from the FabLab) took care of the Arduino coding. Our final pictures will be displayed in the presentation tomorrow but here is a sneak peak of the rastered Arduino casing: Screen Shot 2016-05-01 at 9.12.46 PM. Josh and I wanted to incorporate multiple aspects into the design to show off our skills we learned this semester, this being the reason for the rastering of the side. That, and it looks pretty cool 🙂 We also had to make a change to the fish head so that it would fit on the tuning peg without breaking it so we made some edits in Fusion and re-printed the new piece.

During the week we found a major setback in the code. It was written to only pick up electric frequencies, not acoustic, so it would work with a guitar amp but not an acoustic ukulele. Luckily, Colton and Annie found a quick fix to this by adjusting the microphone and the frequencies it would be able to pick up. We were worried for a while that we would have to find an electric ukulele to work with our tuner but they saved the day.

While this project was very difficult to complete I am so glad I had such an awesome team to work with. Annie, Josh, and Colton were amazing and we definitely could not have a finished product for tomorrow without all of their help. Can’t wait to present it to you all in class!

How to… 3D Scanning

How to… Laser Cutting
How to… Arduino
How to… Soldering 
How to… 3D Scanning (This post)
.
3D Scanning… What is it? As the name says, its the scanning of a 3D object, and can be done with fairly basic technology. It works through the process of laser triangulation, using a sensor to pick up reflected laser rays.
.
Its very popular commercially as personalised gifts: busts or even whole bodies can be scanned and printed.
Screen Shot 2016-04-30 at 23.04.44

Printing in different materials even allows for different colours to be printed on a model

.

Simple camera attachements like this iSense scanner can be added on to existing technology to create the scan.
Screen Shot 2016-04-11 at 15.21.03

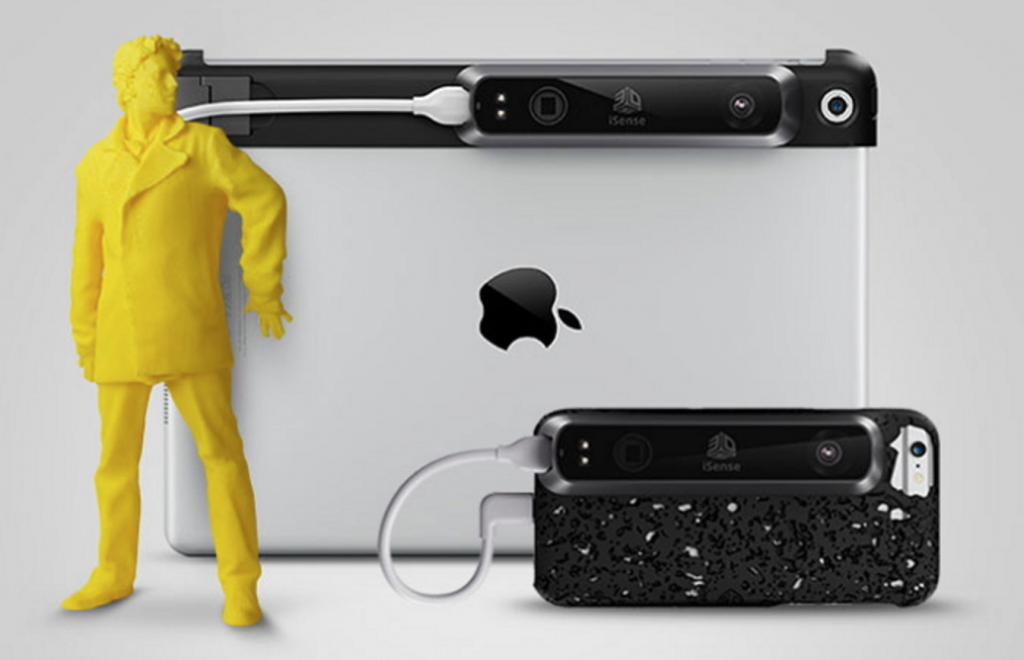
Here 3d scanning has been utilised in a novel way to produce a quirky iPad stand.

More expensive scanning devices do also exist, with more accurate laser and sensing technology for finer detail scans.
.

General workflow for producing a 3D print from a 3D scan:
  • scan in image*
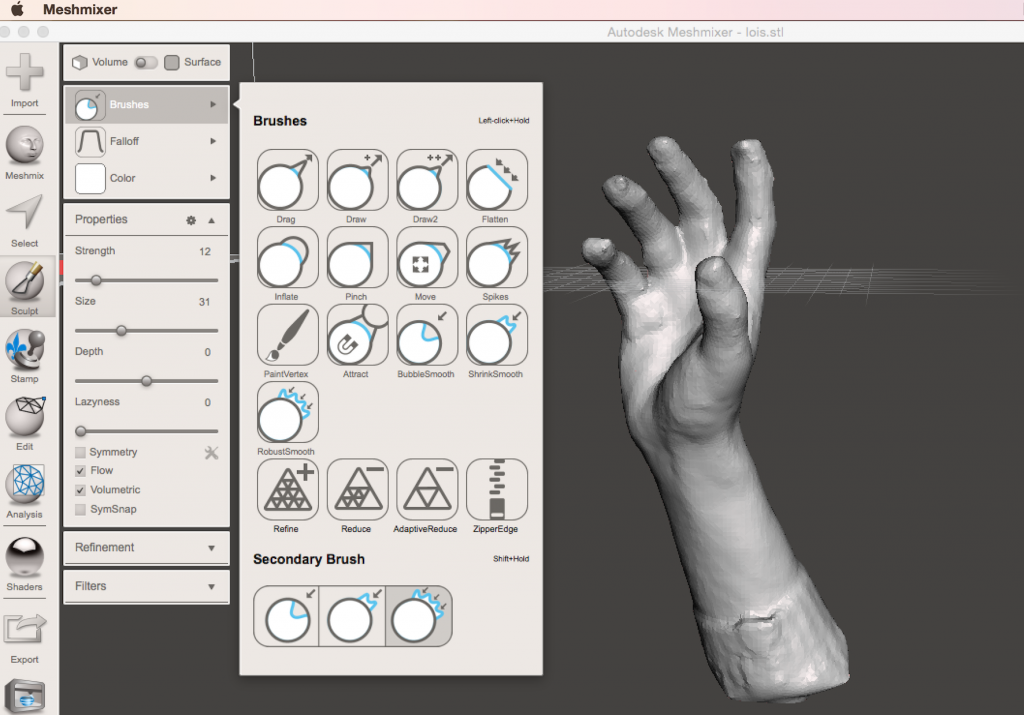
  • using Autodesk Meshmixer to clean and tidy up the scan, scale image to sit on the dimensioned printing bed
  • use edit and sculpt functions to smooth out blemishes on the scan (e.g. smoothing out hair on a bust)
  • Add a base for the print by selecting from primitive shapes
  • autorepair under the analysis inspector section, to fill in any holes on the scan
  • combine all shapes, and save as an .stl file to be imported into Cura for printing

*scanning the image is the hard part! Very easy for the scanner to “lose track” of the object


For this exercise, I wanted to create something functional from my 3D-scanning. Scanning a bust is a very common use of basic 3d scanning, so I wanted to experiment with a more challenging scan.

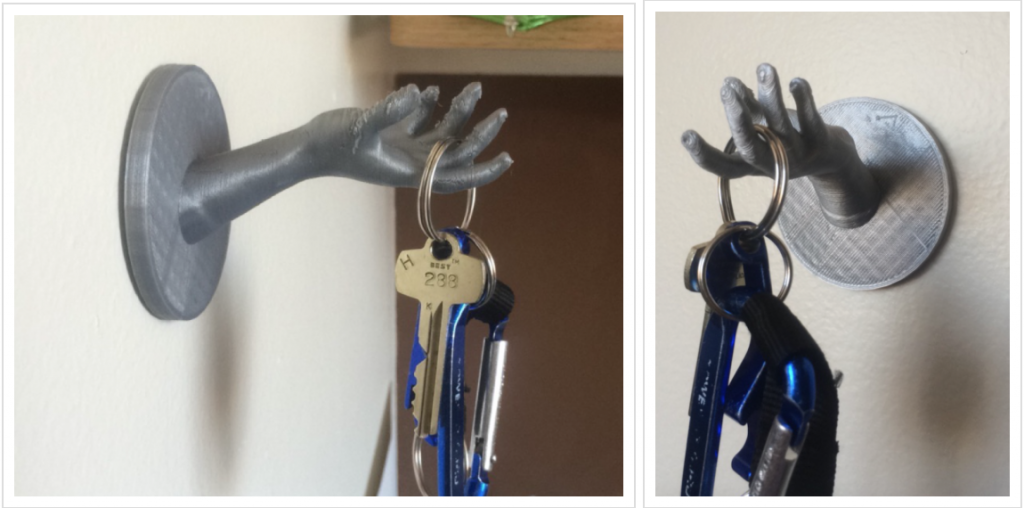
My aim was to scan a outstretched hand and arm, with the goal of turning it into a unique and customised coat-hook or key-holder, like these:

Screen Shot 2016-04-30 at 22.41.56

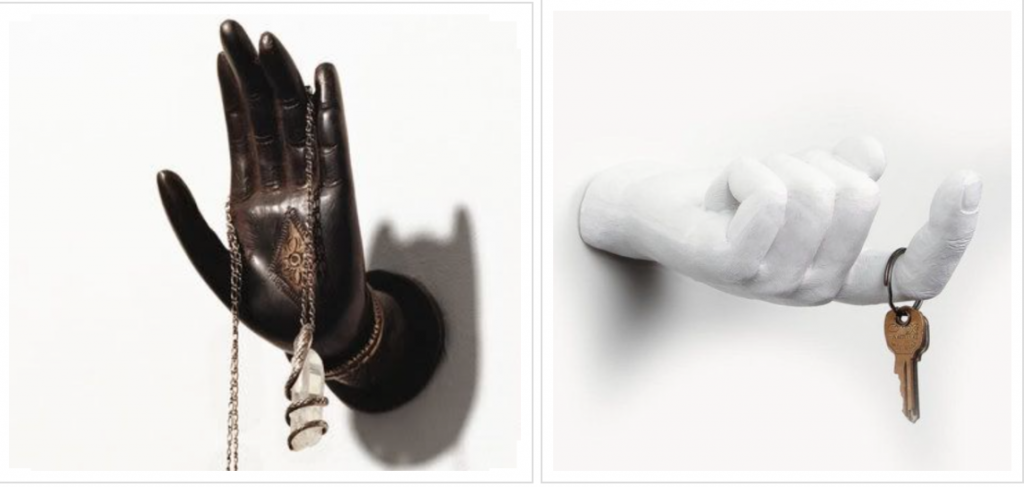
I want to create something like this, using 3D scanning

Since busts are a common use for 3D scanning, the software we were using had algorithms written in to be able to pick out the head shape for a scan, and has optimisations in place to pick up the head scan as smoothly as possible.

IMG_7649

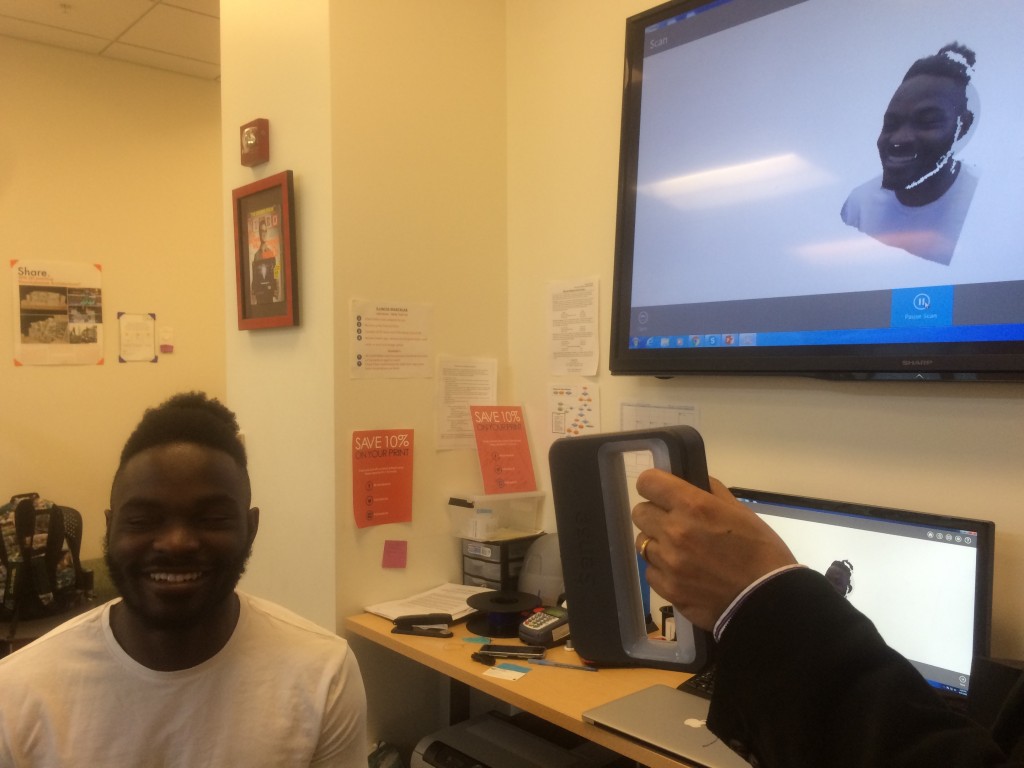
Building up a scan image by rotating head and shoulders on a spinning chair

A particular challenge was getting the scan software to recognise the hand as the item to scan, and not everything else in the background.

Once the scan started picking up the hand as my object, the difficulty was in rotating the scan-camera round the hand to get a full 3D image. It works well for a bust because when sitting on a chair, the rotation has the head at the centre of the axis. I found it very difficult to have the centre of the scan object at the centre of rotation. Its hard to rotate an arm about the same spot!

There were many failed scans that looked similar to this:

IMG_7647

Many scans later there was a better one that was incomplete, but had enough framework in place that I could then build up the missing parts of the hand using Meshmixer.

Screen Shot 2016-04-30 at 22.47.32

After some editing and little fixes (recreated and extended some fingers!), I managed to create this:

Screen Shot 2016-04-30 at 22.54.44

It worked! 3d printed hand scan


(return to main navigation menu)
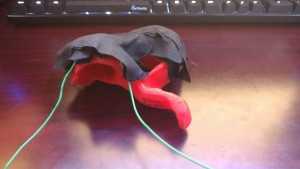
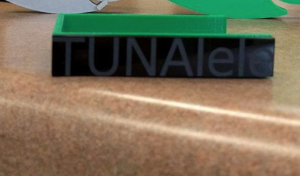
Update on Semester Project

Last week we had the chance to work on our own projects for most of the class. This week has been a little hectic for me as I’ve switched projects and joined another group. I am now currently working with Anjali on her little robot. We will be using raspberry pie to complete the tech portion of our project. The little robot will be able to Speak out of its mouth, Videotape through its eyes and record though a mini microphone that we will be attaching somewhere. Currently I’m trying to decide what materials would work best to design the robot fast and efficiently. The robot will have a pretty big body to allow it to hold the raspberry pie board. Therefore we were thinking maybe we could laser cut all the larger parts of the robot and 3D printing a lot of the little part of the projects just so we can apply multiple things we learned this semester and apply it to our project to kind of come full circle.

As I just entered this project I am still working on the design of our robot and as of yesterday the design restrictions have changed so now the robot will most like have a large rectangular body and short and narrow head so the camera and microphone and properly fit inside of the robot. So im really excited to create a cute looking robot that fits these restrictions.

Week 12 reflection-project update

Within the regular class time, we had time to work on our semester project. It is very interesting to listen to project updates from different teams/individuals. Particularly, one classmate gave us one solution for our current difficulty that is making the bottom of the cup holder adjustable,and professor provided us valuable suggestions on our project. Last week, Jiaqian and I discussed the different designs for cans holder. Comparing cons and pros, our team decided to have a fixed bottom with an adjustable handle not only because the design will be easier for us to implement, but also considering the material as well as time costs. Currently, we have measured the normal size range of cans and start to draw the parts in Fusion 360 in order to 3D-printed it.

Our design has been broken into four 3D printing parts and one external part. I printed one of the parts of the bottom, which it only took 20 minutes. The design is a very time-consuming work. Cutting, extruding and modifying are all completed based on Fusion 360 tools. Due to the unfamiliarity of Fusion 360, I cannot quickly reach the points that I want to achieve. Fixing a small line of the design sometimes takes me more than half an hour. I hope we could complete the project on time. On Monday class, the major task for me is making the handle design adjustable so that it can fit any sizes of cans. We would like to add a temperature meter (external part) on our design for future users so that people will be able to know the drinking temperature and enjoy the best tastes. IMG_1640[1] 屏幕快照 2016-04-24 11.35.21 PM屏幕快照 2016-04-25 12.00.24 AM

Project Update: Smart Glove

With the deadline fast approaching, I’m glad to say we have a fair amount of work done and we also have a good plan moving forward. For what we’ve done so far, We have a basic prototype with a force sensor done. This consists of the glove and two copper sheets isolated by some flexible material. Each layer is further isolated by the black hockey tape you see in the picture. Also, we are currently prototyping on an Arduino Uno, but for the final design we’d like to use an Arduino Nano (which should be a drop in replacement).

IMG_20160424_233634144

One of the biggest design changes we made this week was realizing that it would be unnecessary to process all the data in real time on the Arduino, and it would be better to just use it to capture the raw data and process it later on a computer. One potential idea we had was to make a small website to do it, and time permitting, we’d like to try that out.

Moving forward this week, we need to design the sd card system, which should be fairly trivial, and see if it is still feasible to do the accelerometer.

Week 12

This week we got a chance to see what the MakerLab at IU was like. It was pretty cool to see how others interpreted the maker mindset and built their own space for making. Also this week everyone focused on progressing with their final semester projects. It was great to see how all the other projects were coming along and how everyone is tackling different problems in their own unique way. I really liked the idea of an auto-tuner for a stringed instrument as my pitch isn’t quite perfect enough for me to tune a guitar by hand after re-stringing it.

As previously mentioned, Pri, Steven, Toheeb, and I are currently trying to bring wheelchair racing gloves into the 21st century by enabling data connectivity and analytics. The team really has no data at the moment, so even the most basic information about stroke depth or frequency would be invaluable for training.

For our next steps, we’re working on code for the actual collection of data. We’ve already created our first mockup that is supposedly ready for basic accelerometer and force readings. Hopefully it holds through our tests this week and we can get ahead on making it somewhat presentable and into a legitimate object!

Week 12 Reflection + Project update

This week we had a guest speaker from Indiana University MakerSpace to introduce us some of their current equipment and products they have made. The MakerSpace of Indiana University is of a more comprehensive setting compared to the 3D printing Lab we have in the business building. But by having 3D printing Lab and C-U FabLab separated, I guess U of I will be able to satisfy larger student demands. Anyway, I am very excited to see the technology I am so interested in gaining more and more attention. After skyping with the guest speaker, every group gave a brief presentation about their semester project. Our group project is to make a adjustable cup-holder, and after listening to my introduction, my classmates generously offered their knowledge and Vishal also suggested us to find something that would adds more value to the final product. I really appreciate everyone’s suggestion.

For our group project, we(Jiaqian Chen & Ran Jin) already ordered a temperature sensor from ebay and the basic/fundamental model is already made in Fusion360. The plan for next week is to change the middle part of the second photo to a adjustable structure, something like a 3D spiral. We are also going to figure out how to adhere the sensor to the entire structure.

IMG_1640[1]IMG_1641[1]

Indiana University Guest Speaker and More Time at FabLab!

This week we had a guest skype conversation with the professor in charge of the MakerSpace at Indiana University. Their lab was a bit different from ours in that it only contained two Ultimaker printers however it seemed like they had plenty of other resources for digital making. From what I could gather, their version of their FabLab is combined with their printers in the same MakerSpace. While it would be nice to have all resources in the same place, I realize how fortunate we are in Champaign to have a separate printing lab and FabLab that contain many different tools for us to use! Also, because I was deciding between UIUC and IU last spring, I felt even better about my decision coming here after seeing their MakerSpace! 😛

After the presentation, each group gave a two minute update on their project and how it is coming along so far. Needless to say, in that classroom I am surrounded by 20 brilliant people. We have students making things from DJ masks to heart prototypes and everything in between. I hope we have a large presentation at the end of the course in the BIF atrium to showcase our final projects so that students will sign up for the course in the spring next year! I have already convinced a few friends to take the course if time permits them too, but I definitely believe that a final showcase could attract more students.

Josh, Annie, and I left after that to go to the FabLab and talk with Colton about how to design our tuner. Josh and I found a koy fish design on Thingiverse that we are going to try to modify as the adaptor that connects on to the tuning peg of the Ukulele, and Annie will be bringing in hers tomorrow so we can take measurements. Annie also talked with Colton about the software of the design, and we actually found a good amount of public code that will help us move much further along than expected! We will definitely be back there soon to ask Colton more questions. Working in different areas of campus has been so beneficial because each time we go to a new place I have more familiarity with it when visiting the next time, encouraging me to go back and work there in future semesters.

Week 11: Project Update

After the virtual tour of Indiana University’s Makerspace, we continued to work on our projects.

Glasses Project with Paige and Harina

For this week, we worked on remodeling the initial design we had. The initial design was not capable of remaining on the glasses without external pressure, and did not fit as well on most glasses.

With the new design, it was able to remain on the glasses and provide support to the glass when lying down.

Next week in class we should have the NinjaFlex and hopefully be able to test out a couple of prototypes in the lab to see what is the best fit.

Interchangeable Hooks

For my personal project, I finally had the base done! With the help of Reid, I was able to get a design for the wall attachment of the hook.

Now to get the base of the hook itself to fit with the wall attachment. The one I managed to get printed this week was a little too big for the wall attachment, and got stuck halfway through it.

Next week in class I will try again to adjust the size of the base hook and see if I can get it to fit, and start printing all the different attachments!