-
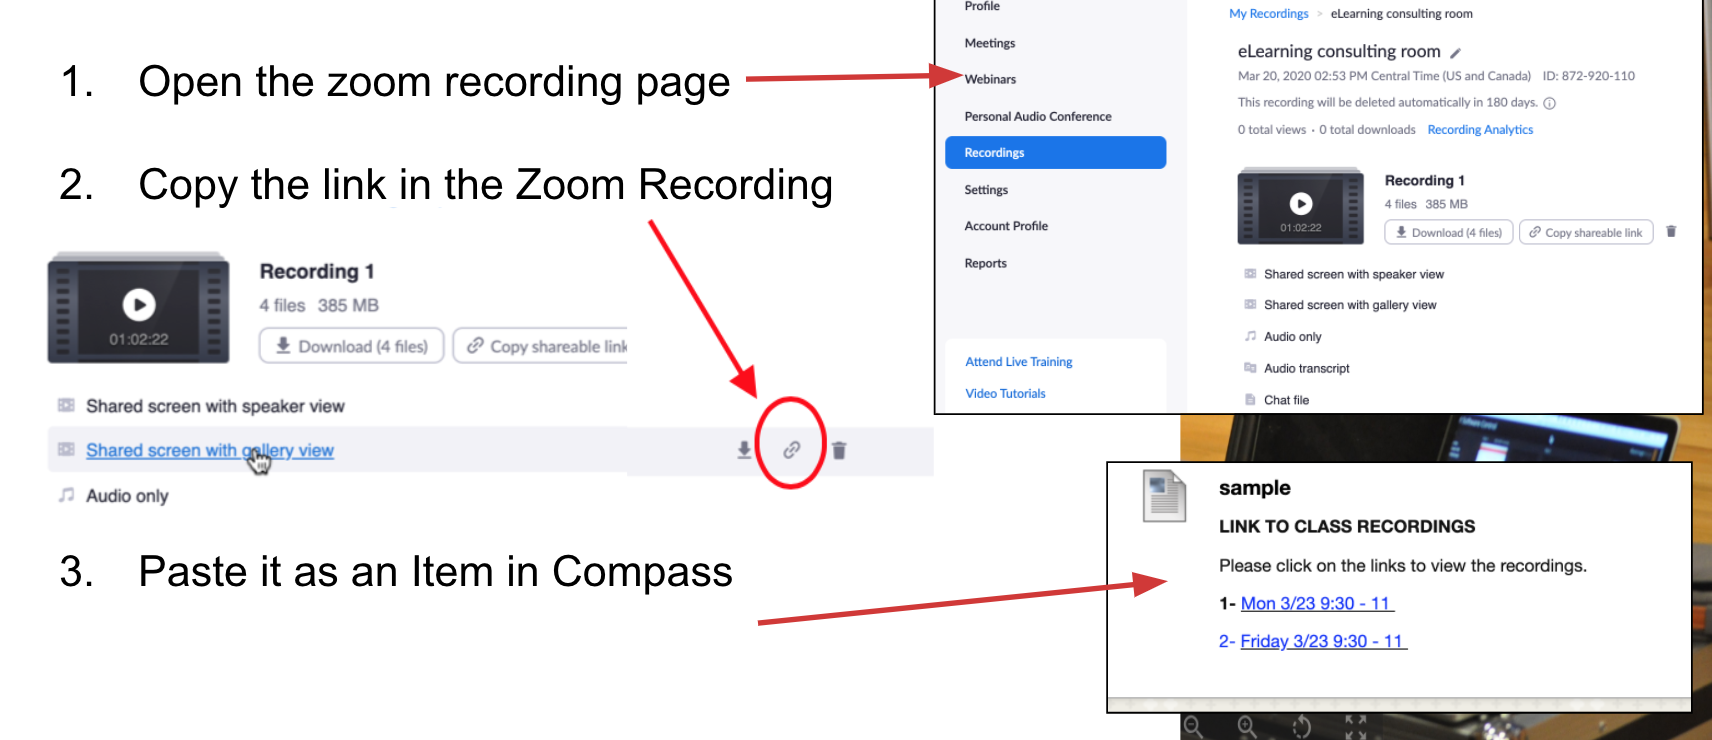
- Record a live session
- If your live session is recorded in the cloud, add to your channel
- Add captions to your videos
- Upload any the videos to the Illinois Media Space server
- Add live session recordings to your course and Share with your students.
- Embed your videos in Compass 2G
Recording a Live Session
You can record a ZOOM session on local computer or on the cloud. The recorded files can be uploaded to different storage or streaming services. You will see here how to upload them to Illinois Mediaspace, your Illinois dedicated server for media streaming.
Recording your session can be done when the session starts (Click on the “Record” icon) or it can be programmed in your settings.

Planning the recordings in your settings:
- Sign in to the Zoom web portal and Sign In to configure your settings
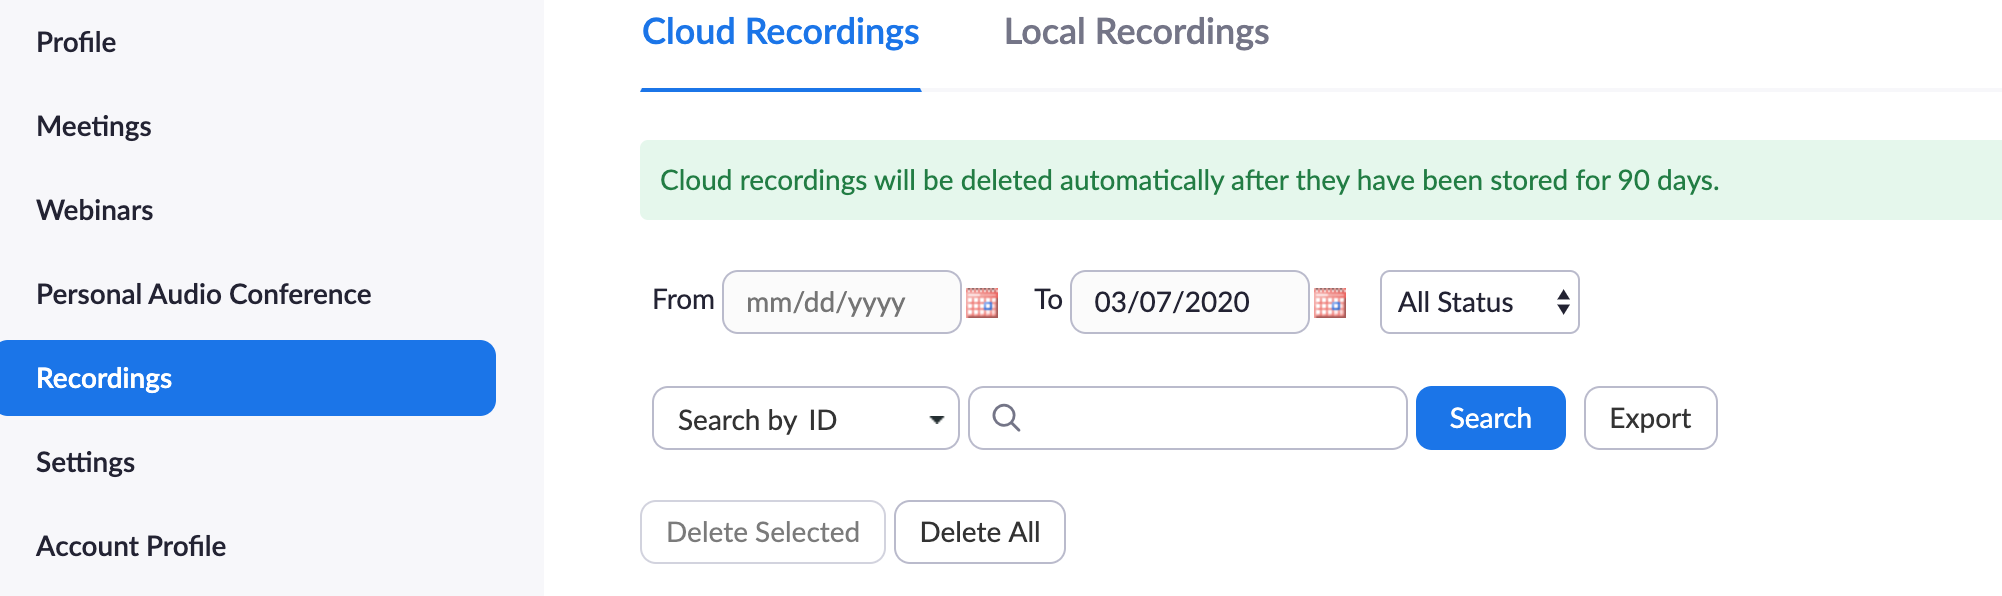
- Click Settings, and select Recordings from the top menu.
- In the Recording tab, navigate to the Local Recording option and verify that the setting is enabled.
If the setting is disabled, click the toggle to enable it. If a verification dialog displays, choose Turn On to verify the change.
Local recording will save the sessions in your machine and then you can upload to Illinois Mediaspace (see instructions below). 
You may record your videos in the cloud and they will show in your Zoom account portal when you log in.
- If you want to save the interaction that happens in the chat box during the Live Session, you may do so, as well. See Save the chat for more details.
Uploading your recordings to Illinois Mediaspace

Mediaspace is a streaming service dedicated to Illinois faculty, staff and students. It is powered by the software called Kaltura, and it offers multiple features for your benefit. The following tutorials show how to use Kaltura (or Mediaspace).
Add captions to your videos
- Once your video has been uploaded in Illinois Media Space, you will see an Actions menu. Click on it and select “Captions and Enrich”. Automatic (machine) English captions will be added.
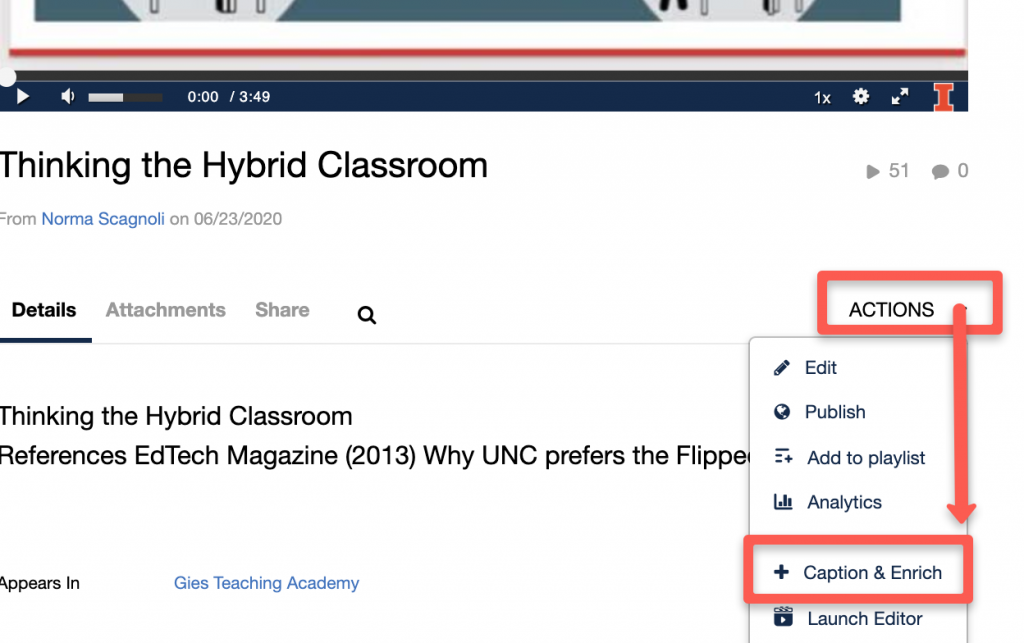
The machine captioning system is 90% accurate, however, if you or your students find some misspelled words, (i.e. “Geese” instead of “Gies”), you may edit the captions later.
Instructions to upload videos in your computer or mobile device
- Using Channels in Illinois Mediaspace
- More about Publishing a MediaSpace Channel Link
- Inviting your students to create and submit videos to your course channel in Illinois Mediaspace
- Illinois Mediaspace Help and FAQs
- Find more tutorials in Illinois Technology Services Tutorials for Kaltura
Adding the Live Session videos to your course
You may embed the video recordings of your Live Session in Compass, or create a space in your Compass site for the link to the zoom recording. You have to share your videos using Compass so that only the students in your class can access it. Listing your videos in a public site may infringe copyright or FERPA regulations.
- Embed Live Session recordings in Compass
When you have added your video to Mediaspace, you will see the menu below at the bottom of your video. Select Share to choose options to share your video. You can share through a link, or embed or by email. (If you do not see the tabs in the image below, it may be that you have not logged in to the site)
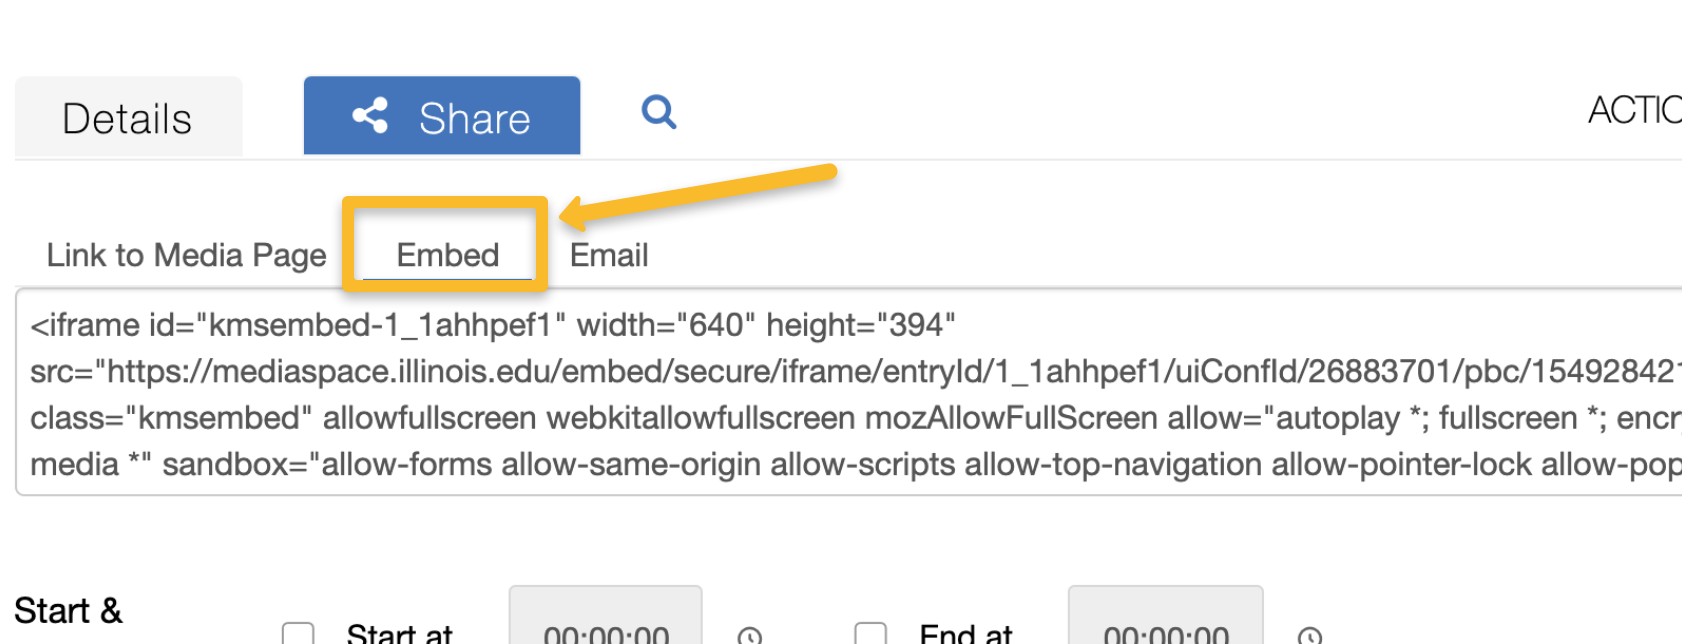
- To embed within your course page and other ideas, follow the instructions in this link: Embedding your videos in Compass 2g
2. Create a list of links from Zoom Meetings page