How to Encapsulate Time

An Educational Guide to Optimize the Preservation of Time Capsules

 by Dani Demmerle, Preservation Services Grad Assistant
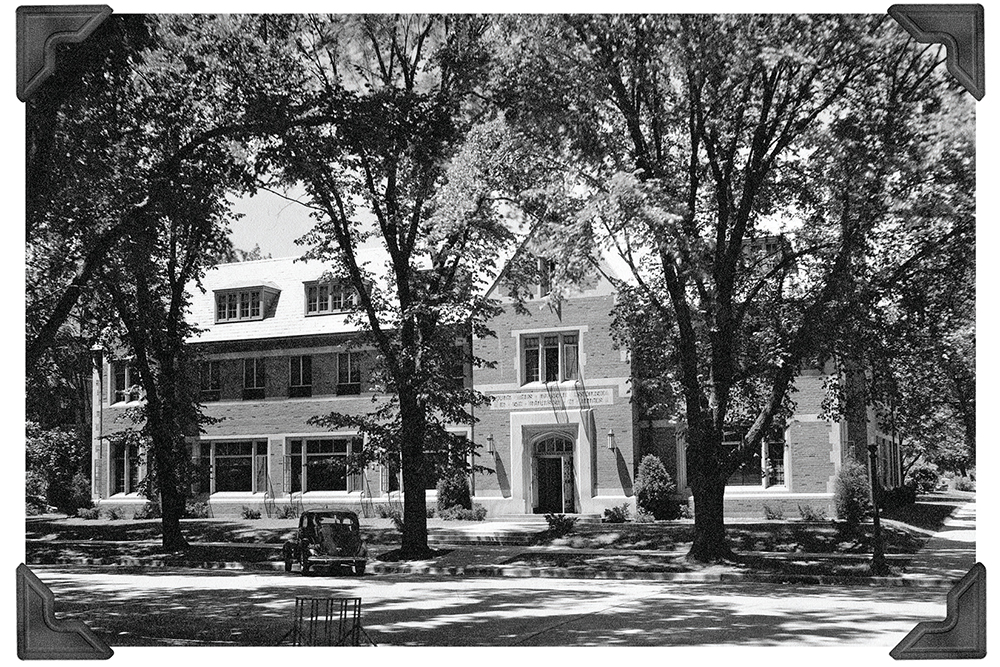
Image courtesy of University YMCA

To explain the depth of this story we need to take a step back in time. In 1873, the University YMCA was founded, and in 1907 a new building was built to function as the organization’s headquarters. That building was named Illini Hall. During construction of Illini Hall, a time capsule was hidden in the cornerstone.  

In February 2023 the demolition of Illini Hall was underway, beginning the plan for a new facility. During the building’s demolition, the time capsule was discovered inside the cornerstone. There were historical photos and documents that hinted at the possibility of a time capsule but there was no guarantee. 
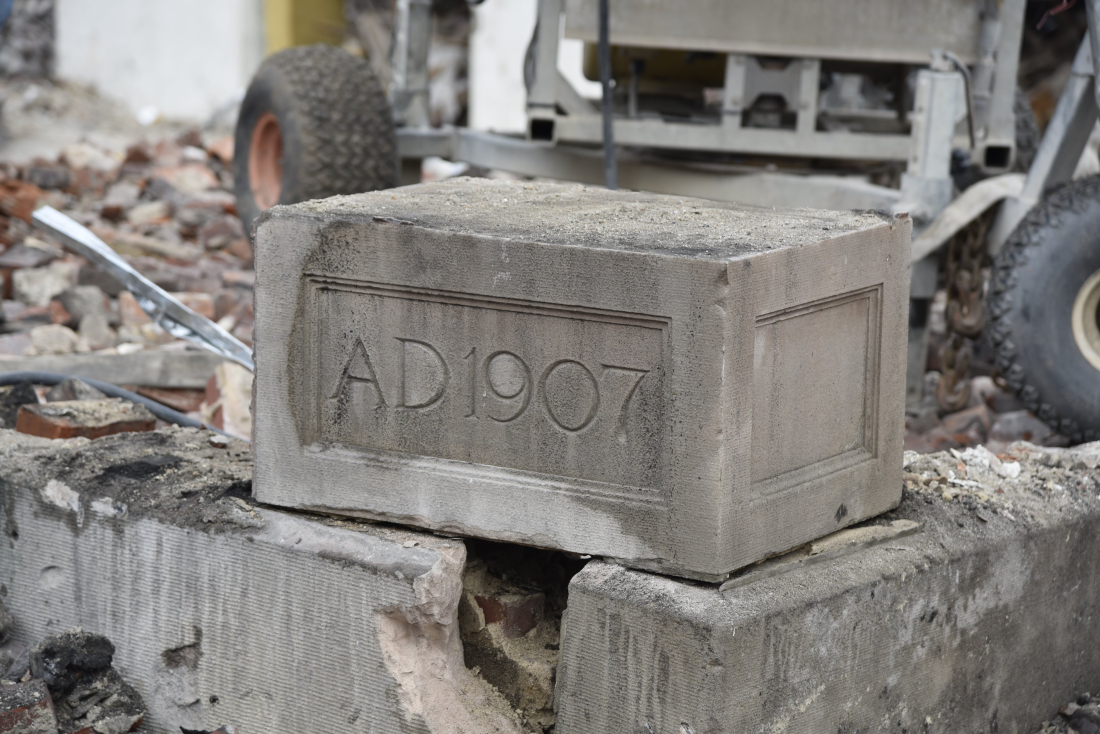
Image courtesy of WCIA

After the time capsule was discovered in February 2023, it was returned to the current YMCA Executive Director, Jim Hinterlong. The YMCA decided to hold off opening it until the fall of 2023 when the University YMCA would be celebrating its 150th anniversary. The time capsule was kept in a display case in the YMCA building, located at 1001 S Wright St.  

After unveiling the contents of the time capsule at the anniversary celebration, it was clear that professional attention would be needed.  Jennifer Hain Teper, Head of Preservation Services at the University Library, was contacted by Jim Hinterlong to assess the time capsule and its contents.   

What’s Inside 
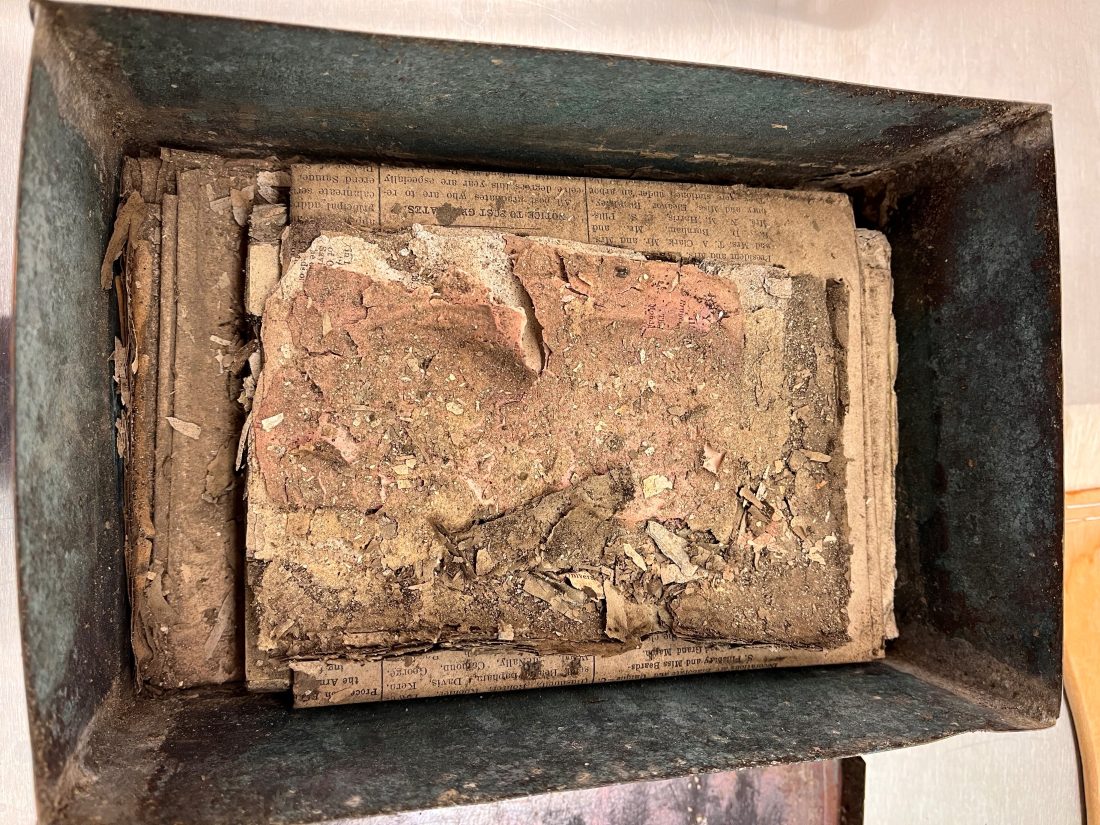
Image courtesy of UIUC Preservation Services

The time capsule itself was a heavy metal gauge box, possibly copper. Inside the metal box was a stack of paper-based materials. The materials on top of the stack were the most affected by age and elements. Fragmented into tiny pieces and incapable of being handled without more damage, the topmost material was unidentifiable. The remaining items were in far better condition, and able to be identified: 

  • YMCA annual Report of the General Secretary, ca. June 1907 
  • YMCA Founding Constitution, 1904 
  • The Illini, vol.36 [no.200], June 11, 1907  
  • University of Illinois Bulletin, vol.4 no.16, April 15, 1907 
  • The Champaign Daily Gazette, June 19, 1907 

Jennifer and her associate Shelby Strommer, the University Library’s Collection Care Coordinator, assessed the items. Overall, the contents of the time capsule were in good condition, considering the items were in a wall for 116 years with no control over fluctuating temperature and humidity. Jennifer and Shelby were impressed with the condition of the newspapers that were at the bottom of the stack. The paper itself was intact and able to be unfolded without breakage. Many of the other materials had become brittle with age and the fluctuating conditions they were exposed to, but the newspapers were the exception.  

It is difficult to speculate why the newspaper was in better condition compared to the other contents, but this is the magic of time capsules: you never know what will happen.  

Strangers to Neighbors  
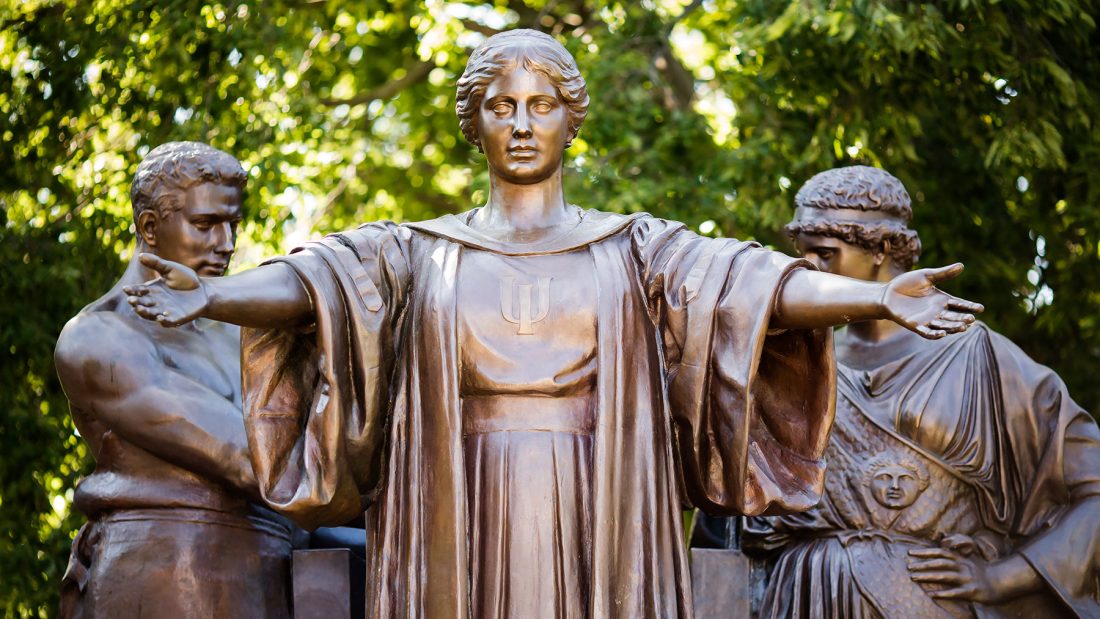
Image courtesy of University of Illinois Board of Trustees

More than ten years ago and just across the street from Illini Hall, less than 200 feet from where the time capsule was found, was another time capsule hidden inside the Alma Mater statue. This time capsule was removed in 2012 and replaced with a new one when it was discovered that the screw top glass jar used as the container exploded due to conditions it had been exposed to.  

The Alma Mater time capsule was placed in the statue back in the 1980s. Between then and 2012, a gap near the base of the statue was patched. The cast bronze statue has seams throughout it where it was pieced together. These seams are not airtight, and water and moisture can get it. Without the proper drainage the water is trapped inside, heating and cooling with the seasons. The glass jar inside was locked in these conditions and caused the glass to eventually shatter, exposing its contents to the elements inside the statue.  

The statue was removed in 2012 for conservation. When the statue was lifted away for transport, finding a time capsule, or what was left of it, was quite a surprise to Jennifer Hain Teper and Christa Deacy-Quinn, who were on the conservation project team. Since the glass jar time capsule was damaged, the University of Illinois Office of Public Affairs set a new one in its place. The new time capsule included a gold DVD, USB drive, UIUC t-shirt and the original items. A gold DVD was used since gold is one of the most inert, reflective elements on earth, which makes it perfect to resist the effects of temperature and humidity. These characteristics prevent oxidation, a common cause of failure for most DVDs. The items were sealed inside a stainless-steel preservation time capsule container. This container was made to be a time capsule and will do a better job of minimizing the impact of fluctuating temperature and humidity. 

The Alma Mater statue’s conservation project included regular maintenance to prevent it from needing to be sent away, so there is no guarantee the second capsule will be seen again.  

For 30 years these two time capsules were neighbors. With the discovery and removal of the YMCA time capsule, the time capsule in the Alma Mater statue is once again the only time capsule that we know about in the area.  

Treasure Chest
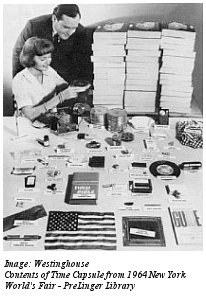
Image courtesy of ALA 

The success of a time capsule depends heavily on the quality of the enclosure. If an improper container is selected, then the contents of the time capsule are more susceptible to the environment around it. There are many materials that can be used for time capsules, but a highly recommended container is one made of high alloy stainless steel. Ideally, the container should be of seamless or welded construction with a screw top and gasket to ensure it is suitable for long-term burial. You can find high quality, waterproof time capsules online by searching for “professional grade time capsule.” Containers like glass jars are cheap and accessible time capsules but do not have insulating properties. If mishandled they can shatter, completely exposing the contents to the environment.  

Paper Doesn’t Get Claustrophobic

A common mistake in long-term storage of items, including time capsules, is that the contents are given too much room to breathe. Materials like paper that are hydroscopic absorb moisture from the environment and expand and shrink with changes in humidity. This causes the paper to warp and become brittle at an accelerated rate. Storing materials that are hydroscopic in snug, but not tight, containers can help reduce fluctuations in humidity, creating a more stable microclimate. 

To Seal or Not to Seal 

Next, let’s discuss sealing time capsules. If you have a professional grade time capsule, you might purchase a time capsule preservation kit to accompany it. These kits include desiccants, packs that absorb the moisture in the air to maintain a low humidity environment. You will often find them at the bottom of snack bags, because if too much moisture was introduced into a snack bag it would be trapped and cause mold to form. The same goes for time capsules, which is why sealing your time capsule can be tricky. If you seal your time capsule, make sure there is not excessive moisture in the container before sealing, and that the container itself is waterproof to avoid the formation of microclimates: 30 – 50% relative humidity is ideal. If you are using a box you have lying around, sealing it may not be the way to go. If moisture is introduced to a time capsule that is not sealed, then mold might not flourish since there is more air circulation. This is not a guarantee, and it is a tricky line to walk but factors such as these can make all the difference.  

Location, Location, Location

When building a time capsule, so many decisions are made based on protecting the contents from the outside world and the degrading effects of time. The location you pick is one of the biggest decisions in this process. Many hide time capsules away where they won’t be disturbed, but even if the item is mortared into the walls of a building or welded inside a bronze statue, things can go wrong. Sometimes not having control over the space the time capsule is stored in can be its demise. But the mystery of locking it away is part of the fun too. If you are interested in burying your time capsule, in most areas a depth of 18 to 24 inches should suffice. This is the area between the top of the time capsule and the ground level. You want it to be deep enough down in the ground to get a stable temperature. 

Extra Help 

If you are looking for extra help with your time capsule, there are time capsule preservation kits available online to better protect the contents from the inside. Kits include archival-quality paper (which may be buffered to slow the creation of acids) envelopes, folders, or boxes; uncoated PET zipper bags; or glass or stable plastic vials with screw-top lids. It is recommended that the time capsule’s contents are put into these containers individually or grouped with like items. Desiccants, as mentioned above, will help with moisture control. Desiccant packs usually last 1-3 years depending on the size.  

Last Thoughts

Everything covered in this article depends on you. This is your time capsule, and it will be up to you to decide what your motivations are for it. Is your goal to make a highly secure modern time capsule that will protect the contents? Then purchase a professional grade time capsule and preservation kit. Or are you looking to make memories with loved ones, and you are more interested in the fun that comes with the journey? Then a shoe box might just be the capsule for you. Time capsules are an excellent way to capture time in material form to be unveiled in the future. Although there are plenty of resources today for optimal time capsule success, there have been many century-old time capsules that have endured the tests of time despite the conditions and factors working against them.  
Library Disaster Practice

by Victoria Schmitz  U of I Collections Care Graduate Assistant

A library’s tabletop disaster scenario is a meeting of the library’s disaster team with the goal to talk through an imaginary disaster that could happen at the library.  The disaster team features folks from the library’s facilities department, human resources and business, IT, preservation and conservation, and more.  The goal of a tabletop exercise is to allow team members to become familiar with the library’s disaster plan and their roles, and to identify potential challenges and gaps in our emergency response.

Our disaster scenario featured a pipe bursting in the ceiling above a reading room, onto multiple rows of shelves.  The scenario’s destruction was about 3,000 water damaged books, which is a relatively minor disaster for our library (or so I’ve been told).

My fellow graduate assistant for Conservation, Nani Hodges, and I were the ones to plan out the disaster training scenario.  This was our first ever tabletop disaster scenario.  We meet up to work on the scenario anywhere from 1-4 hours per week for two months.  While the planning was a bit stressful, especially since we did not have any prior personal experience to go off of, the actual day of the scenario felt like a breeze for us.  All we had to do was offer up the prompts and make sure the discussion wasn’t going over the allotted time.

The disaster scenario tabletop proved to be both a good exercise after a 2+ year gap of no disaster practice and a good way to meet new colleagues that had joined the team.  For me, it was a great experience to learn about the other branches of a library (outside of Preservation Services) that I don’t get to see often and how in depth their parts would be in a disaster.

Things to consider when writing your disaster response manual, reviewing your existing manual, and training with your manual.

Additional Resources:

“What is a Tabletop Exercise?” COSTEP MA, 31 July 2020, https://mblc.state.ma.us/costepma/index.php/2020/07/31/what-is-a-tabletop-exercise/ 

“Exercises.” Ready.gov, 12 October, 2021, https://www.ready.gov/exercises 

At the Lab: The Battle Flag of the Abraham Lincoln Battalion

Written by Extra Help Hourly Savannah Adams; research and editing by Graduate Assistant in Newspaper Digitization and Conservation Hourly Katie Poland

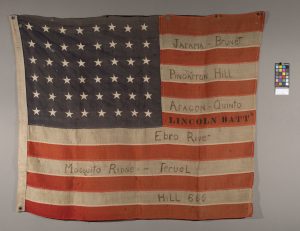
Before Treatment of the Original Battle/Parade Flag of the Abraham Lincoln Battalion  

Original Battle/Parade Flag of Abraham Lincoln Battalion

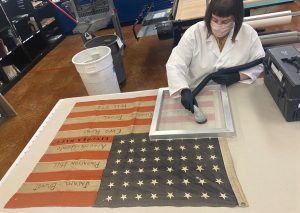
During Treatment: Conservator Jody Waitzman vacuuming the flag through a screen to remove surface dirt and dust.

The Oak Street Library Facilities Conservation unit has been tasked with the stabilization, cleaning, and safekeeping of the Original Battle and Parade Flag of the Abraham Lincoln Battalion. The flag, sized at 88cm x 107cm, is inscribed in black pen and ink and/or paint, and blue pen and ink. Made from a semi-sheer textile in red, white, and blue, the flag has many small tears, holes, abrasions, discoloration/soiling and general signs of use. However, it is stable overall. Oak Street Library Facility Conservator, Jody Waitzman, treated the flag by vacuuming the item through a screen to reduce surface dirt and dust (see image) and rehoused for rolled storage in an acid-free, preservation-grade box.

Spanish Civil War and the Abraham Lincoln Battalion (1936 – 1939)

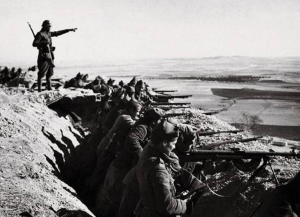
In the decades leading up to the Spanish Civil War, tension between the Republican government of Spain and the Nationalist faction, led by General Francisco Franco, steadily increased. After General Franco’s failed attempt at a military coup in order to gain control of the country, the nation was thrust into a bloody, 3-year long Civil War. The Nationalists, or rebels, were backed by Fascist Italy and Nazi Germany. In opposition, the Republican government received aid from the Soviet Union, as well as International Brigades.

Within the International Brigades, military units were composed of volunteers from Europe and the United States. The Lincoln Battalion was formed by a group of volunteers from the United States who served in the Spanish Civil War as soldiers, technicians, medical personnel and aviators. The American Battalion stood for Spanish Republican forces and against that of General Franco and his Nationalist faction. Of the approximately 3,015 volunteers from the US, 681 were killed in action or died of wounds or sickness.

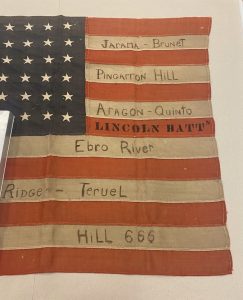
Inscription on flag:

Detail of the battle sites inscribed on the stripes of the flag.

JARAMA – BRUNET

PINGARRON HILL

ARAGON QUINTO

LINCOLN BATTₙ

EBRO RIVER

MOSQUITO RIDGE – TUREUL 

HILL 666


What these battles signified: 

Jarama – Brunet: The battle of Jarama took place February 6-27, 1937. This twenty-one day battle was an attempt by General Franco’s Nationalists to dislodge the Republican lines along the Jarama river, just east of Madrid.

The Pingarrón Hil defense led by Nationalist faction soldier Carlos Asensio. https://buff.ly/2Ty3wHA

Pingarrón Hill: Also known as “Suicide Hill,” the battle on Pingarrón Hill took place on February 12-13, 1937. The flag’s inscription recalls the place in which Spanish soldier, statesman, and member of the Nationalist faction, Carlos Asensio’s troops took the Pingarrón hills in the hopes of claiming the high ground. Unfortunately, this battle resulted in one of the deadliest fights of the Spanish Civil War.

Aragon Quinto: The Aragon Offensive was a salient military campaign launched by the Nationalist faction after the Battle of Teruel (see below). The offensive ran from March 7 – April 19, 1938, and overran Republican forces in Aragon, parts of Catalonia, and the Levante (the eastern region of the Iberian Peninsula) of Spain.

Ebro River: The longest and largest battle of the Spanish Civil War, Batalla del Ebro, took place between July through November of 1938. The fighting took place mainly in two areas on the lower region of the Ebro River: the Terra Alta comarca of Catalonia, and the Auts area by Fayón in Aragon. The battle was extremely deadly, with tens of thousands of Repubican soldiers left dead and wounded. However, the outcome had little effect in the advancement of the Nationalists.

Mosquito Ridge – Tureul: Coincidentally taking place during the worst winter Spain had seen in 20 years, The Battle of Teruel occured between December 1937 – February 1938. The battle proved to be one of the bloodiest the war had endured. The city of Tureul, initially held by the Nationalists at the start of the battle, would be taken over by the Republicans, and then eventually be retaken by the Nationalists. By the end, both parties suffered over 140,000 casualties throughout the two-month long battle.

Hill 666 Plaque commemorating the battle of the Ebro River. https://buff.ly/3ylWgO3

Hill 666: On 2 October the Nationalists occupied the heights of Lavall and two weeks later Point 666, the key of the Pandols Range. Plaque Hill 666 in the Serres de Pandols-Cavalls signifies and commemorates the deadly battle at this location by the International Brigades during the Battle of the Ebro.


References: 

Jarama Valley (song)

Songs of the Lincoln Battalion

https://www.proquest.com/hnpnewyorktimes/advanced/7CE710BF7BC24952PQ?accountid=14553

https://spartacus-educational.com/SPjarama.htm

https://www.tracesofwar.com/sights/92280/Plaque-Hill-666.htm

https://www.aslscenarioarchive.com/uploads/08.2018/pingarron_hill_defense.png

https://en.wikipedia.org/wiki/Battle_of_Jarama

https://en.wikipedia.org/wiki/Aragon_Offensive

https://en.wikipedia.org/wiki/Battle_of_the_Ebro

https://en.wikipedia.org/wiki/Battle_of_Teruel

https://en.wikipedia.org/wiki/Lincoln_Battalion

https://www.britannica.com/event/Spanish-Civil-War

https://www.aslscenarioarchive.com/uploads/08.2018/pingarron_hill_defense.png

https://en.wikipedia.org/wiki/Battle_of_the_Ebro#Nationalist_counteroffensive  Spanish Civil War | Hill 666

A Preservation Chat Reflecting a Year into the COVID-19 Pandemic & our Local Emergency Access Digitization System Workflow

Two Digitization Workflows, Both Alike in Dignity, in Fair Preservation, where we lay our scene… it has been just over a year since the state of Illinois issued a stay-at-home order and we hustled to close our labs and offices to work remotely. COVID-19 had arrived regionally, and we departed the building for our homes in the spring. By mid-summer, we were starting to repopulate the library cautiously in limited numbers. We tested weekly, and then biweekly following campus SHIELD saliva testing protocols, and shipments in and out of the library followed quarantine restrictions to limit the chance of shared contact infections. As a non-public-facing unit, our work in Preservation Services could carry on in the background. Shortly after returning to the office, often on staggering shifts or as the only person in an area, we set to work supporting an experiment to provide digital first access to all general collection requests.

Here’s a conversation we had reflecting on the good that’s come out of all of this:

Will: My first thought when we started up with this was, how can we leverage existing digitization workflows to meet the needs of an extremely increased general collections patron request demand?

William Schlaack, Digital Reformatting Coordinator

Rachael: I was optimistic, but uncertain of how we’d get up to speed and keep momentum, especially considering we were starting from a complete stop in services. I remember an early talk about what we were going to try to do with Kyle, Jennifer, you and Shelby about getting this going and feeling a bit like we had just come back from off season to a culminating test of skills and agility.

Will: After that, it was sort of setting up the parameters for items that we are unable to scan with any sort of fast turnaround time and thus would need to be sent to the locker pickup workflow. Initially it was very difficult to deduce what our capacity for scanning was with our existing infrastructure.

Rachael: I was glad to meet our colleagues Diane and Johna, who came to us from other library areas to help. Their willingness to learn how to use our equipment and adapted workflows as we started sorting out the day to day of hands-on digitizing of all the books has been a positive constant.

Will: A lot of this was taking old techniques and applying them in new ways with new people.

Rachael Johns, Digital Imaging Specialist II

Rachael: I agree, I think the people aspect was a really big factor. We had people learning some fairly complex technical processes from scratch, and we improvised as we went. I was so thankful that came together and I remember Jennifer emphasizing the people aspect, a willingness for this experimental approach, and that came through for us. All the other things, that maybe were big hurdles, seemed smaller in comparison.

Will: We used and tried to investigate making do with what we had, pushing that to the limit, and learning that we really needed to scale up the DS side of things because our existing general collections digitization that I manage wasn’t built to have this quick turn-around time and scale – DS went from digitizing rare manuscripts to mass market paperbacks over the course of a month.

Rachael: Yes. It was interesting!

Will: With realized that with our on-site Internet Archive scanning center we would only be able to continue to scan content through them that is in the public domain. After some real quick calculations, we realized that out of all the requests items in the public domain accounted for only about five percent of the total, so that didn’t take a lot of the pressure off of Digitization Services. Nonetheless, the triage and digitization processes are always balancing acts, with the need for prompt turn-around times promised to patrons, what we could logistically handle. Our communication has always been more or less the following: what are we getting, what does the queue look like, how are we ensuring a balance of efficient delivery time and meeting needs for patrons? Except now the scale and turnaround time are both greatly expanded and expediated, respectively.

Rachael: Maybe to me this aspect is sort of game, keeping things balanced, or at least I’ve tried to approach things that way to stay energized – everything is so trying so coming back to the team vibes, after a year, it’s not the details I’m remembering most it’s getting to know the people involved.

Will: It has been interesting when what we do becomes the forefront of what’s needed, but that magnitude is not something we were traditionally equipped for… we’re used to being in the background and now we’re more public facing and collaborating with staff from all over. I think we’re certainly the better for it. This has been an exercise in opening up channels of communication.

Rachael: It’s been somewhat surreal, from the quiet first coming back to campus. At that time from being remote to in person I was still interacting remotely with Brynlee, Kim, Henry and Angela in a tiny unit that is used to a much different focus to fall and winter, now having more staff with help from great people like Christine and Tabby and shifting back to Special Collections support on a daily, which we kept working with on a much smaller scale but now a year later, getting back into a more regular schedule for.

Will: It’s been trying to meet a quantity, before the reigning paradigm was quality.

Rachael: Right, the needs of a general collections workflow are not the same as the needs of an exhibit in New York City being blown up 20 feet tall! Will you be glad to get back to normal or do you think some of this is here to stay?

Will: It will be interesting to see the role, with the new normalcy and increase comfort with remote work capacities, this injection of ideas about remote and online access to things will have, I don’t think it’s going away. It will always be lingering as people find new ways to approach usage. I would hope to some extent we take the spirit of collaboration and quick thinking that was developed through this process and ensure that we sort of continue to meet shifting patron needs.

Rachael: Quick thinking and support from the library for our small area here in DS to step up to this challenge, was so impactful. I’ve enjoyed the interpersonal aspects helping this effort. We were a small existing team in DS, and now we have new people in DS. Shelby was fairly new, and working with you both from across the hall, and all these new professional relationships has been a really great outcome.

Will: It’s exciting to see our initial ad-hoc and frankly cobbled-together experimental workflow become a much more defined and collaborative institutional procedure and policy working in concert with departments across the library. That’s been good to see. I’m really proud of everything not just our digitization staff have accomplished, but staff across the library as well, to meet this unique challenge and serve our patrons safely and efficiently.

Rachael: Agreed!

A special thanks goes out to Tabby Garbutt, who loaned us the opening line of this blog post and has the unique perspective of having worked on both workflows on this project, IA and DS!

Independent Study in the Lab – Tacketed Binding

In the coming weeks, we will feature blog posts written by a current MSLIS student in the iSchool at the University of Illinois, Annabel Pinkney. Annabel is interested in the material culture of the book, the history of bookbinding, and the preservation and conservation of library materials. Due to her interests in the physical wellbeing of library items, she enrolled in an independent study this semester to practice book and paper conservation treatment and to explore historic bookmaking. This week she is creating a tacketed stationer’s binding!

Independent Study: A Tacketed Binding Model

This semester, I have been working hard to master basic conservation treatments and learn as much as I can about the historic craft of bookbinding. During the first half of the semester, I completed conservation treatments for 12 books, ranging from a book which was in nearly flawless condition, to a book that appeared to be run over by a car several times.

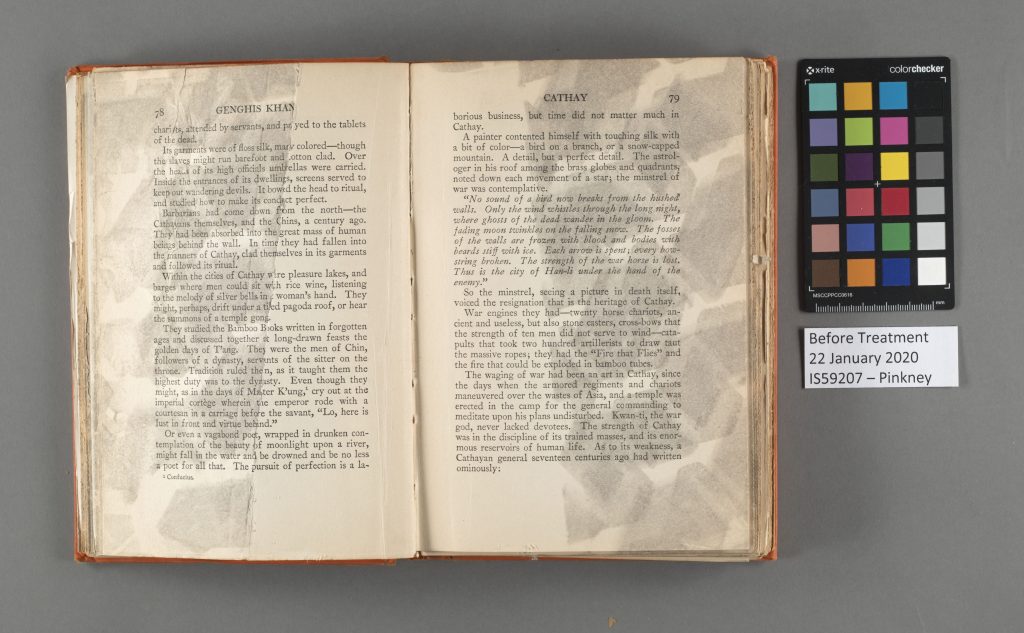
Before treatment documentation of a book repaired earlier this semester.

With the onset of the global pandemic, I have shifted to working remotely. I have sorely missed the amenities of working in a conservation lab, but so far, I have been able to work from home fairly efficiently. To aid in the adjustment to working from home, I am taking the rest of the semester to focus on building historic book models and reading, reading, reading! This week, I am making a tacketed stationer’s binding. Join me in taking a look at what this involves.

Tacketed Stationer’s Bindings

Tacketed stationery bindings are considered a type of temporary binding. These are non-adhesive structures most commonly made in 16th century Germany, Italy, and the low countries (what is modern-day Belgium, The Netherlands, and Luxemburg).  According to Nicholas Pickwoad,  “it can be said that tacketed bindings of printed books were intended to perform a variety of functions within and outside the book trade. The ease with which they allow a cover to be attached to and separated from a sewn text-block and their lightweight made them attractive to the book trade, which found them useful for giving immediate cheap protection to their wares. The private or institutional owner who did not wish to spend more on their libraries than they had to, clearly found them a convenient way to protect their books and allow them to be used.”

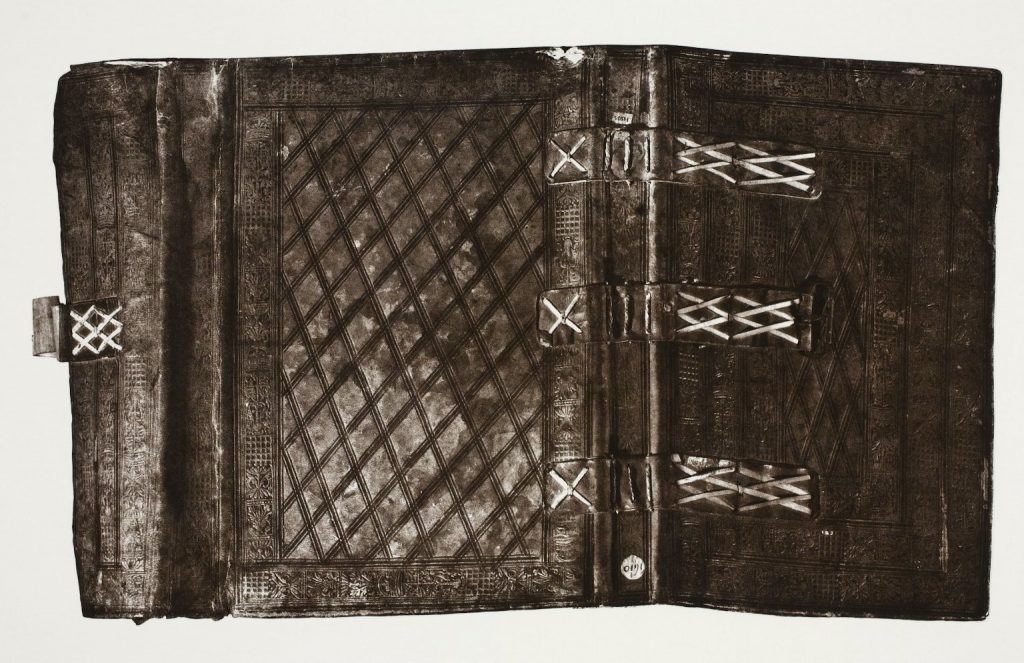
Folger binding, unwrapped. Folger Shakespeare Library, V.b.296 (c. 1568–1644), binding unwrapped. Used by permission of the Folger Shakespeare Library.

What is a tacket?

Think of a tacket as a hefty medieval staple. Tackets are made of parchment that has been twisted upon itself while wet. When it dries, the parchment shrinks and hardens, forming a very secure bond where it has been twisted.

Types of tacketed bindings. Drawing by Nicholas Pickwoad, from “Tacketed Bindings: A Hundred Years of European Book-binding.”

There are two types of tacket bindings, primary and secondary.  Primary tackets individually secure each section of pages to the cover one by one, whereas secondary tackets are used to attach the entire text block (which is already held together by the conventional manner of sewing) to the cover.

A Word on Temporary Bindings

In the 1500’s, books were not necessarily produced as they are today. Books were sometimes sold as sewn blocks of printed pages without a case. After purchasing a text-block, one could hire a binder to design and build a case for their book with hard covers (usually made of wood). Depending on the wealth of the owner and the importance of the book, the case could be very fancy (e.g. a full leather covering with gold tooling and bosses). But until the owner of the text-block had the means and intention to have it cased in boards, the text-block could be temporarily secured in a limp case of vellum or leather – like a tacket binding! This provided simple and quick protection for their new purchase.
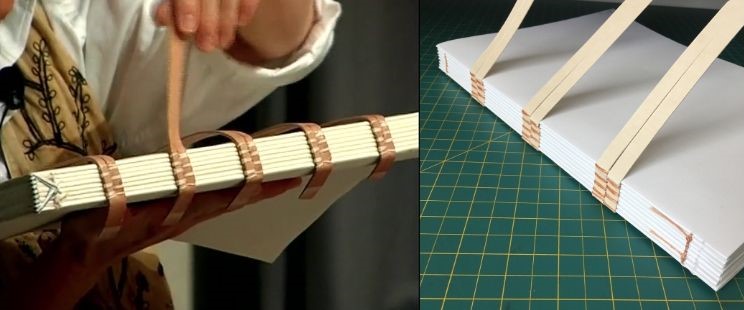
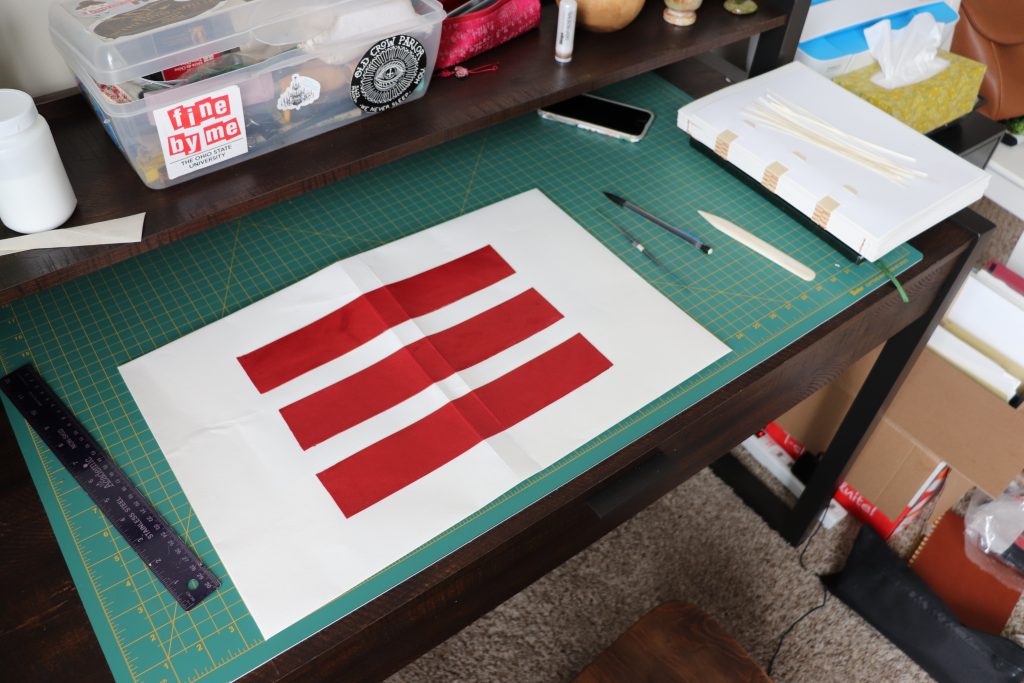
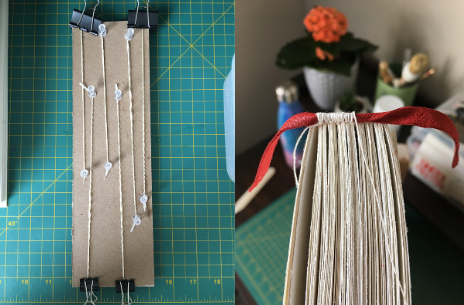
Some books, however, were never intended to have a sturdy wooden case. The ease of construction, low cost, ergonomic, and lightweight handling of a limp vellum cover were ideal qualities for account keeping books, typically known as ledger bindings. For these reasons, tacketed bindings may not have always been intended to be temporary.  Pickwoad tells us that “some of the surviving [tacketed bindings] were clearly intended as no more than temporary protection for the texts found inside them and have survived by accident, while others were clearly more permanent in intention, but it is not often possible to know where to draw the line between the two.”

Making the Model

There are many variations of the tacketed binding (in Pickwoad’s article he identifies 240+ variations of the tacket attachments alone), so it was imperative that I first develop a clear plan for my model using the materials I had at hand. My end goal was to make a secondary tacketed binding with transverse twisted tackets.

I began by making my text-block. I folded large, hefty sections of paper and secured them with a sewing structure I imitated from an online recording of the Guild of Book Workers 2007 Standards meeting (Creating Medieval Stationer’s Binding Structures: Lacing Patterns, Tacketing Methods, and Leather by Chela Metzger) However, instead of using split leather thong, I used Bristol board. You can see that the supports are longer on only one side. This was traditionally done to allow for the possibility to add more sections to the book at a later time.

Left: Chela Metzger’s Sewing block from the GBW Standards meeting recording 2007. Right: My sewn text block inspired by Chela.

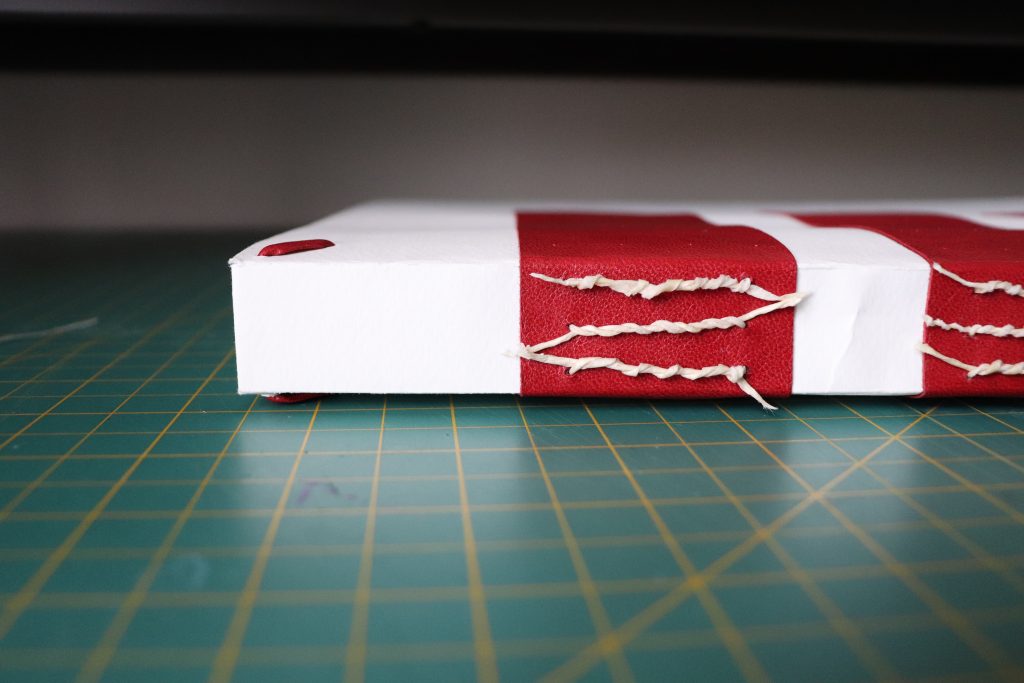
Next, I constructed a paper case with large turn-ins and three leather overbands. These cases would normally have been made out of vellum, parchment, or leather, but I only had access to a thick, textured paper (I used Canson Mi Tienes paper). I decided to add cardstock weight paper insets laced onto my supports to strengthen the covers. I’m intending to add an Italian decorative lacing pattern into the overbands once I have the right cord. Simultaneously, I consolidated my spine with a layer of wheat starch paste and added Japanese paper linings to the spine between my sewing stations.

Prepping the limp cover with leather overbands.

My next step was to start making my tackets. I cut up very thin pieces of parchment and I soaked them in water for about 10 minutes to make sure they had been sufficiently hydrated and were pliable. Once moisturized, I twisted the tackets firmly and let them dry in their new formation. While my tackets dried, I sewed endbands onto my text-block.

Left: Twisted parchment drying
Right: Endbands on a leather core in progress.


Finally, I attempted the tacketing process. I pierced the parchment tackets into the sections of my text-block and out my case’s pre-punched leather overbands. I found securing the tacket ends to be more challenging than I expected.  After an hour or so of adjustments, my tackets ultimately turned out to be a little looser than I would like. Parchment is a beast of a material, and I am relatively inexperienced in coaxing it to do what I want.  However, after I tighten my tackets a bit and add decorative lacing to the overbands, I will consider this model a win.

Tackets in progress.

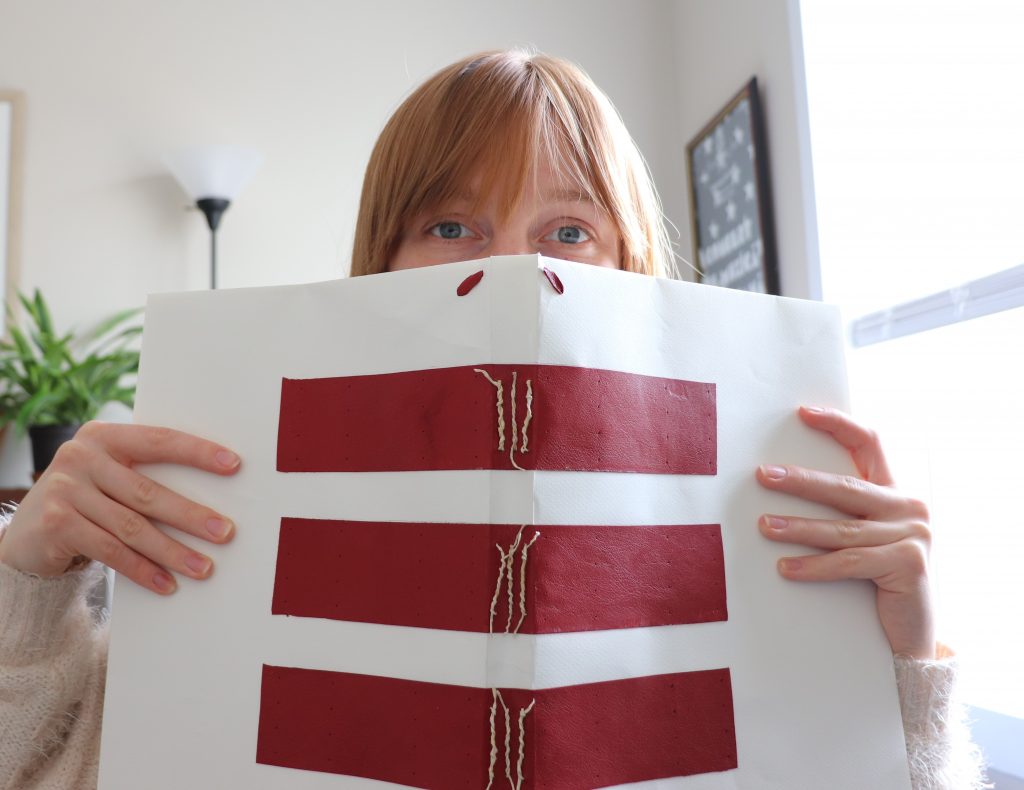
Me and my (almost) finished book!

References:

Pickwoad, Nicholas. “Tacketed Bindings: A Hundred Years of European Book-binding.” “For the Love of the Binding”: Studies in Bookbinding History Presented to Mirjam Foot. Ed. David Pearson. London: British Library and Oak Knoll, 2000. 119–67. Print.

Chela Metzger. “Creating Medieval Stationer’s Binding Structures: Lacing Patterns, Tacketing Methods, and Leather.” Guild of Book Workers Standards Meeting. 2007. Video.


Pamphlet Bindings: A History & DIY Activity

The global pandemic has affected us all in different ways. For most of us, we’re facing a lot more down-time and time spent indoors. In response to the growing need for boredom mediation, we’re supplying you with this short tutorial on how to make a pamphlet binding along with some brief historical tidbits. Enjoy!

A Very Brief and Noncomprehensive History of the Pamphlet Binding.

The pamphlet binding is a simple structure with a long history in the Western world. In fact, the term pamphlet is derived from the main character of a love poem, Pamphilus seu de Amore, written in the 12th century. The poem rose to popularity, and the term pamphlet came to be associated with small pieces of writing after the character, Pamphilus. (Partridge, 1966) The definition of a pamphlet binding, according to Randy Silverman (1987), is “a thin book composed of between one and three folded sections, linked together by a sewing structure and bound as a permanent enclosure.” Today, pamphlet structures are still used as conservation structures and are commonly found in zines, brochures, music, and other ephemera.

Most ubiquitously throughout history, pamphlet bindings have been used for ephemera because of their economic use of material and ease of assembly. Pamphlet production was likely at a highpoint during the late 18th century in Europe and America. (Silverman, 1987) In early America, pamphlets were a dominant form of information dispensation, and could even be considered as “America’s first social media” (check out the RBML’s awesome blog on the topic here). With just a little digging, you can find evidence of pamphlet structures throughout history.

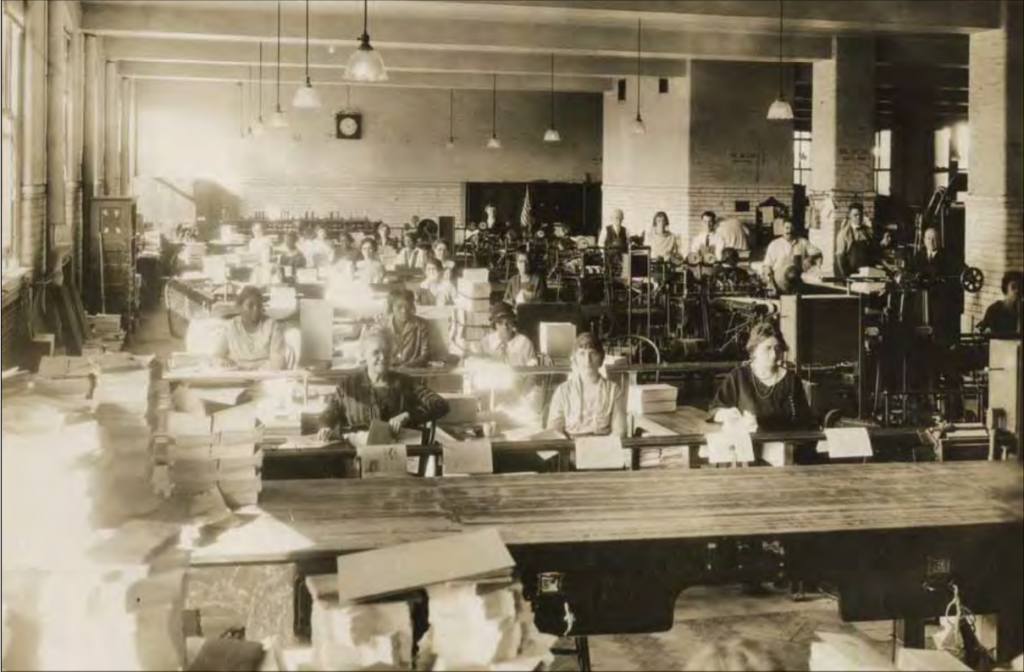
Here’s an example! As early as 1860, the U.S. Government Publishing Office binders produced every kind of folded, stitched, sewn, or glued pamphlet and book.

Image of workers at the government publishing office pamphlet making room.
“Single section pamphlets, being carried along the rail, receive a wire stitch to secure them. This photo from the 1930’s is one of many showing employees of different races working side by side. In this period area in GPO outside the production floor were, like most Federal Agencies, segregated.” (Borrowed from the Government Printing Office Picturing the Big Shop: Photos of the U.S. Government Publishing Office 1900-1980)

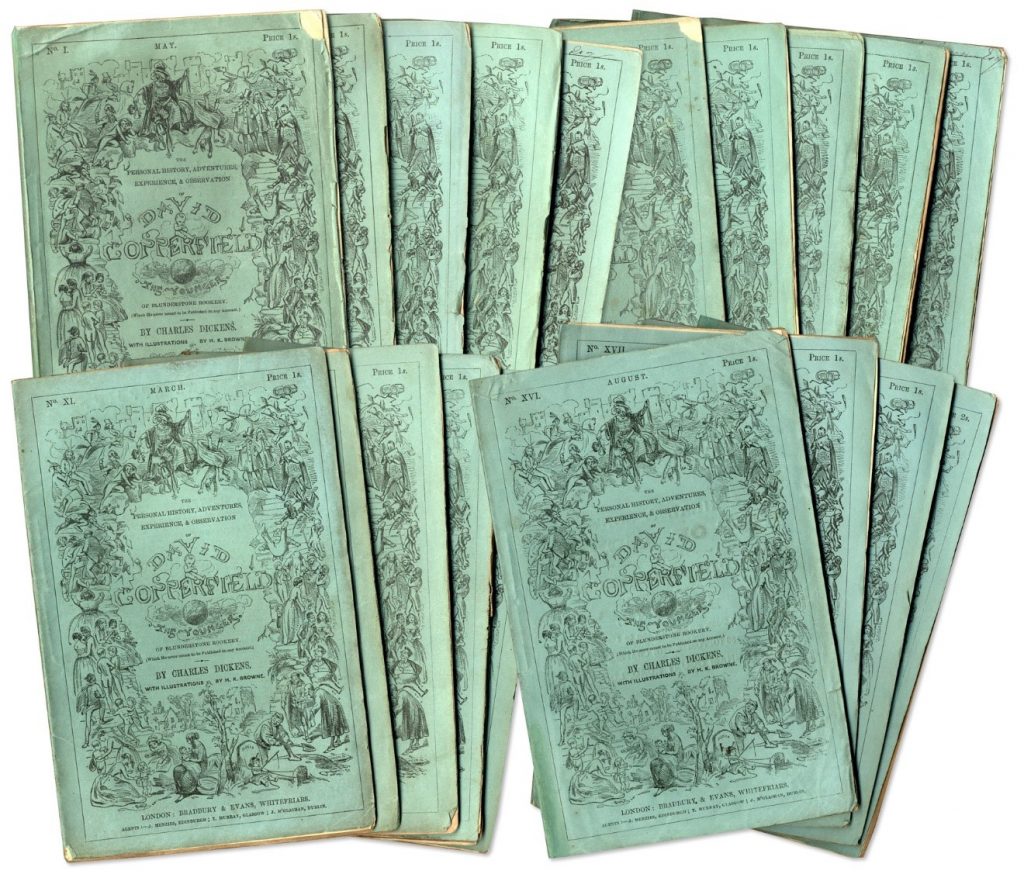
Pamphlets were also the common structure for binding serialized novels as they were published. For example, this serialized collection of David Copperfield by Charles Dickens (below) exists as pamphlets!

This image is from the Nate D. Sanders Auctions September 2016 Lot #80 Charles Dickens First Printing of ”David Copperfield” in Serialized Form — Rare in Original Green Wrappers.

There are infinite historical variations on the pamphlet binding. One will find that historical example materials run the gamut in sewing supports, endpaper styles, and covering materials. There really is no right or wrong way to make one – so experiment with what you have, and let’s get to it!

Did you know? The University of Illinois had its own “Pamphlet Binding and Book Repair” section of the library, started by William Henderson (Preservation Librarian, 1986-1996) in 1989. This was a critical step towards establishing a conservation department. In its beginnings, 8-10,000 pamphlets were bound per year.

Making a Pamphlet Stitch

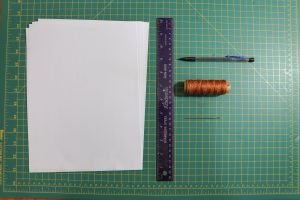
You will need:

  • 2-6 pieces of paper
  • A needle
  • Ruler
  • Pencil
  • Thread


Optional:

  • 1 piece of cover weight paper
  • Bone or Teflon Folder
  • An awl


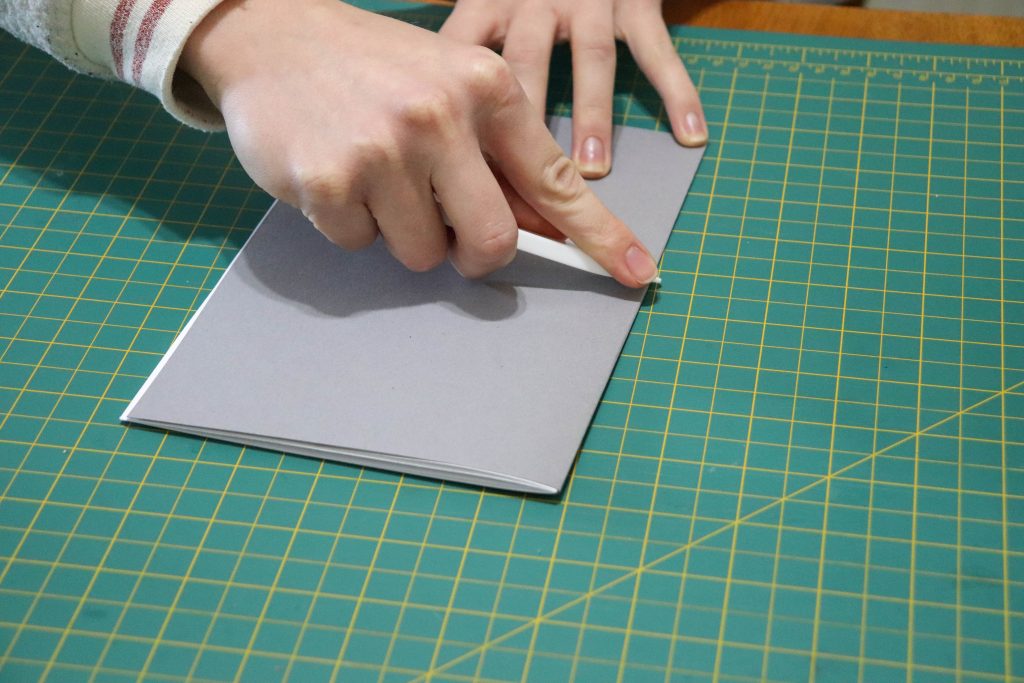
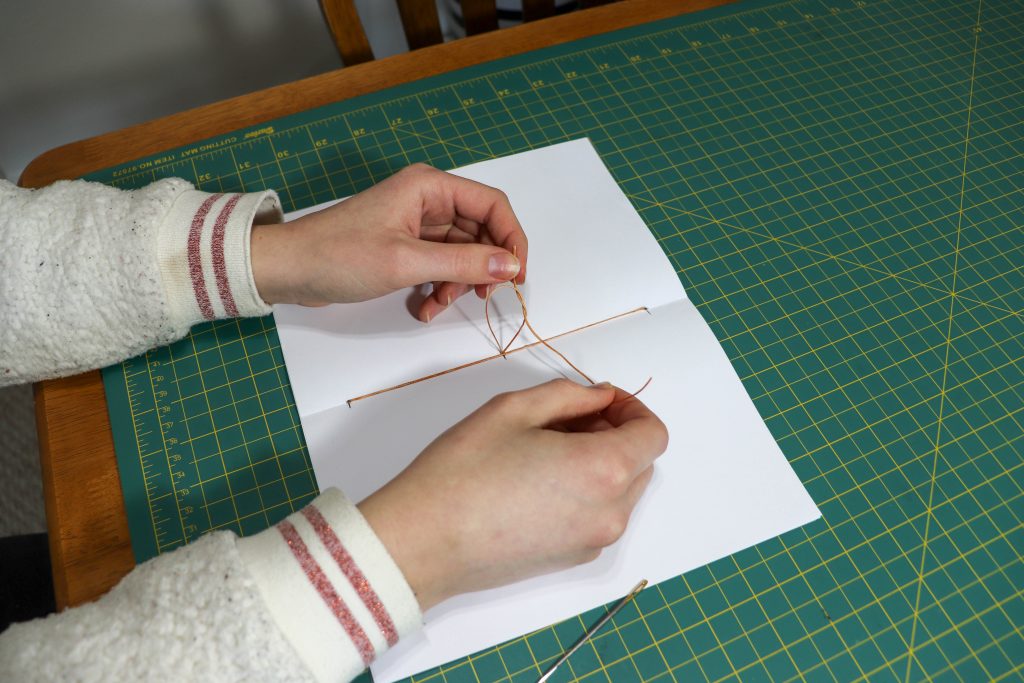
STEP 1: Begin by folding your pieces of paper in half. Fold all your sheets at once, with your cover weight paper on the outside of the fold. Use your fingernail to crease the edge or use a bone folder if you have one.

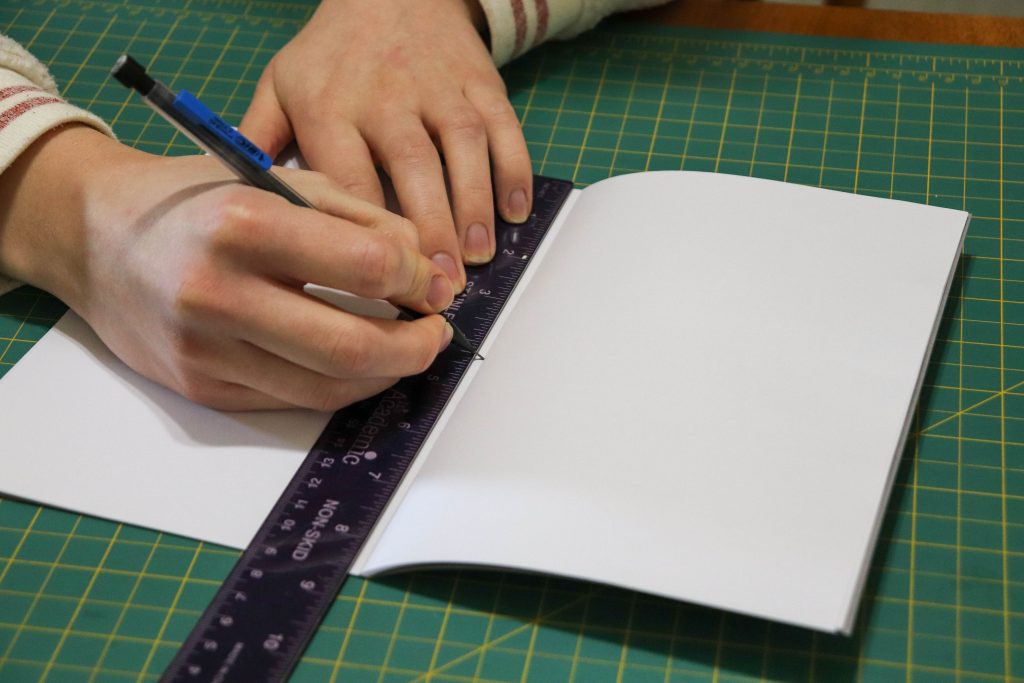
STEP 2: Use your ruler to measure the height of your pamphlet. Make three marks on the inside of the pamphlet, one at the center, and two equidistant from either side of the center mark.

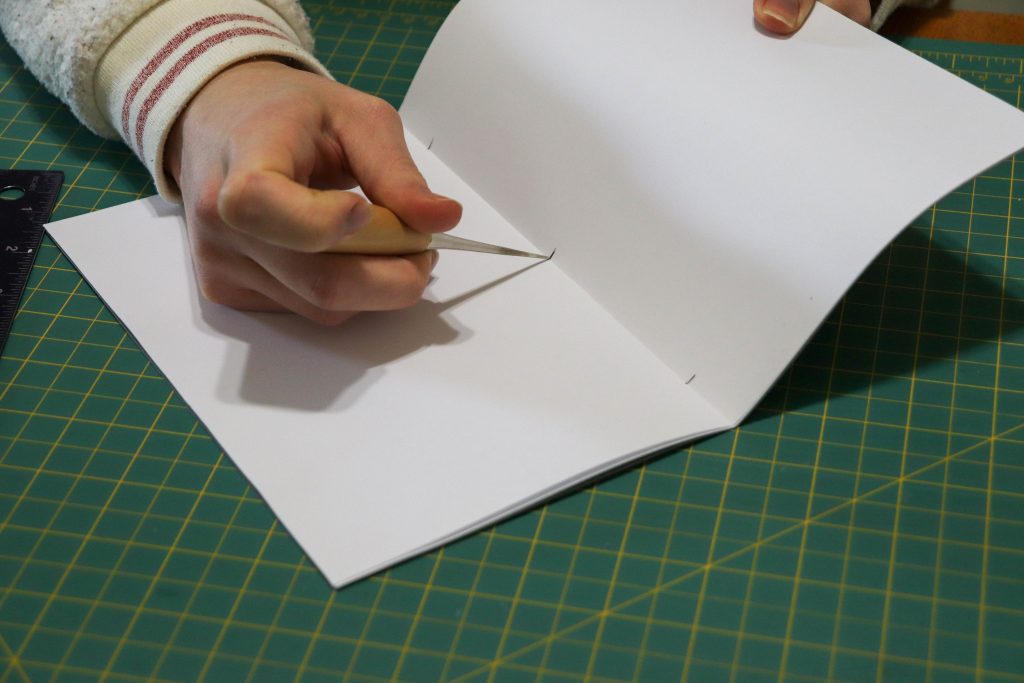
STEP 3: Use your awl to pierce through the marks you made. Aim to go directly through the fold from the interior to the exterior of the pamphlet.

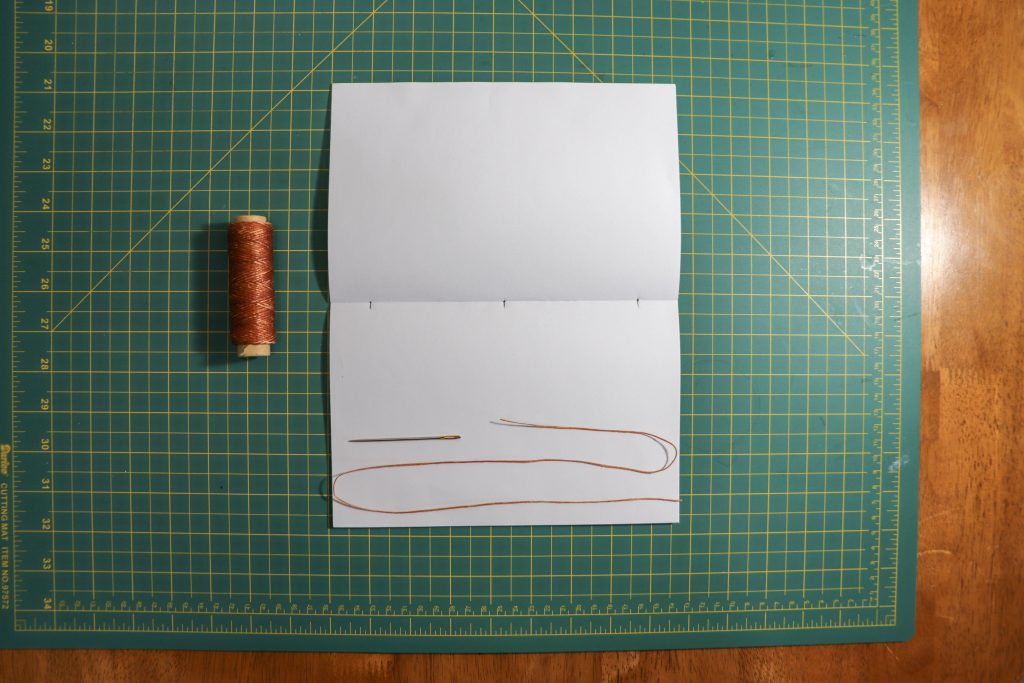
STEP 4: Cut a piece of thread 2 ½ times the height of your pamphlet and thread your needle.

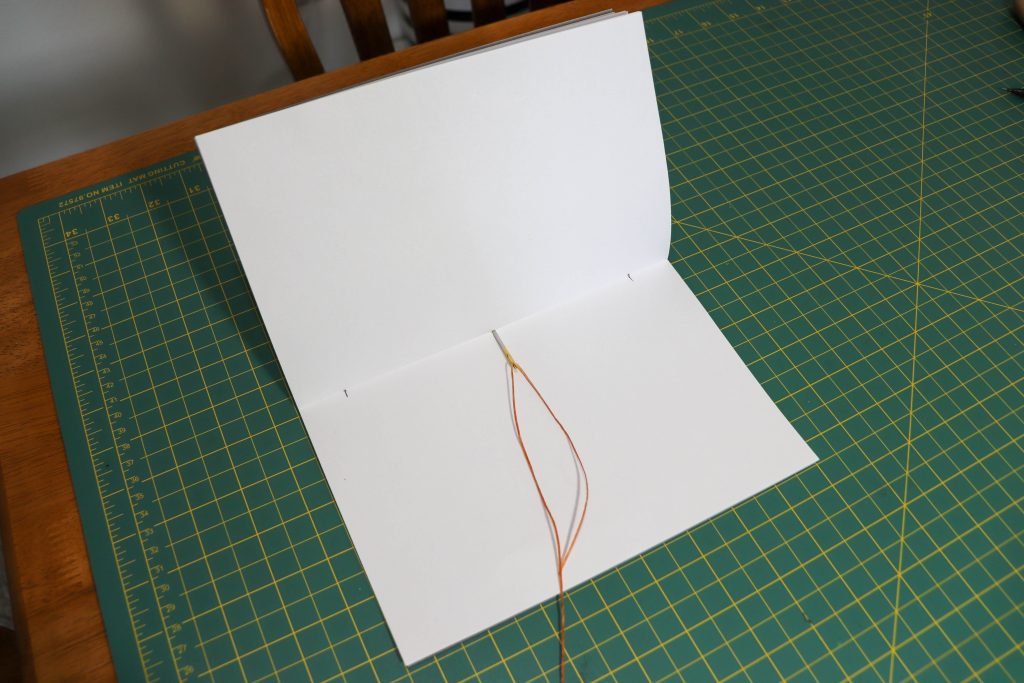
STEP 5: Take your needle and thread through the center hole of the pamphlet leaving a small tail behind.

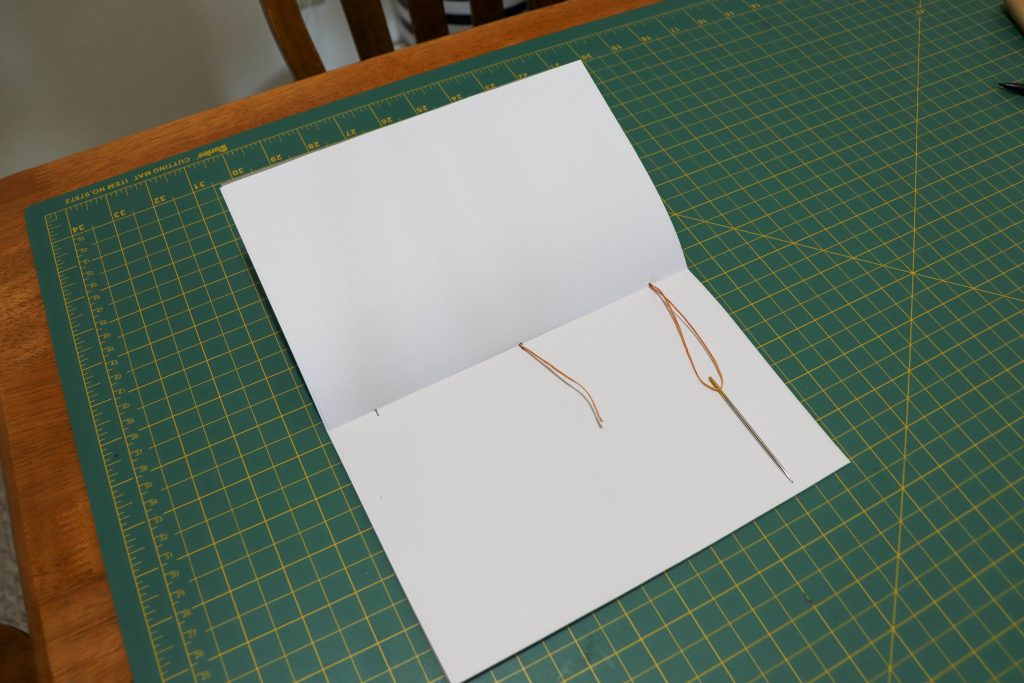
STEP 6: Take the thread from the outside through one of the other holes. It doesn’t matter which one. In this case, I went through the top hole.

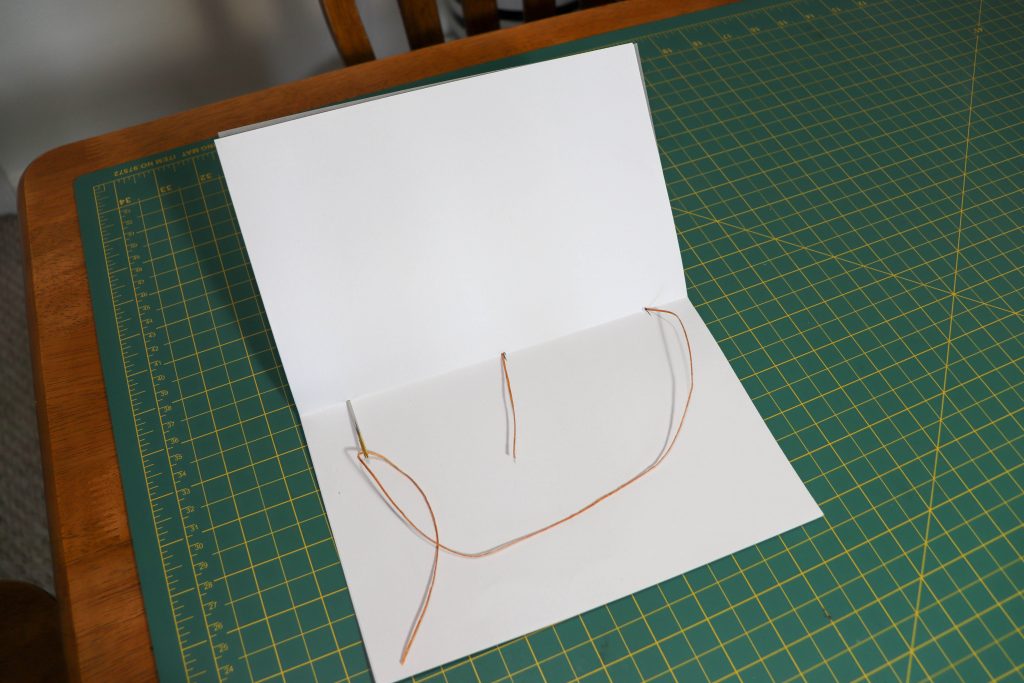
STEP 7: Bring the thread all the way across the interior of the fold, and out the final hole. In this case, I am going from the top hole to the bottom hole. The key is to take the thread through the hole you have not used yet.

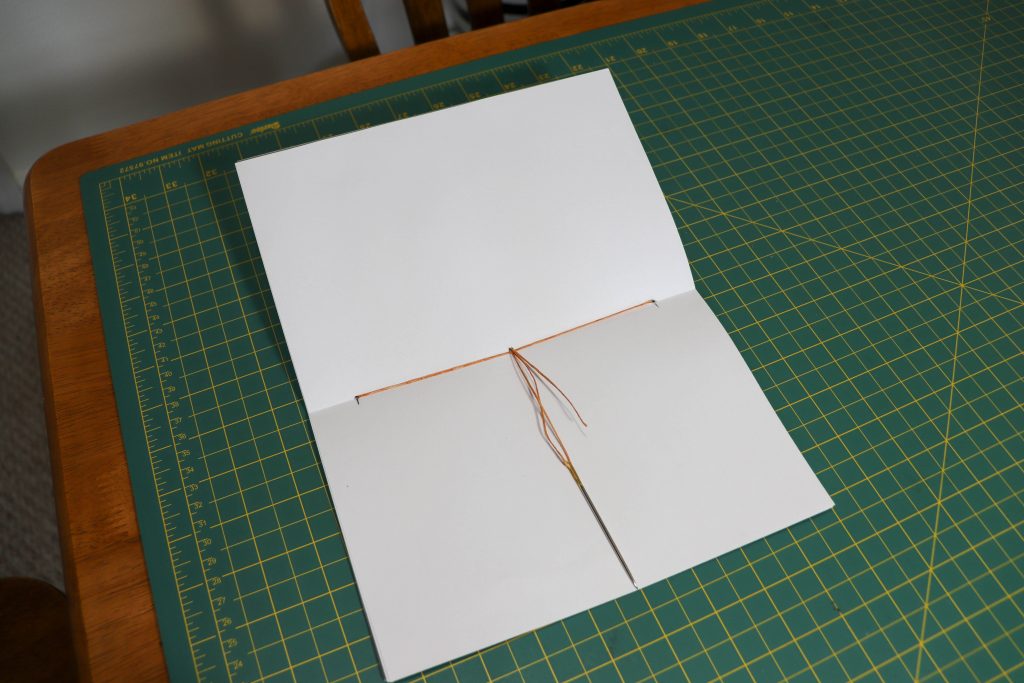
STEP 8: Finally, take the needle back into the center from the outside. This will leave the two ends of your string coming out the center hole on the inside of your pamphlet.

STEP 9: Tie off the strings and trim the ends.

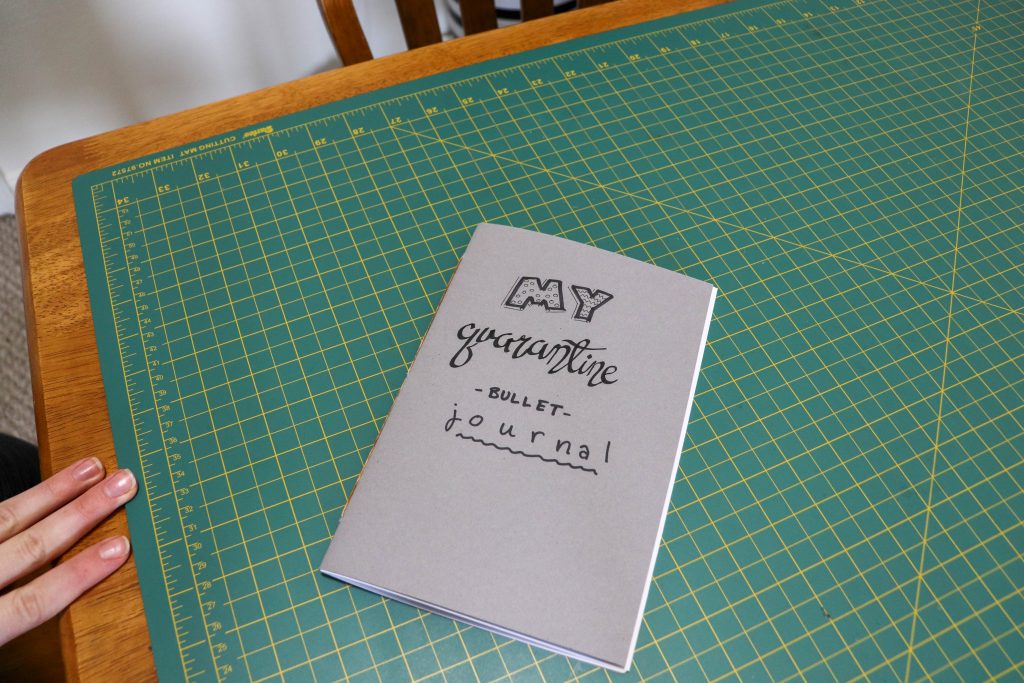
STEP 10: Decorate, and you’re finished!

Works Cited:

Eric Partridge, Origins; A Short Etymological Dictionary of Modern English (New York: Macmillan, 1966), 466.

Randy Silverman. “Small, Not Insignificant: a Specification for a Conservation Pamphlet Binding Structure.” The Book and Paper Group Annual Vol. 6 (1987)

United States Government Publishing Office. Picturing the Big Shop: Photos of the U.S. Government Publishing Office, 1900-1980  2017.

Nate D. Sanders Inc. Lot Detail; Charles Dickens First Printing of David Copperfield in Serialized Form. Copyright 2020.

University of Illinois Preservation and Conservation Services. https://www.library.illinois.edu/conserve/Backup_of_PresCons_Website/pamphlet_binding.htm

A Special Song Book from the Illinois History & Lincoln Collections

On Tuesday, February 12, the Illinois History and Lincoln Collections and the History, Philosophy, and Newspaper Library will celebrate Abraham Lincoln’s 210th birthday. The event will take place from 4-6 pm in room 246 of the Main Library and will include several fun activities, as well as a pop-up exhibit of rare and unique Lincoln-themed items.

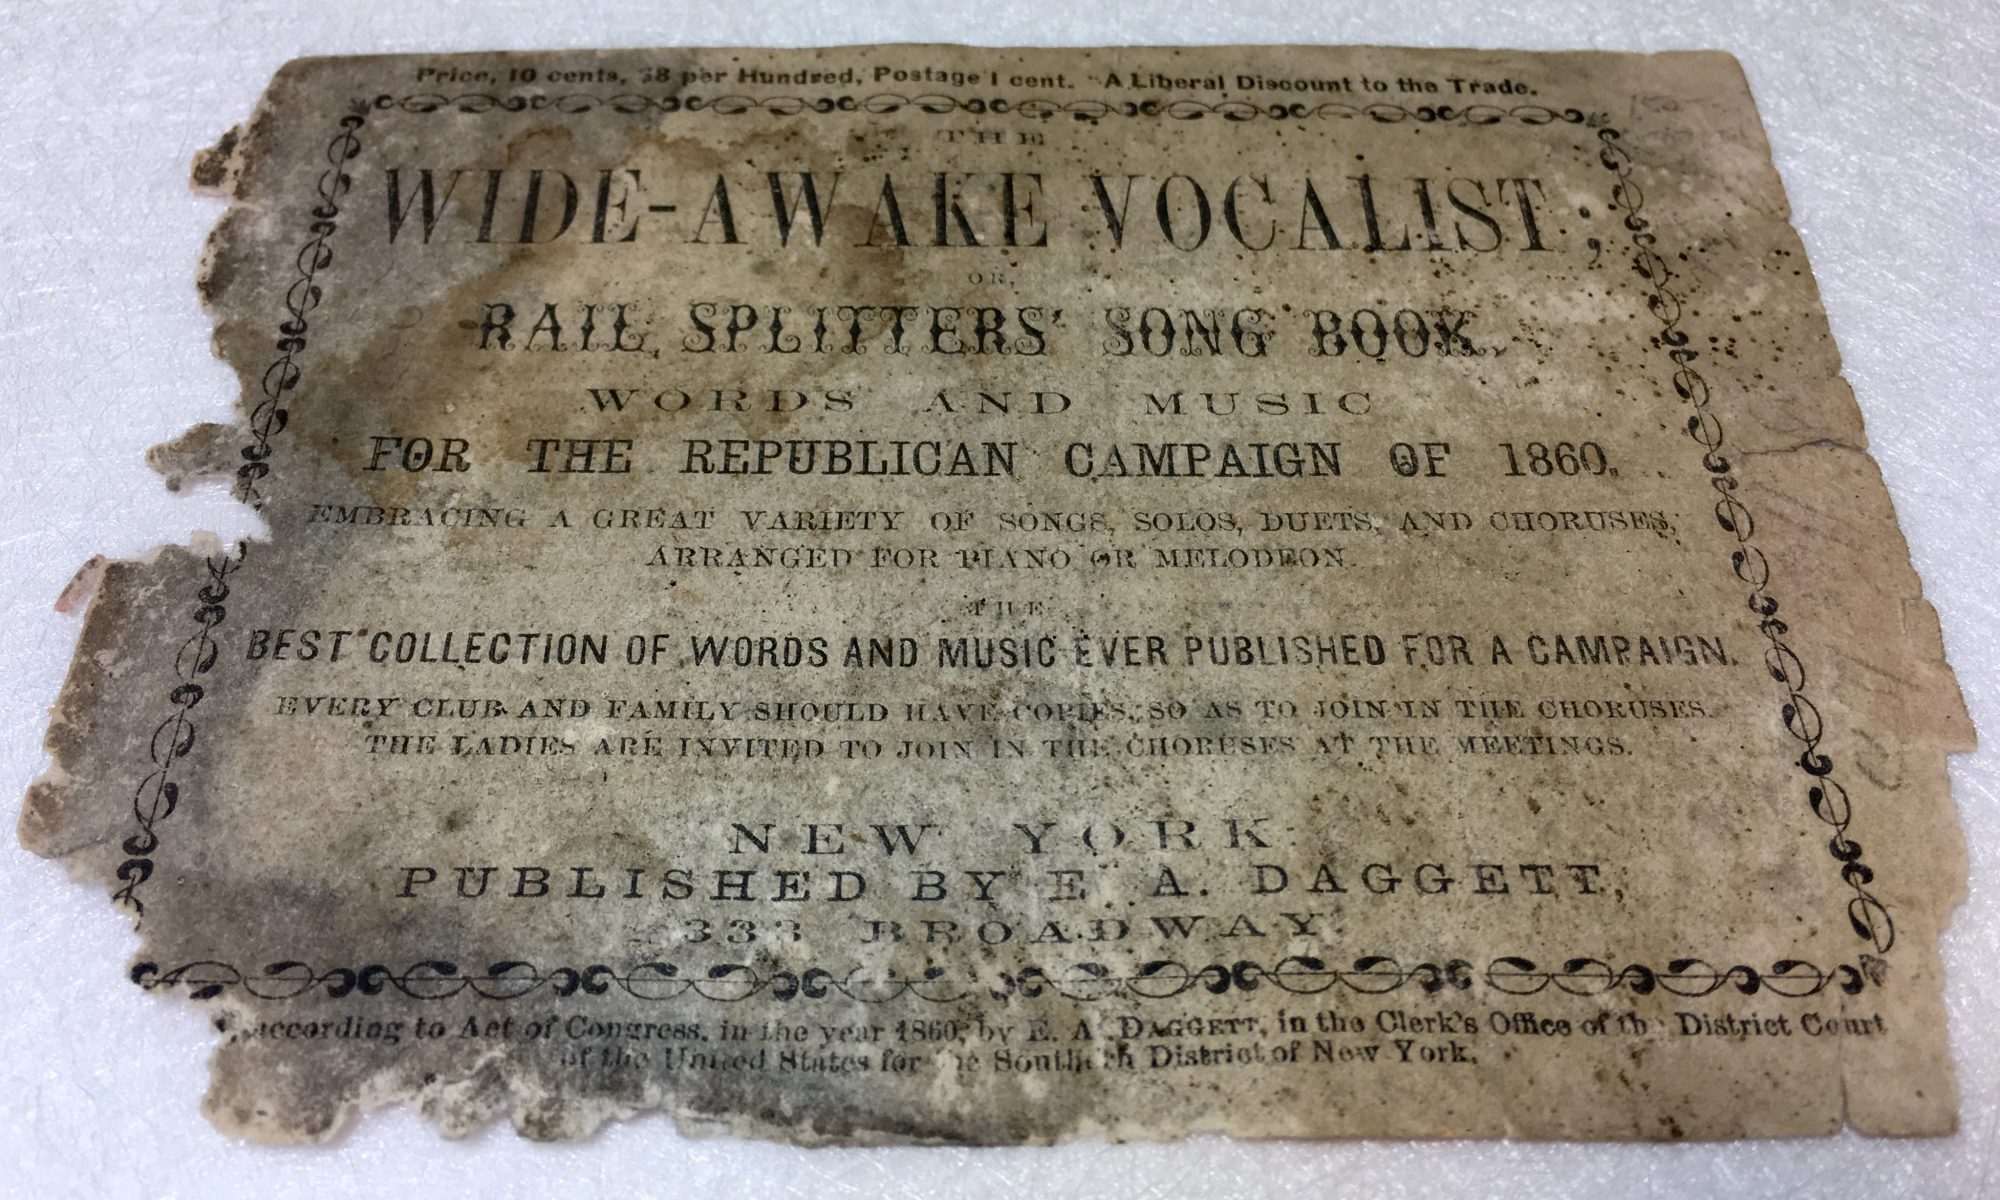
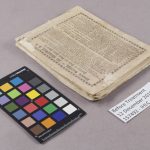
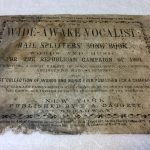
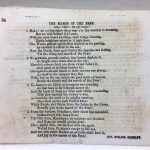
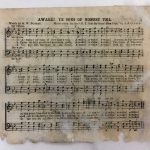
One special item will not be on display at the birthday celebrations, as it is currently receiving some TLC at the Conservation Lab: The wide-awake vocalist: or, Rail splitters’ song book. : Words and music for the Republican campaign of 1860. Embracing a great variety of songs, solos, duets and choruses, arranged for piano or melodeon. 

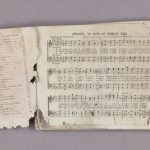
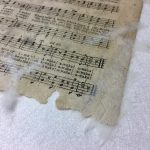
Illinois History and Lincoln Collections’ curator Krista Gray shared that during the 1860 campaign, the “Wide Awakes” – political groups of young Republican men marked by a paramilitary style, distinctive garb, and torch-lit rallies – organized on a grassroots basis throughout the north and west in support of Republican candidates, including Abraham Lincoln (Grinspan). This particular song book contains lyrics and musical scores for more than 60 songs from the 1860 Presidential campaign for Lincoln. It has certainly seen better days; the paper is in poor condition, with significant mold staining and damage. The damage is most significant on the front and back covers, but mold spots and tears in the paper occur throughout.

Conservator Quinn Ferris is working to repair the song book; so far, she has frozen the object to deactivate mold, vacuumed the covers to brush away soiling and mold, surface-cleaned the object to reduce remaining grime, washed the pages in several chemical baths to remove yellow degradation products and strengthen the paper, and used gelatin to consolidate flaking materials and create a fungal-resistant coating.

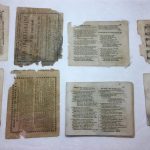
Currently, Ferris is working to repair tears in the pages by using a thin Japanese tissue paper – Yukiyushi – and a diluted wheat starch paste.  This process is called mending, and once it is complete, Ferris will resew the loose pages and text blocks together, reattach the cover using more tissue paper, and create a custom enclosure for the item.

While the finished product might not look significantly different than the initial item (though hopefully it will look less beaten-up), the treatment process involves many precise steps to stop chemical degradation in the paper, stabilize the item, and make it usable to those wishing to see it in the IHLC reference collection. The goal of library conservation is not to return an item to a pristine or ‘original’ condition, but to show its long and interesting life and to make it accessible for patrons to use. Hopefully this special song book can have a long life still to come!

Reference:

Jon Grinspan, “‘Young Men for War’: The Wide Awakes and Lincoln’s 1860 Presidential Campaign,” Journal of American History 96 (Sept. 2009): 357-378, http://archive.oah.org/special-issues/lincoln/contents/grinspan.html

Sir Isaac Newton comes to the Conservation Lab

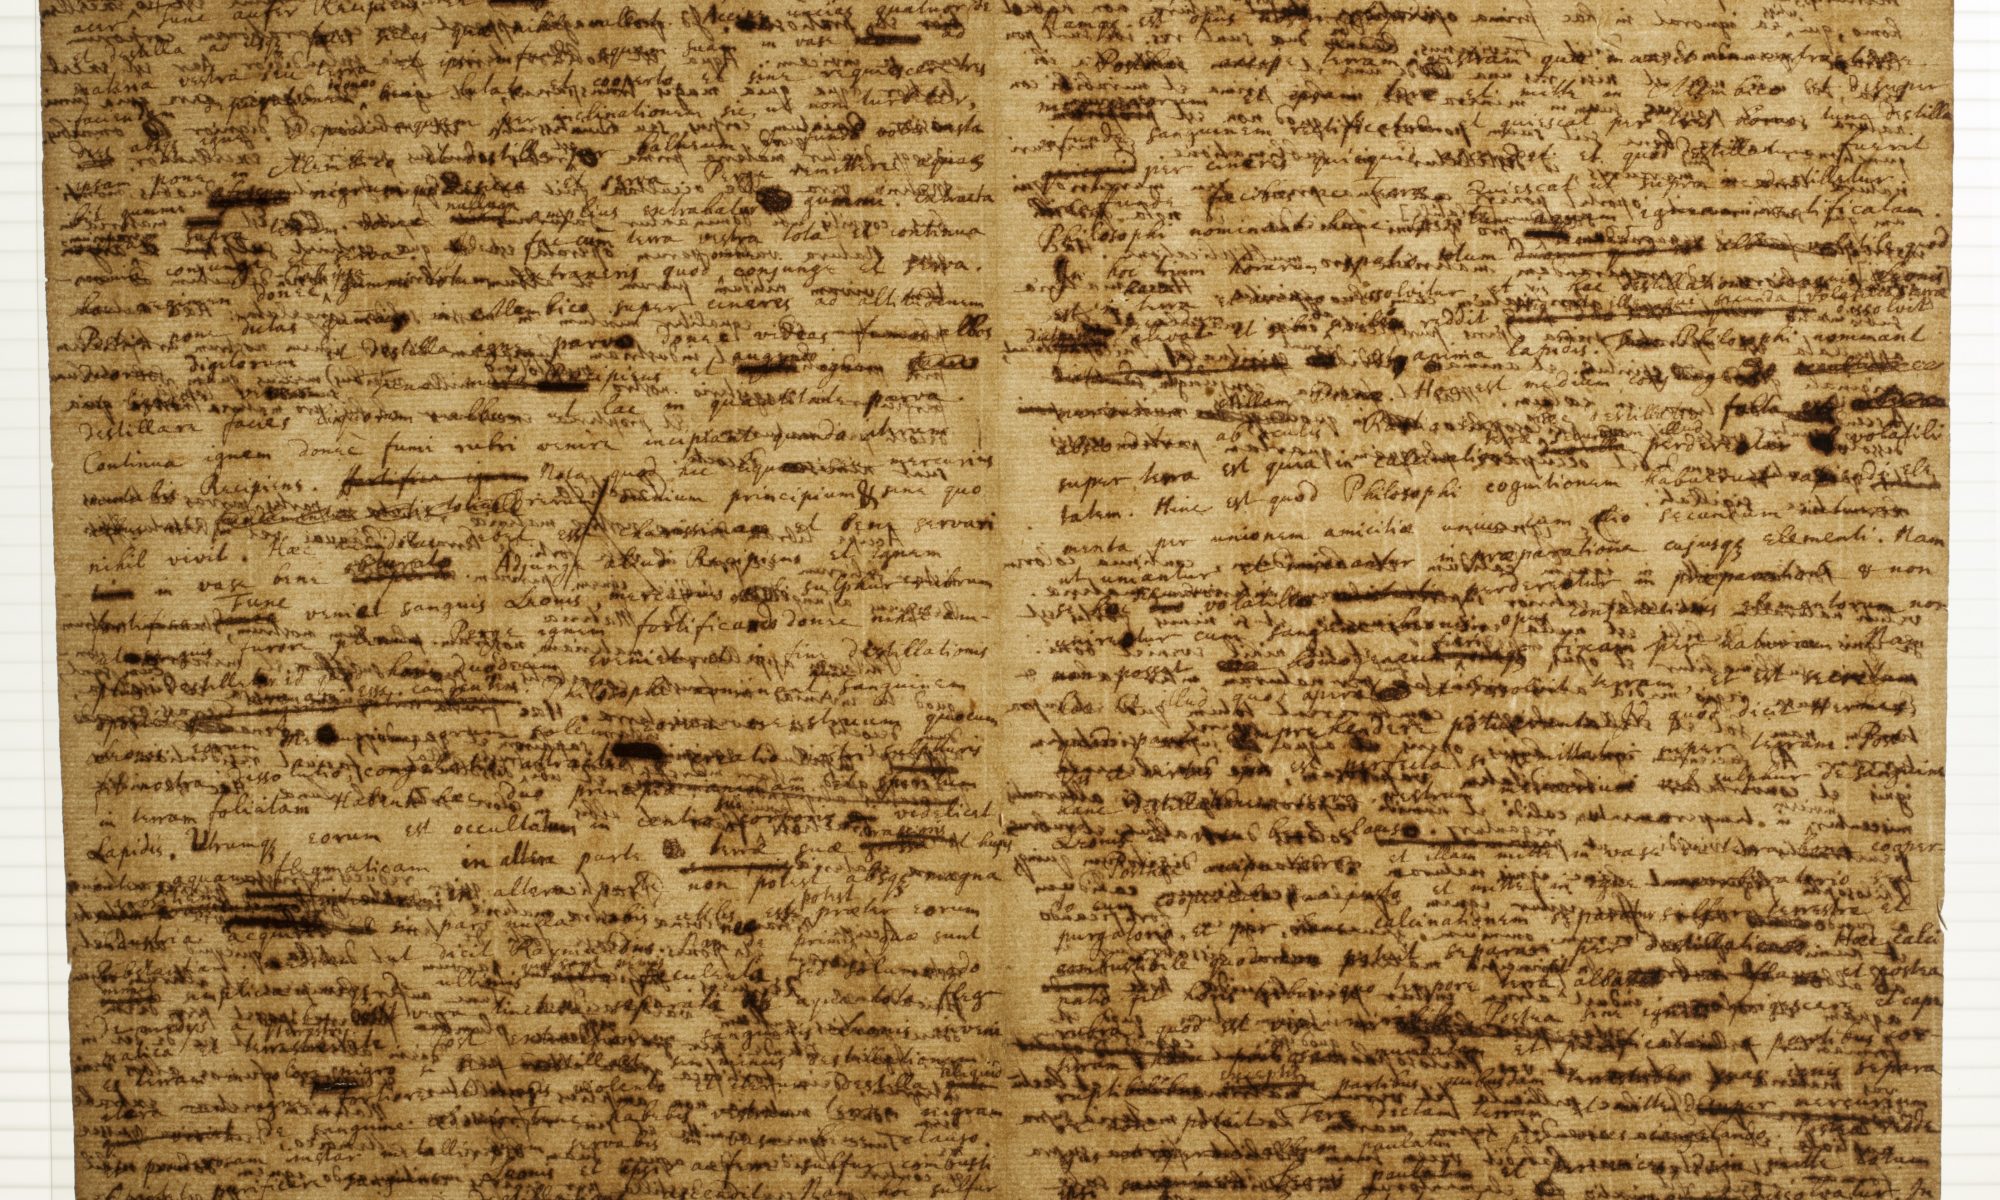
It is amazing to work at an institution that acquires so many interesting objects for its collection. A recent acquisition to our Rare Book and Manuscript Library is Sir Isaac Newton’s Latin translation of “Opus Galli Anonymi” in April 2018. While a fascinating piece for researchers, this antique manuscript needed some conservation help.  Continue reading “Sir Isaac Newton comes to the Conservation Lab”

The Spanish Play Collection at Illinois: An Interview with Conservator Jody Waitzman

One of our previous blog posts introduced our ongoing project to disbind and rehouse nearly 12,000 19th and early 20th-century Spanish plays.  The Conservation Lab has just finished this massive disbinding process, and future steps will include cataloging and digitization.

We talked to Jody Waitzman, the General Collections Conservator at the Conservation Lab, who has overseen the unbinding process of the 669 volumes of Spanish plays. Jody shared some of her reflections about this project:

Continue reading “The Spanish Play Collection at Illinois: An Interview with Conservator Jody Waitzman”