How to Encapsulate Time

An Educational Guide to Optimize the Preservation of Time Capsules

 by Dani Demmerle, Preservation Services Grad Assistant

Image courtesy of University YMCA

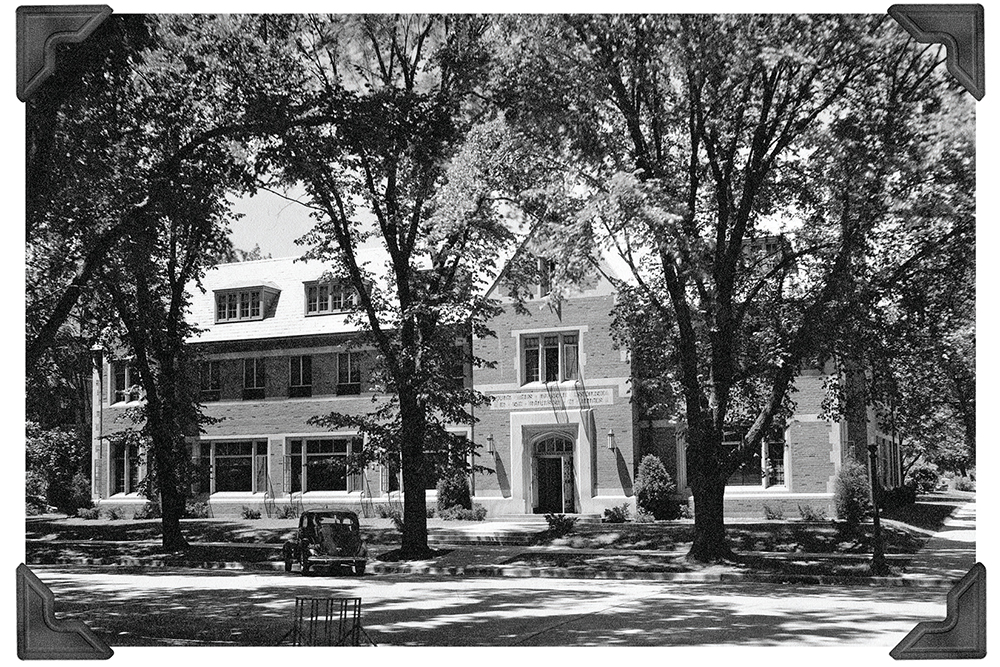
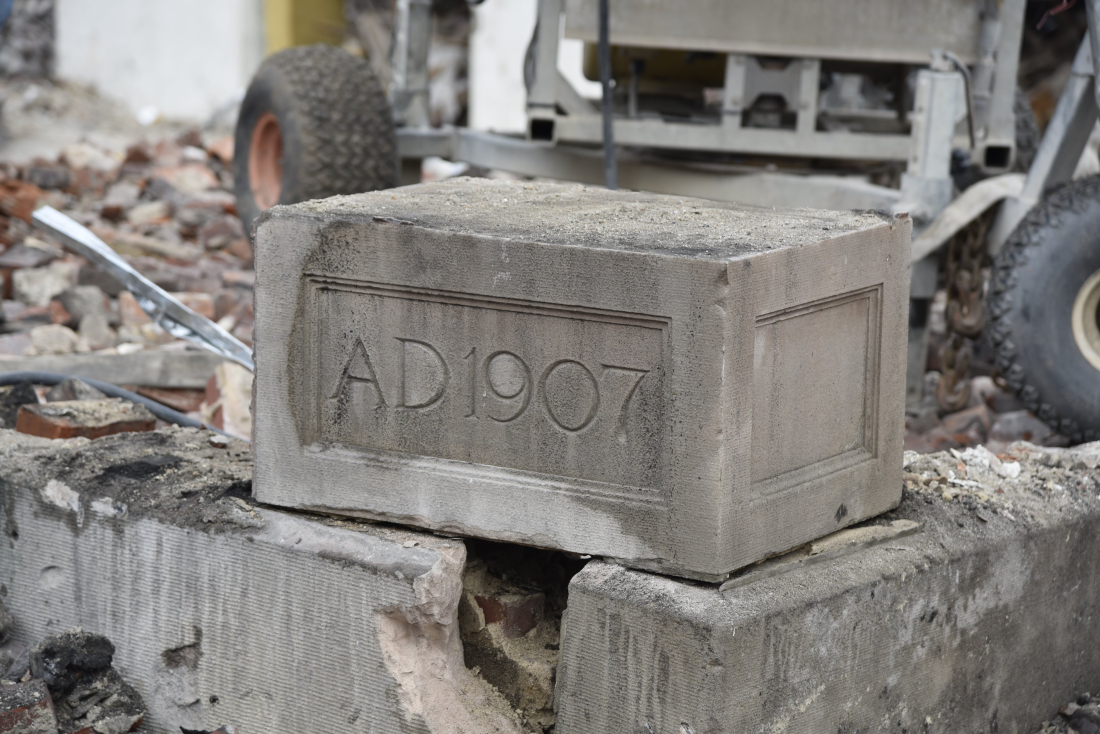
To explain the depth of this story we need to take a step back in time. In 1873, the University YMCA was founded, and in 1907 a new building was built to function as the organization’s headquarters. That building was named Illini Hall. During construction of Illini Hall, a time capsule was hidden in the cornerstone.  

In February 2023 the demolition of Illini Hall was underway, beginning the plan for a new facility. During the building’s demolition, the time capsule was discovered inside the cornerstone. There were historical photos and documents that hinted at the possibility of a time capsule but there was no guarantee. 

Image courtesy of WCIA

After the time capsule was discovered in February 2023, it was returned to the current YMCA Executive Director, Jim Hinterlong. The YMCA decided to hold off opening it until the fall of 2023 when the University YMCA would be celebrating its 150th anniversary. The time capsule was kept in a display case in the YMCA building, located at 1001 S Wright St.  

After unveiling the contents of the time capsule at the anniversary celebration, it was clear that professional attention would be needed.  Jennifer Hain Teper, Head of Preservation Services at the University Library, was contacted by Jim Hinterlong to assess the time capsule and its contents.   

What’s Inside 

Image courtesy of UIUC Preservation Services

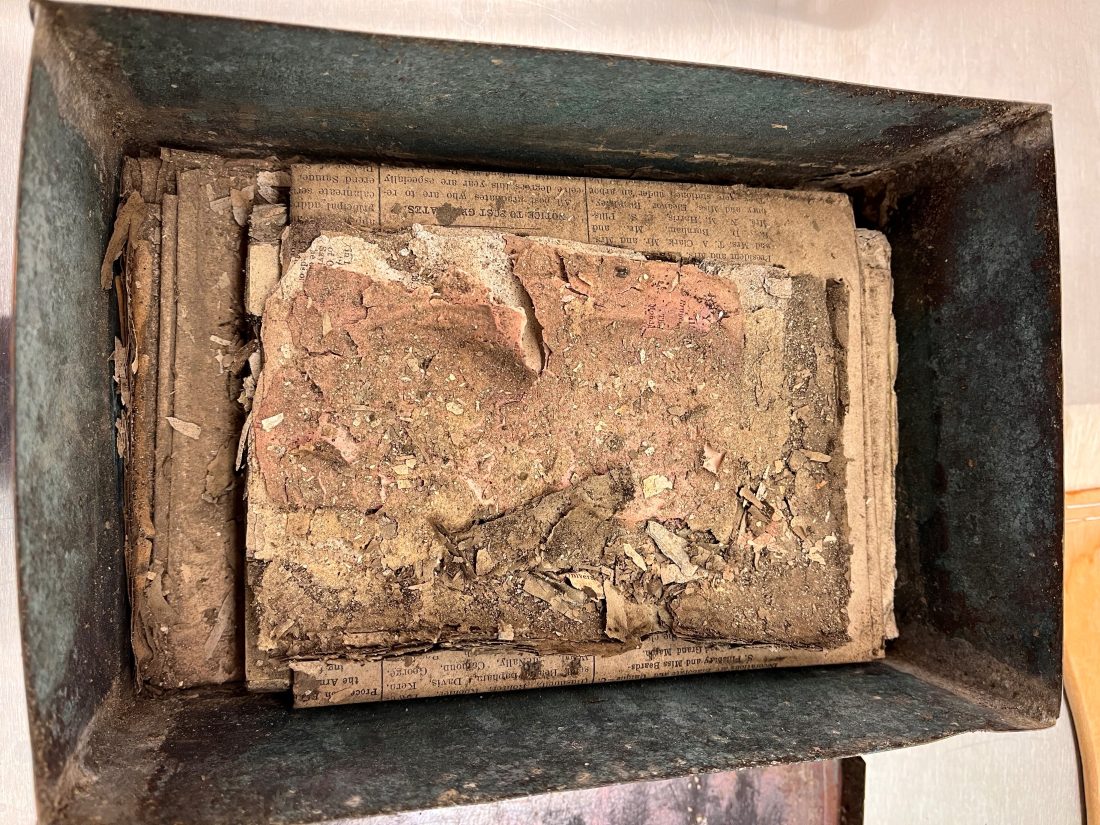
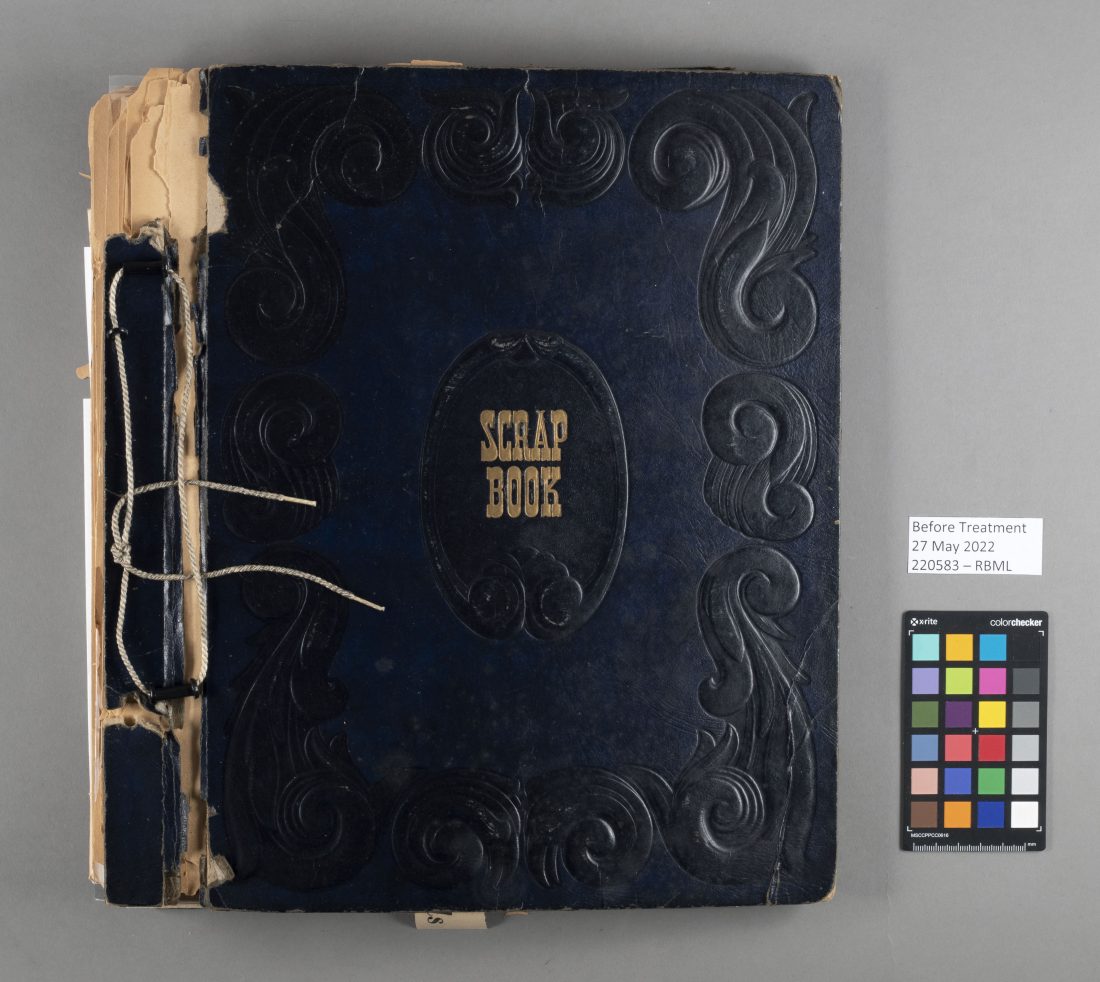
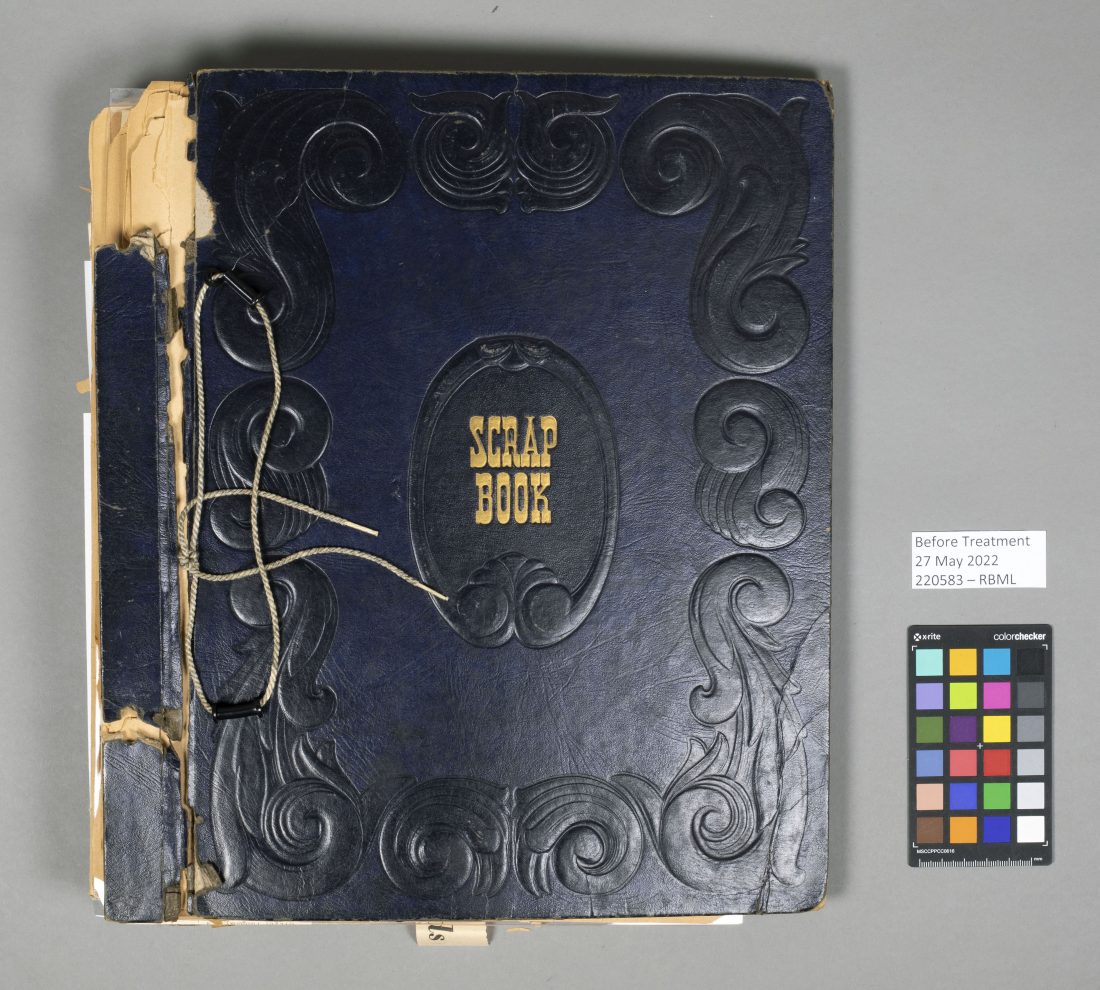
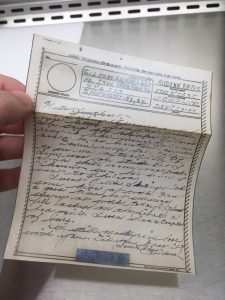
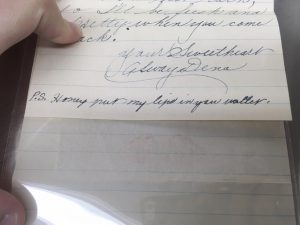
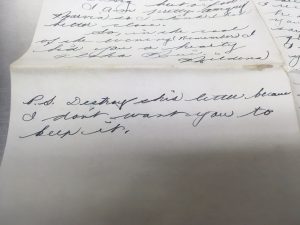
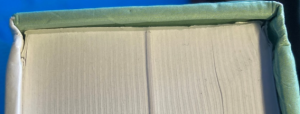
The time capsule itself was a heavy metal gauge box, possibly copper. Inside the metal box was a stack of paper-based materials. The materials on top of the stack were the most affected by age and elements. Fragmented into tiny pieces and incapable of being handled without more damage, the topmost material was unidentifiable. The remaining items were in far better condition, and able to be identified: 

  • YMCA annual Report of the General Secretary, ca. June 1907 
  • YMCA Founding Constitution, 1904 
  • The Illini, vol.36 [no.200], June 11, 1907  
  • University of Illinois Bulletin, vol.4 no.16, April 15, 1907 
  • The Champaign Daily Gazette, June 19, 1907 

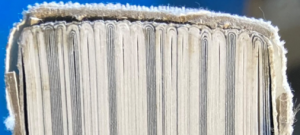
Jennifer and her associate Shelby Strommer, the University Library’s Collection Care Coordinator, assessed the items. Overall, the contents of the time capsule were in good condition, considering the items were in a wall for 116 years with no control over fluctuating temperature and humidity. Jennifer and Shelby were impressed with the condition of the newspapers that were at the bottom of the stack. The paper itself was intact and able to be unfolded without breakage. Many of the other materials had become brittle with age and the fluctuating conditions they were exposed to, but the newspapers were the exception.  

It is difficult to speculate why the newspaper was in better condition compared to the other contents, but this is the magic of time capsules: you never know what will happen.  

Strangers to Neighbors  

Image courtesy of University of Illinois Board of Trustees

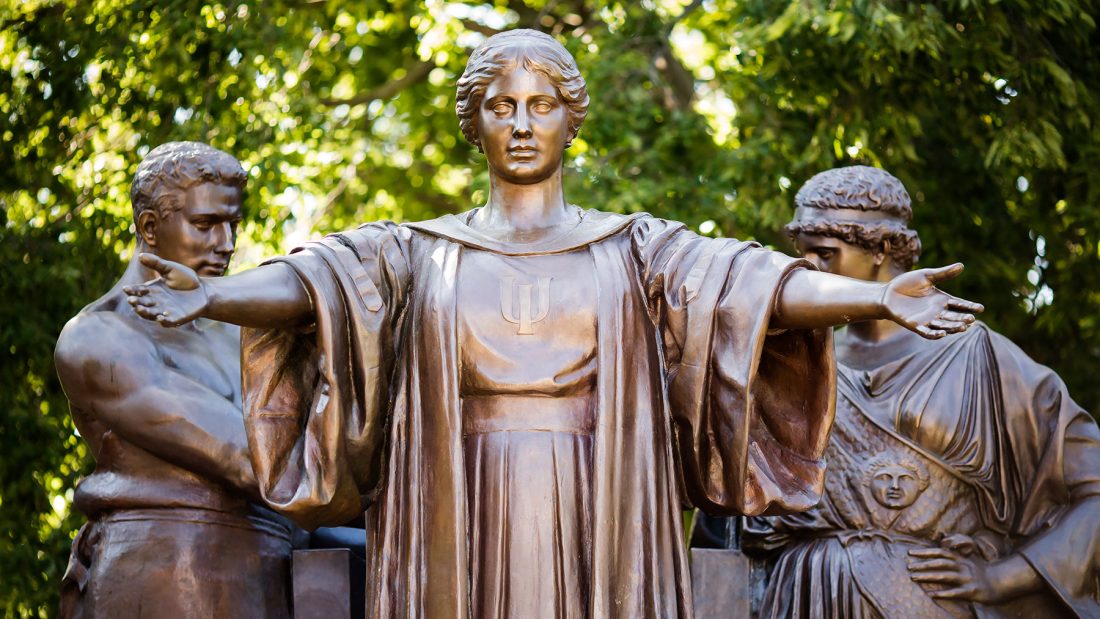
More than ten years ago and just across the street from Illini Hall, less than 200 feet from where the time capsule was found, was another time capsule hidden inside the Alma Mater statue. This time capsule was removed in 2012 and replaced with a new one when it was discovered that the screw top glass jar used as the container exploded due to conditions it had been exposed to.  

The Alma Mater time capsule was placed in the statue back in the 1980s. Between then and 2012, a gap near the base of the statue was patched. The cast bronze statue has seams throughout it where it was pieced together. These seams are not airtight, and water and moisture can get it. Without the proper drainage the water is trapped inside, heating and cooling with the seasons. The glass jar inside was locked in these conditions and caused the glass to eventually shatter, exposing its contents to the elements inside the statue.  

The statue was removed in 2012 for conservation. When the statue was lifted away for transport, finding a time capsule, or what was left of it, was quite a surprise to Jennifer Hain Teper and Christa Deacy-Quinn, who were on the conservation project team. Since the glass jar time capsule was damaged, the University of Illinois Office of Public Affairs set a new one in its place. The new time capsule included a gold DVD, USB drive, UIUC t-shirt and the original items. A gold DVD was used since gold is one of the most inert, reflective elements on earth, which makes it perfect to resist the effects of temperature and humidity. These characteristics prevent oxidation, a common cause of failure for most DVDs. The items were sealed inside a stainless-steel preservation time capsule container. This container was made to be a time capsule and will do a better job of minimizing the impact of fluctuating temperature and humidity. 

The Alma Mater statue’s conservation project included regular maintenance to prevent it from needing to be sent away, so there is no guarantee the second capsule will be seen again.  

For 30 years these two time capsules were neighbors. With the discovery and removal of the YMCA time capsule, the time capsule in the Alma Mater statue is once again the only time capsule that we know about in the area.  

Treasure Chest

Image courtesy of ALA 

The success of a time capsule depends heavily on the quality of the enclosure. If an improper container is selected, then the contents of the time capsule are more susceptible to the environment around it. There are many materials that can be used for time capsules, but a highly recommended container is one made of high alloy stainless steel. Ideally, the container should be of seamless or welded construction with a screw top and gasket to ensure it is suitable for long-term burial. You can find high quality, waterproof time capsules online by searching for “professional grade time capsule.” Containers like glass jars are cheap and accessible time capsules but do not have insulating properties. If mishandled they can shatter, completely exposing the contents to the environment.  

Paper Doesn’t Get Claustrophobic

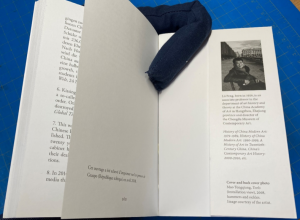
A common mistake in long-term storage of items, including time capsules, is that the contents are given too much room to breathe. Materials like paper that are hydroscopic absorb moisture from the environment and expand and shrink with changes in humidity. This causes the paper to warp and become brittle at an accelerated rate. Storing materials that are hydroscopic in snug, but not tight, containers can help reduce fluctuations in humidity, creating a more stable microclimate. 

To Seal or Not to Seal 

Next, let’s discuss sealing time capsules. If you have a professional grade time capsule, you might purchase a time capsule preservation kit to accompany it. These kits include desiccants, packs that absorb the moisture in the air to maintain a low humidity environment. You will often find them at the bottom of snack bags, because if too much moisture was introduced into a snack bag it would be trapped and cause mold to form. The same goes for time capsules, which is why sealing your time capsule can be tricky. If you seal your time capsule, make sure there is not excessive moisture in the container before sealing, and that the container itself is waterproof to avoid the formation of microclimates: 30 – 50% relative humidity is ideal. If you are using a box you have lying around, sealing it may not be the way to go. If moisture is introduced to a time capsule that is not sealed, then mold might not flourish since there is more air circulation. This is not a guarantee, and it is a tricky line to walk but factors such as these can make all the difference.  

Location, Location, Location

When building a time capsule, so many decisions are made based on protecting the contents from the outside world and the degrading effects of time. The location you pick is one of the biggest decisions in this process. Many hide time capsules away where they won’t be disturbed, but even if the item is mortared into the walls of a building or welded inside a bronze statue, things can go wrong. Sometimes not having control over the space the time capsule is stored in can be its demise. But the mystery of locking it away is part of the fun too. If you are interested in burying your time capsule, in most areas a depth of 18 to 24 inches should suffice. This is the area between the top of the time capsule and the ground level. You want it to be deep enough down in the ground to get a stable temperature. 

Extra Help 

If you are looking for extra help with your time capsule, there are time capsule preservation kits available online to better protect the contents from the inside. Kits include archival-quality paper (which may be buffered to slow the creation of acids) envelopes, folders, or boxes; uncoated PET zipper bags; or glass or stable plastic vials with screw-top lids. It is recommended that the time capsule’s contents are put into these containers individually or grouped with like items. Desiccants, as mentioned above, will help with moisture control. Desiccant packs usually last 1-3 years depending on the size.  

Last Thoughts

Everything covered in this article depends on you. This is your time capsule, and it will be up to you to decide what your motivations are for it. Is your goal to make a highly secure modern time capsule that will protect the contents? Then purchase a professional grade time capsule and preservation kit. Or are you looking to make memories with loved ones, and you are more interested in the fun that comes with the journey? Then a shoe box might just be the capsule for you. Time capsules are an excellent way to capture time in material form to be unveiled in the future. Although there are plenty of resources today for optimal time capsule success, there have been many century-old time capsules that have endured the tests of time despite the conditions and factors working against them.  

Preserving State History with The Illinois Newspaper Project: A Call for Nominations

Newspaper Preservation

Since its founding in 1987, the Illinois Newspaper Project (INP) has contributed toward the preservation of historical Illinois newspapers. Funded in large part by grants from the National Endowment for the Humanities (NEH) as part of the US Newspaper Program, the INP’s first phase surveyed cultural heritage institutions, newspaper publishers, and individuals in order to identify newspapers published throughout Illinois history. Newspapers were then cataloged over the course of several years of fieldwork in which many institutions played a role. This collaborative effort led to the creation of the Illinois Newspaper Directory. In 2005, INP staff began preservation microfilming Illinois newspapers held in the University of Illinois collections and other institutions in the state.

Entering the digital era, a new program was founded to lead efforts to digitize previously identified and microfilmed newspapers. NEH grants have funded the INP’s contribution to the National Digital Newspaper Program (NDNP), a cooperation founded in 2004 between the NEH and the Library of Congress. This Program ensures long-term preservation and access to the country’s newspaper heritage through Chronicling America, a searchable digital newspaper repository freely available to the public.

Over the years, the INP has contributed over 500,000 pages to Chronicling America. The INP also created a local searchable database for newspapers, the Illinois Digital Newspaper Collections (IDNC), which currently has issues from 207 newspapers.

Jessie assessing (“collating”) a newspaper on microfilm before sending the reel off for digitization. 

New Opportunity to Participate

Now in its sixth round of partnership with the NDNP, the Illinois Newspaper Project invites Illinois libraries, museums, historical societies, and other cultural heritage institutions to participate in the preservation of Illinois newspapers starting with the selection process. This year, the INP will accept nominations of newspapers submitted by Illinois cultural heritage institutions. An advisory board will review the applications and winning titles will receive long-term preservation and open research access through Chronicling America.

In April 2023, Jessie Knoles was hired as the Newspaper Content Coordinator for the INP. Her role will assist in all aspects of newspaper preservation, including outreach and engagement efforts (because as we say in the information world…what is preservation without use!). Jessie’s goals for this year are to engage cultural heritage institutions across the state in the INP; assist institutions with preservation questions, including questions about the nomination process; and engage various communities in using digitized newspapers for their research and instruction.

By working with institutions across Illinois, the INP can ensure that digital newspaper databases like Chronicling America and the IDNC are reflective of the diversity across the state. Building partnerships across the state will also strengthen efforts to continue preserving Illinois newspaper heritage. Submissions will be accepted through September 30, 2023. To learn more about eligibility and how to nominate, check out our website.

If you have any questions or interest in the project, you can email the INP at inp@library.illinois.edu or Jessie directly at knoles1@illinois.edu. You can read more about the history of the INP on our website.

Lights, Camera, & More Lights: The Role of Lighting in Conservation Photo Documentation

By Savannah Adams, Conservation Unit Graduate Assistant

“The Conservation Professional shall document examination, scientific investigation and treatment by creating permanent records and reports”
Article VII, AIC’s Code of Ethics

Everyone loves a satisfying before and after picture, but for conservators those photos are also an important record of how an item has changed during treatment. In fact, those photos are so important that the Conservation Unit has a whole area dedicated to image capture. This summer, the Conservation Unit had the opportunity to refresh our photo documentation area. The space now features a new grey paper backdrop, more storage, and most importantly, new LED lights!  

Until recently, our copy stand (Fig. 1) was equipped with four flood lamps using 250W incandescent bulbs. Although the specifications for these lights weren’t terrible – emitting 6500 lumens and a Color Temperature (CT) of 3500K – the bulbs burned uncomfortably hot and had an average lifespan of about 3 hours. With a library collection as large as the U of I’s, we were burning through a lot of bulbs during photo documentation of the library’s special collection materials.  

Working as the Conservation lab’s Photo Documentation Coordinator, I wanted to find a new sustainable light source that would burn cooler and longer than incandescent. I also wanted to better understand how different light sources might affect the type of photography we use for conservation documentation. After months of researching light bulbs, light terminology, referencing the AIC standards for conservation photo documentation, and asking our friends in Digitization Services for guidance, we made the leap and updated our setup with two new LED Studio lights. And what a difference it’s made!  

Conservation Photo Documentation


Before delving into the nitty-gritty light bulb jargon, let’s discuss the function of Conservation photo documentation and how it differs from digitization and other forms of documentation.  

The role of conservation photo documentation (here after referred to as photodoc) is to provide a visual representation of an object before, after, and sometimes during treatment procedures. Unlike digitization – which aims to create a digital reproduction or surrogate of an object – conservation photo documentation is intended to provide a photographic record of the conservation treatment that may be used to supplement both written documentation and treatment reports.

In addition to being used for before and after treatment comparison, photodoc can also serve as an examination tool, wherein the use of different light sources, directions, or wavelengths can highlight certain areas of damage or surface textures that may otherwise go unnoticed. Want to see how it works? Try crumpling up a sheet of scrap paper and then opening it flat(ish) again. Use a flashlight to illuminate the paper from above and note how it looks. Next, move the flashlight down so it sits on the same surface as the paper and illuminates it from one side. The peaks and valleys of the crumpled paper will look much more dramatic!

Therefore, it is important that each image consistently represents the scale, color, and texture of the object as accurately as possible – which is sometimes trickier than it sounds. One of the most important elements for achieving this level of image accuracy is lighting.

Lighting Specifications for Conservation Photo Documentation: LED vs Incandescent 

Our newly acquired LED lights deliver up to 10,700 lux while only using 75 watts of power consumption (that’s 175W less than our previous bulbs!). In addition, the LEDs have a Color-Rendering Index (CRI) of >96, emit 5580 lumens, and a color temperature (CT) range of 3150-6300K. All these words and numbers may sound nonsensical to those uninitiated in light bulb technical specifications. However, when you break down the terminology and compare the different features of our old incandescent verses the new LEDs, you may find that the information is…illuminating. 

According to the AIC Conservation Photography and Documentation Guide, the ideal light source should be, “continuous and inexpensive, with low heat output, a daylight color temperature, and a smooth and spike-free spectral curve” (section 2.3, p. 19). But what does that mean exactly? And how did our old incandescent lights fare verse our new LED lights? Is it even possible to achieve all these characteristics within a single light source? The short answer is no, but our new LEDs are a good step closer to the perfect bulb. Let’s deconstruct the AIC quote bit-by-bit in order to better understand what we want our lightbulb to do:


“…continuous and inexpensive…”

 
A continuous light source is one that is exactly that – the intensity of the light remains constant and flicker-free. The expense of a light depends on several factors, including frequency of use, heat offput, or current output. However, to demonstrate the amazing cost efficiency of LEDs over incandescent, we try and figure how much the light sources costs us for an hour of use:

One of our previous incandescent bulbs cost $5.99 with an approximate life expectancy of 3 hours. In contrast, one Anova Pro II LED light costs $1,477 and has an estimated lifespan of 100,000 hours. Therefore, it costs…

Thus, the LED light source is 120x cheaper than the incandescent alternative. Note that this does not take into consideration power demands of the bulbs and how much the electricity will cost to power them. It’s fairly well known that LEDs are the most cost-effective option, but we did the math on this too and you can expect to spend around 80% less on energy for LEDs vs incandescent providing the same amount of light.

“…low heat output…” 

As the person working under them, I have always held that the heat output should be relatively high on the list of considerations for lights used for conservation photodoc purposes. Our old incandescent lights would quickly heat the photodoc area to an uncomfortable temperature! Even more importantly, subjecting library materials to direct, high temperature lighting can contribute to photocatalytic degradation and is therefore an key aspect to consider when looking into bulb types. For example, a 100-watt incandescent bulb has a filament temperature of approximately 4,600 degrees F and a surface temperature between 150-250 degrees F. In contrast, the Anova Pro II LED studio lights have an operating temperature of 5-100 degrees F (depending on brightness settings).  


Fig 3: Range in Kelvin temperatures from 2000K – 10,000K

“…a daylight color temperature…”

Color Temperature (CT) is the color of the light emitted and is measured in Kelvins (K). For photo documentation purposes, a standard CT ranges from warm, reddish tungsten (3200K) to a cool, bluish (8000K). As mentioned above, the ideal CT for conservation photodoc is a daylight color temperature which is around 5500K. 

Additional information regarding color is attributed to its CRI or “Color-Rendering Index.” The CRI is measured in a scale of 0-100 and describes how well a light source reproduces a set of different colors in comparison to a reference light source of the same or similar color temperature. Under this system, the highest possible CRI is 100 – the ideal for photo documentation purposes. Our previously used incandescent bulbs had a fixed CT of 3500K and a CRI between 80-90, while the LEDs have an adjustable CT of 3150K-6300K and a CRI of >96. 

“…and a smooth, spike-free spectral curve…”

Different light sources emit various intensities of light at different colors across the spectrum. The emitted lights can be visualized in a type of graph called a spectral curve, where the x-axis represents intensity and the y-axis represents wavelengths of light in the visible range. To achieve a “smooth” and “spike-free” curve, the light source should exhibit a smooth arc that is well distributed across the color spectrum. In the image below, the spectral curves of incandescent and LEDs are compared. Visually, the incandescent lights (left) appear smooth while the LEDs (right) exhibit two spikey arcs. However, because the incandescent emits far less blue light, they are more challenging to accurately color match. Although LEDs may appear more “spikey,” both light sources are considered smooth (for example, compare the spectral curve of fluorescent lights – yikes!). As seen below, LEDs actually provide a more balanced distribution of colors across the color spectrum, giving them the advantage.

Fig 4: Spectral curves comparing incandescent verses cool white LED light

So, after weighing the pros and cons, the decision to trade out our old incandescent lights for new LEDs was a no brainer. The photographs speak for themselves! See above (Fig 2) for a comparison of the same “black” scrapbook photographed under incandescent verses LEDs. Due to the brighter and more evenly distributed light from the LEDs, it was revealed that the book wasn’t black, but blue!

References:

https://www.pacificlamp.com/temperature-of-a-100-watt-bulb.asp

https://karltayloreducation.com/lighting-angles-reflection-photography/

https://www.library.illinois.edu/preservation/

https://www.conservation-wiki.com/wiki/PMG_Examination_and_Documentation#Purpose_of_Examination_and_Documentation

https://www.larsonelectronics.com/blog/2017/12/12/led-lighting/lighting-101-color-temperature-what-is-the-kelvin-scale

https://www.ledlightingwholesaleinc.com/Understanding-Lumens-vs-Kelvin-s/399.htm

Library Disaster Practice

by Victoria Schmitz  U of I Collections Care Graduate Assistant

A library’s tabletop disaster scenario is a meeting of the library’s disaster team with the goal to talk through an imaginary disaster that could happen at the library.  The disaster team features folks from the library’s facilities department, human resources and business, IT, preservation and conservation, and more.  The goal of a tabletop exercise is to allow team members to become familiar with the library’s disaster plan and their roles, and to identify potential challenges and gaps in our emergency response.

Our disaster scenario featured a pipe bursting in the ceiling above a reading room, onto multiple rows of shelves.  The scenario’s destruction was about 3,000 water damaged books, which is a relatively minor disaster for our library (or so I’ve been told).

My fellow graduate assistant for Conservation, Nani Hodges, and I were the ones to plan out the disaster training scenario.  This was our first ever tabletop disaster scenario.  We meet up to work on the scenario anywhere from 1-4 hours per week for two months.  While the planning was a bit stressful, especially since we did not have any prior personal experience to go off of, the actual day of the scenario felt like a breeze for us.  All we had to do was offer up the prompts and make sure the discussion wasn’t going over the allotted time.

The disaster scenario tabletop proved to be both a good exercise after a 2+ year gap of no disaster practice and a good way to meet new colleagues that had joined the team.  For me, it was a great experience to learn about the other branches of a library (outside of Preservation Services) that I don’t get to see often and how in depth their parts would be in a disaster.

Things to consider when writing your disaster response manual, reviewing your existing manual, and training with your manual.

Additional Resources:

“What is a Tabletop Exercise?” COSTEP MA, 31 July 2020, https://mblc.state.ma.us/costepma/index.php/2020/07/31/what-is-a-tabletop-exercise/ 

“Exercises.” Ready.gov, 12 October, 2021, https://www.ready.gov/exercises 

Tips from a Collections Care Student Employee

by Naja Morris U of I Preservation Unit Grad Hourly

I always wish someone would give a guidebook or cheat sheet on what to expect from life. There are things that people give you a heads up like fix a broken toilet or what to do when you get a flat tire. There are also a few things that no one could have prepared me for, like how to juggle writing two research papers at the same time or how to cope when the grocery store stops carrying my favorite ice cream. One of the great things when applying for a position is the fact that the job announcement neatly lists the expected duties you’re going to have to do if you get said job. It’s a little comforting so, you’re not going in blind on your first day on the job. As with most things in life there can be unexpected things that can arise once you’re in the position. For people interested in working in preservation, I thought I share a few tidbits that you’ll come across if you decided to seek a job in the field:

  1. Don’t wear white or any type of light clothing if you’re handling books with red rot. Red rot does stain and can get everywhere, by the end of the work day you’ll look like you rolled around in clay.
  2. If your job in preservation deals with integrated pest management, or IPM, get comfortable with bugs and be prepared to know their scientific name. Did you know the Latin name from a carpet beetle? Fun fact it’s Allagenus unicolor.
  3. Preparing for the worst is a part of the job. Terms like disaster planning, flooding, air drying books, and dehumidifier will become a familiar part of your vocabulary. It may seem overwhelming at first thinking of all things that can go wrong, but nothing can beat being prepared.

These are just practices or little things that I have picked up in my time working in Preservation Services. Hopefully these tips will give people a clear picture of what it is like to in a collections care position.

Preservation Week 2022
Example of Red Rot at the U of I.


General Collections Book Repairs

By Anneka Vetter, General Collections Hourly

Note: Click on any image to enlarge.

In library conservation we come across our fair share of beautiful books, historic letters, and unique objects all in need of treatment and tender care. We also have a regular influx of common, mass-produced books: textbooks, reference books, literature, and everything in between. While these books may seem less important than many of our special or rare collections materials, they serve an important function to the university as the most circulated items. These are the books handled by hundreds of students and professors over the years, taken down from the stacks, stuffed into backpacks, perhaps accidentally dropped a few times, eventually worn thin and broken from use. Since these book repairs make up a regular part of our daily operations in the lab we thought it only appropriate to introduce this basic workflow.  

As highly circulating materials, our ultimate goal for general collections books is to withstand being handled by many hands over many years, and that changes what materials and processes we use to make repairs. Function comes first and aesthetics second. While we take care to make our repairs blend in to the original design as seamlessly as possible, we don’t spend very much time on perfectly matching every new material and color to the original. Medium Rare and Special Collections conservation treatments, in contrast, are far more detail oriented and carefully consider every aesthetic and material aspect of the treatment. On the other extreme, the local bindery, where we send a fair amount of books, chops off spines and replace most of the original material except the textblock (check out our previous post about bindery options for more info). Our general collections workflow is the happy medium: we stabilize and repair while still considering aesthetics and keeping as much of the original book as possible, while also working quickly. For reference, medium rare and special collections book binding can take weeks to complete; in general collections most repairs take about an hour.  

So today’s blog post will introduce our most common general collections repairs. But first, let’s start with Book Anatomy 101. What most people consider the “book” is actually the textblock, containing all the writing and pertinent information being communicated to the reader. The binding of the book is how the pages are kept together, they can be glued or sewn together, and there are hundreds of bindings styles and variations. The rest of the structure, the case, is simply protecting the textblock and helping to make it functional.  The case is the outside covering made up of boards and bookcloth (or sometimes leather, paper, parchment, etc). To attach the textblock to the case there is the internal structure: supercloth (gauze in the diagram), cords sometimes, and spine lining material to reinforce the binding.

Fig. 1 Modern Hardcover Book Binding

In conservation we do everything from fixing tiny tears to completely rebuilding the case. Every book has different needs, we often combine multiple repair types to fit the book’s needs, but the damage generally falls into the following categories: torn bookcloth, loose or torn supercloth, damaged boards, and broken bindings. Our most common repairs, from least invasive to most, include cover repair (repairing small tears in the bookcloth), reback (replacing damaged bookcloth on the spine), reback with boards detached (replacing damaged bookcloth on the spine AND repairing the supercloth internally), recase (repairing supercloth internally but keeping the original bookcloth), and creating a new case (replacing the boards and all of the bookcloth). If this is starting to sound too technical, don’t worry, we’ve got great pictures! For example, Fig. 1 provides a visual showing the structure of a hardcover book.

Cover repair

These repairs are pretty obvious: there are small tears in the cover materials, but not enough to warrant replacing the bookcloth. These are easy to fix externally: tears are reinforced with tissue and then toned (colored) to match the original cover material. We also help consolidate and strengthen any soft corners or loose pieces of bookcloth, although, spoiler alert: the outside corners are soft on almost every single book we ever get in the lab.

Fig. 2 Before: the cover is torn! Oh no!

Fig. 3 During: repair tissue is applied.


Fig. 4 After: the tissue is now toned to match the bookcloth.

reback with boards attached

These books show more significant damage to the cover material, mostly along the hinge, but the boards and hinge and supercloth underneath are still stable. Often the difference between a book needing cover repair vs a spine repair is the degree of the damage. On these repairs (Figs. 5, 6, and 7), we replace the cover material around the entire spine, but preserving as much of the original materials as possible. 

Fig. 5 Before: the bookcloth is torn at the spine.

Fig. 6 Before: another view of the spine bookcloth detaching.

Fig. 7 After: We’ve replaced the bookcloth around the spine, using a bright and cheery coordinating color.

reback with boards detached

Here we go a layer deeper: these generally have a damaged internal structure, for example the supercloth or hinge is torn in addition to the cover material (Figs. 8 and 10). We detach the boards, strip down the textblock to the spine, and rebuild with new supercloth and bookcloth on the spine.   

Fig. 8 Before: the cover is torn at the spine.

Fig. 9 After: replaced the bookcoth around the spine.


Fig. 10 Before: another view of the spine damage.

Fig. 11 After: the spine fixed and decorative label saved.

Fig. 12 Before: the hinge and supercloth is torn on the inside.

Fig. 13 After: we’ve replaced the supercloth and managed to save the decorative endsheets and book plate.

recase

On these books the cover material looks great, no tears! So what’s the problem? Upon opening the book, the internal hinge is broken and the textblock has become separated (Fig. 16). Thus, we detach the cover, replace the supercloth underneath, and “re-case” it in the original cover. 

Fig. 14 Before: the case is in good shape (although there is a small tear at the top we fixed, earlier shown in cover repair).

Fig. 15 After: we were able to save the whole case!

Fig. 16 Before: while the bookcloth and case is fine, here we see the internal damage and torn supercloth.

Fig. 17 After: we’ve replaced the supercloth and endsheets!

Double Fan Adhesive Bindings(DFA)

We’re headed to the guillotine! Time to free the books, off with the spines! This repair type is an adhesive binding rather than a sewn binding. This repair is most often done on books that were originally bound this way and have “cracked” or broken. Books in this state often go to the bindery, however if the paper is too brittle or there are portions of the cover to be retained we repair them in the lab.  This repair removes the cover and chops off the spine of the book, so that the entire textblock is now unbound, flat pages.  The pages are then glued together by “fanning” the pages out one way to apply glue to the right edge, then fanning to the other direction to apply to the left, thus the name “double fan” adhesive. Because this repair chops off a bit of the spine, it changes the original size of the book and an old case would no longer fit. Therefore, these repairs are finished by creating a new case. 

Fig. 18 Before: This binding was broken into multiple separated blocks.

Fig. 19 After: The pages are now bound together! This is after the DFA, but before being put into a new case.

Fig. 20 After: the DFA binding is open, showing how well the textblock stays together!

New case

These books are often the most damaged (or in the case of the DFA, simply need a new case to fit their changed shape). The book in figure 21 is a great example: the cover material is torn, the edges of the boards are frayed and soft, the boards are detached, packing tape has been used to keep pieces together, ultimately there is so much damage it isn’t worth saving very much on them. Thus, we replace everything around the textblock and build a new case! Figures 22 and 23 show the new case from the previous DFA repair.

Fig. 21 Before: damaged spine being held together with packing tape, scratched cover, board edges worn away.

Fig. 22 Before: broken binding, and the case has boards that are warped and will not fit the new DFA binding.

Fig. 23 After: new case made and the decorative cover and label was saved.

Miscellaneous repairs

Internal hinges, sewing, and tip ins, oh my! Is there a book that technically looks fine, doesn’t have any tears, but just seems loose? We can tighten up the hinges without taking it apart completely and help it live a long and fulfilling life in the stacks. Pages missing or falling out? We can put them back in the right place. We also spot sew, or fully re-sew books where the actual structure is compromised.  

While this post shows a range of what we can do, one of the underappreciated benefits of the general collections workflow is that it provides training for our hourlies! Because we have a much higher volume of these books and they are cheap, in comparison to medium rare and special collections, they provide great practice materials. Our department specifically prioritizes education and training for future conservators, and this is where many of our graduate students and assistants from the iSchool, academic hourlies, undergraduate students, and volunteers begin their work in the lab. Our workers are able to learn basic bookbinding principles, the structure of various binding styles, types of adhesives and when to use them, how to prepare a myriad of materials from bookcloth to paper and board, and countless other skills. The general collections workflow not only gives books longer lives for the university to use, but also allows our department to give back to the university community by providing jobs and assistantships and passing on the craft of bookbinding on low risk materials. 


References 

https://bookprinting.com/resources/parts-of-a-book 

https://www.flickr.com/photos/13bd05726/32549033180 


At the Lab: The Battle Flag of the Abraham Lincoln Battalion

Written by Extra Help Hourly Savannah Adams; research and editing by Graduate Assistant in Newspaper Digitization and Conservation Hourly Katie Poland

Before Treatment of the Original Battle/Parade Flag of the Abraham Lincoln Battalion  

Original Battle/Parade Flag of Abraham Lincoln Battalion

During Treatment: Conservator Jody Waitzman vacuuming the flag through a screen to remove surface dirt and dust.

The Oak Street Library Facilities Conservation unit has been tasked with the stabilization, cleaning, and safekeeping of the Original Battle and Parade Flag of the Abraham Lincoln Battalion. The flag, sized at 88cm x 107cm, is inscribed in black pen and ink and/or paint, and blue pen and ink. Made from a semi-sheer textile in red, white, and blue, the flag has many small tears, holes, abrasions, discoloration/soiling and general signs of use. However, it is stable overall. Oak Street Library Facility Conservator, Jody Waitzman, treated the flag by vacuuming the item through a screen to reduce surface dirt and dust (see image) and rehoused for rolled storage in an acid-free, preservation-grade box.

Spanish Civil War and the Abraham Lincoln Battalion (1936 – 1939)

In the decades leading up to the Spanish Civil War, tension between the Republican government of Spain and the Nationalist faction, led by General Francisco Franco, steadily increased. After General Franco’s failed attempt at a military coup in order to gain control of the country, the nation was thrust into a bloody, 3-year long Civil War. The Nationalists, or rebels, were backed by Fascist Italy and Nazi Germany. In opposition, the Republican government received aid from the Soviet Union, as well as International Brigades.

Within the International Brigades, military units were composed of volunteers from Europe and the United States. The Lincoln Battalion was formed by a group of volunteers from the United States who served in the Spanish Civil War as soldiers, technicians, medical personnel and aviators. The American Battalion stood for Spanish Republican forces and against that of General Franco and his Nationalist faction. Of the approximately 3,015 volunteers from the US, 681 were killed in action or died of wounds or sickness.

Inscription on flag:

Detail of the battle sites inscribed on the stripes of the flag.

JARAMA – BRUNET

PINGARRON HILL

ARAGON QUINTO

LINCOLN BATTₙ

EBRO RIVER

MOSQUITO RIDGE – TUREUL 

HILL 666


What these battles signified: 

Jarama – Brunet: The battle of Jarama took place February 6-27, 1937. This twenty-one day battle was an attempt by General Franco’s Nationalists to dislodge the Republican lines along the Jarama river, just east of Madrid.

The Pingarrón Hil defense led by Nationalist faction soldier Carlos Asensio. https://buff.ly/2Ty3wHA

Pingarrón Hill: Also known as “Suicide Hill,” the battle on Pingarrón Hill took place on February 12-13, 1937. The flag’s inscription recalls the place in which Spanish soldier, statesman, and member of the Nationalist faction, Carlos Asensio’s troops took the Pingarrón hills in the hopes of claiming the high ground. Unfortunately, this battle resulted in one of the deadliest fights of the Spanish Civil War.

Aragon Quinto: The Aragon Offensive was a salient military campaign launched by the Nationalist faction after the Battle of Teruel (see below). The offensive ran from March 7 – April 19, 1938, and overran Republican forces in Aragon, parts of Catalonia, and the Levante (the eastern region of the Iberian Peninsula) of Spain.

Ebro River: The longest and largest battle of the Spanish Civil War, Batalla del Ebro, took place between July through November of 1938. The fighting took place mainly in two areas on the lower region of the Ebro River: the Terra Alta comarca of Catalonia, and the Auts area by Fayón in Aragon. The battle was extremely deadly, with tens of thousands of Repubican soldiers left dead and wounded. However, the outcome had little effect in the advancement of the Nationalists.

Mosquito Ridge – Tureul: Coincidentally taking place during the worst winter Spain had seen in 20 years, The Battle of Teruel occured between December 1937 – February 1938. The battle proved to be one of the bloodiest the war had endured. The city of Tureul, initially held by the Nationalists at the start of the battle, would be taken over by the Republicans, and then eventually be retaken by the Nationalists. By the end, both parties suffered over 140,000 casualties throughout the two-month long battle.

Hill 666 Plaque commemorating the battle of the Ebro River. https://buff.ly/3ylWgO3

Hill 666: On 2 October the Nationalists occupied the heights of Lavall and two weeks later Point 666, the key of the Pandols Range. Plaque Hill 666 in the Serres de Pandols-Cavalls signifies and commemorates the deadly battle at this location by the International Brigades during the Battle of the Ebro.


References: 

Jarama Valley (song)

Songs of the Lincoln Battalion

https://www.proquest.com/hnpnewyorktimes/advanced/7CE710BF7BC24952PQ?accountid=14553

https://spartacus-educational.com/SPjarama.htm

https://www.tracesofwar.com/sights/92280/Plaque-Hill-666.htm

https://www.aslscenarioarchive.com/uploads/08.2018/pingarron_hill_defense.png

https://en.wikipedia.org/wiki/Battle_of_Jarama

https://en.wikipedia.org/wiki/Aragon_Offensive

https://en.wikipedia.org/wiki/Battle_of_the_Ebro

https://en.wikipedia.org/wiki/Battle_of_Teruel

https://en.wikipedia.org/wiki/Lincoln_Battalion

https://www.britannica.com/event/Spanish-Civil-War

https://www.aslscenarioarchive.com/uploads/08.2018/pingarron_hill_defense.png

https://en.wikipedia.org/wiki/Battle_of_the_Ebro#Nationalist_counteroffensive  Spanish Civil War | Hill 666

From the Archives: Marvin H Mischnick Papers and Letters

The back of an envelope reading, “I love you soldier!”

Written by Digital Imaging Specialist Hourly Savannah Adams

At the Oak Street Library Facility John “Bud” Velde Conservation Laboratory, Graduate Assistant in Newspaper Digitization and Conservation Hourly Katie Poland has been working to vacuum, clean, and rehouse letters of Marvin H Mischnick. This small portion of the collection is to be added to his personal papers in the University of Illinois Archives.

In these letters, Marvin Mischnick, a photographer for the 3rd Armored Division in WWII,  corresponded to his first wife, Mildena Bates. Pictured are only a few of those letters containing examples of photographic prints made from microfilmed Vmail, commercially bought postcards, and lipstick kisses from Mildena.

Example of one of the commercially purchased postcards, specifically for Valentine’s Day.

Example of a photographic prints made from microfilmed Vmail.


Marvin H. Mischnick Papers

The Mischnick papers include correspondence, photographs, books, newspaper clippings, and artifacts concerning the Third Armored Division; World War II; Germany; France; Belgium; 23rd Armored Engineering Battalion;

photography; Dwight D. Eisenhower; Major General Maurice Rose; The American Legion; and the Third Armored Division Association. This general file contains significant material on World War II and the Third Armored Division, in addition to photographs of persons of note such as President Dwight D. Eisenhower. (Description provided by the UIUC Archives database)

A faint lipstick mark from Mildena with a signoff, “Honey put my lips in your wallet”

“P.S. Destroy this letter because I don’t want you to keep it.”


Reformatting Throughout the Ages

Written by Emilye Lewin, Preservation Reformatting, Collections Care, and Digitization Services hourly employee

When books become too brittle or damaged to circulate, they are routed to Preservation Services so that a preservation decision can be made. While the Library is committed to building and sustaining library collections for the use of students, faculty, visiting scholars, and the public, the physical and chemical compositions of many items actively work against this goal. Books become worn with time, so to combat degradation, the Preservation Reformatting department reformats these items to ensure they can be used by patrons without undergoing further damage. Today, reformatting takes the form of digitization, but this was not always the case. The timeline below shows the different forms reformatting has taken over the years to illustrate how librarians and preservationists have provided access to damaged materials.

Reformatting: The Early Years

1851     Daguerreotypes suggested for preservation

1920s    Commercialized for preservation and widespread use

1930s  Newspaper preservation begins plagued by quality control issues like lighting, contrast, film stock quality, etc.

1935    Microfilm is introduce – Microfilm rose in popularity when Recordak, a    division of Kodak, used a 35mm microfilm camera to film and publish the New York Times on microfilm. Microfilm quickly became a solution to the many preservation and storage issues inherent in newspaper collections and government documents.

1971  Project Gutenberg – Volunteer effort to digitize and archive cultural works. Created by a former University of Illinois student.

Contemporary Reformatting Projects at UIUC

Because polyester film has a life expectancy of at least 500 years, we still use microfilm as a means of best preservation practice today. The microfilm itself is often considered to be the preservation copy, while digital files are created from the microfilm as access copies to be used by the public. The timeline below shows how microfilm projects at UIUC have evolved into digitization projects.

1982    United States Newspaper Project. Started at UIUC in 1987 as a partnership between UIUC, the Chicago History Museum, and the Abraham Lincoln Presidential Library. We have cataloged over 20,500 newspaper titles and resulted in the creation of the Illinois Newspaper Project Database so patrons can access newspapers digitally.

2004  Microfilm Goes Digital – National Digital Newspaper Program. The goal of this project is to enhance accessibility of innovative newspaper content for researchers and scholars. UIUC is currently focused on selecting items that represent a wide variety of geographic, temporal, and demographic groups, specifically labor, African American, and non-English language newspapers.

2004 Google Books -Joint partnership with prominent research libraries in order to build a shared digital repository combining digitized public domain materials from each library’s individual collection into one easily accessible online resource. Public domain materials are available to view, search, or download while only basic information (such as title, author’s name, and a few lines of descriptive text) are provided for items protected by copyright laws.

2014 Internet Archive Partnership – As part of a partnership and customized preservation workflow, Internet Archive staff are located inside the Main Library and perform in-house digitization. This is a unique reformatting workflow as it ensures Library materials never leave the building. Internet Archive has digitized over 16,000,000 eBooks and growing, with over 73,000 books from UIUC.

A Brief Walkthrough of Our Bindery Options

Written by Victoria Schmitz, Collections Care Graduate Assistant

At the library’s preservation unit, we send items to a commercial bindery when they need to be rebound. Described below are some of our options of binding and how we decide which binding style is appropriate for individual items.

Example of digicover bind in cover candidate.

If an item needs to go to the bindery, our first preferred option is to send it in as digicover (paperback or hardcover) or digicover bind in cover (paperback only). With this option, the informational and/or artistic value of the item’s cover and/or inside covers can be preserved through a professional copy printed on a hardback casing, as well as binding in the original cover.

Digicovers have a size restriction, so if the item does not meet the requirements, the next best stop is custom bind in covers, or economy bind in covers. The item must be paperback for both of these options so that the covers can be bound in the buckram cover with the rest of the text block. Custom is for sewn binding while economy is for perfect bound items.

Example of a binding that is sewn.

Example of perfect bound.

If the item does not meet the digicover requirements, has sewn binding, the text block is not broken, and is a hardback with informational and/or artistic value on or inside the covers, we can send the item to our Conservation unit. If the item is not qualified for conservation, then it will need to be sent to Collections Care for bindery prep so that we can copy the covers. We will cut the copies to the appropriate size and then send to the item and loose pages to the bindery as a custom monograph.

An item that does not have informational and/or artistic value on or inside its covers has routes that depend on if it is paperback/hardback and its binding. Paperback follows the instructions above, but if it does not have informational and/or artistic value, it will not hurt to copy or bind in the original covers. As for hardcover, the item will be sent in as custom monograph.

Example of informational and/or artistic value on the inside of covers.

Example of a custom monograph candidate.