Smart Glove Wrap-Up and Documentation

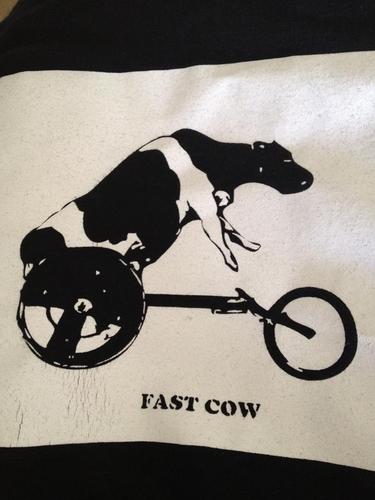
Taking this Digital Making course this semester was possibly one of the greatest decisions I’ve made thus far. I first found out about the course through a previous student of Vishal’s and teammate of mine, Arielle Rausin. She was always talking about 3DP and printing gloves for the team – and I thought that was cool; I wanted to be a part of it.

The first day of class was a little overwhelming. I remember it clearly. Under the assumption that 3D Printing capabilities were limited to wheelchair racing gloves, my mind was blown when we were shown the different methods of printing and the endless possibilities of things to make. This is where my problem started: too many options!

We were then told that we would have this huge semester project where we needed to create something just because, or to solve a problem. My mind was drawing such a blank and I hadn’t the foggiest on what to do. As the semester crept on, so did my anxiety about this project, looming in the background.

When we were visiting the FabLab, messing around with Arduinos, I heard Vishal and Jeff talking about the possibilities of flexible filament, and a lightbulb went off in my head: apply that to the racing gloves.

Immediately I started throwing ideas around with Vishal and settled on a Smart Glove idea that could measure force, acceleration, and stroke frequency. Apparently, I was talking a little too loud, because I had a team at the end of that conversation: Pri, Toheeb, and Andrew.

As far as project scope went, Toheeb and I went to speak with Professor Rice in the Kines Department; he explained exactly what things we should be paying attention to and felt that this project was worth pursuing.

The next week, the three of them built a force sensor out of Arduino parts to see if the actual hardware was something feasible to be built.. and we had success!

The most difficult part of this project was actually coming up with the prototype to have proof of concept. Since the electronics were not very flexible, we had a little spot of trouble with getting everything to stick. All in all, I’d say that this semester was a success.

You can view our presentation slides here.

Week 11: Clones and MeshMixer

This past week, we were back at home base in 3030 BIF. It felt good to be back, and it was surreal. Much like Josh, I looked around the room and the realization of how much I’ve learned this semester hit me with such force. I can actually say, without hesitation, that I am a maker. It’s such a cool feeling to be able to think, and create something from that single thought; it may be really simple and silly, or so complex and thought provoking that it changes the world.

The topic of this class was 3D scanning and MeshMixer, presented in part by Arielle. First, we had to play around with a scanner in order to get an object file to manipulate. This was my second time using a scanner (the first was at the build-a-printer event) and I have to say that it went much better than anticipated, based on my previous experience.

Pri and I worked together, each in charge of scanning the other’s head in order to eventually create a printed bust. The common theme was messing up on the person’s hair and chin features, which brings us to the next part of class: Meshmixer.

Meshmixer is software that allows a person to manipulate a mesh of triangles of a scanned object. This allows you to modify and customise just about anything, anyway you like it. Arielle was gracious enough to tell us of her own experience using the program to modify the racing gloves, and was there to answer any questions. This proved very helpful to me as I was able to iron out all of the kinks in editing and printing mockups for our semester project. I’d consider that a win!

Overall scanning and editing seems like a good workflow for projects where you have to go from a physical object to a digital model, although it is very time consuming. Getting the chance to iron out workflow with someone who’s experienced in using this specific program was priceless.

Vectors, Rasters, and Lasers Oh My!

Okay – so when I feel the need to be a little corny, I mess with my titles.. I know, weird sense of humor. This week was our final week in the FabLab, and I can honestly say that I’ve learned an immense amount about making things.

This week, we learned how to vector (cut) and raster (etch) with the help of some vector software and powerful lasers. I chose to etch a design onto a pocket-sized notebook (look at my Twitter to see a picture). The process was very straightforward and fairly quick.

The first step was to find either a silhouette or a vectored image from google. These images are very flat and are mathematically produced; this is very important for the next step.

Second, we imported the image into inkscape in order to trace and vectorize the image in order for the laser to be able to “print” it. Bitmap images shouldn’t be used because the laser can pick up on each individual pixel and make the image blurry.

Third, turn the file into a pdf and send it to the laser!

The most difficult part of this way of making things was using the inkscape program. I’m very familiar and comfortable with Adobe Illustrator, so having to relearn a different layout with different tools in order to complete the same actions, was quite frustrating.

Overall, it was really cool that we learned how to vector and raster; I can see myself coming back in the future in order to make some really cool things. However, I was a little disappointed because it was the least hands-on station that we have done.

Semester Project Update: Smart Glove

With Pri, Toheeb, Gwen, and Andrew

For our semester project we decided to create a pair of everyday gloves for wheelchair users, updated with some 21st century technology. This idea took life back during our first meeting in the FabLab when I overheard Vishal talking to Colin about some new conductive PLA. My intentions going into this class were primarily sport based applications: what could I make to benefit our wheelchair track and roadracing team? That’s when the idea hit me.. Take Arielle’s 3D printed racing gloves and add some tech to them so we could boost our training productivity. The idea here was to use the conductive PLA to somehow include a force-sensor, accelerometer, and a bluetooth transmitting device. The goal was to be able to reliably measure peak resultant force in the x, y, and z dimensions, along with speed, contact and push time, and stroke frequency.

To make this idea more of a reality, I contacted a professor here on campus who was on the track team himself, and whose area of expertise lies within measuring the effects of adaptive equipment on the body. He has used a similar device attached to the handrings of a racing chair to measure these areas. He felt that our idea was awesome and attainable, just not in the timeframe that we have available to us. In conversation, he mentioned that one of his upcoming studies was going to include the forces used for transferring in and out of a wheelchair, but he was not satisfied with instrumentation currently in use. And this is where our idea really took shape. Our focus now is to create an everyday glove with the same technology that can be one day used in a racing glove.

As far as progress goes, we have a working force sensor, and a survey that is ready to be distributed. We are well on the way to having a fully functional prototype!

Week 9 Recap: Build – a – Printer Event

I think it’s safe to say that our Build – a – Printer event was a success. This was the once in a semester project that I was responsible for running – well in part, anyway. Anjali and I were in charge of the logistical side of the event. Before spring break, we met to discuss the kit components, and to break the assembly into groups based on what we thought would make sense; of course as with everything, there was one major caveat and hindsight really is twenty-twenty: We had not seen the kit prior to our planning meeting.

This meant on giant issue was to occur on event day, and we hadn’t seen it lurking. We split up all of the teams based on old Wiki instructions that we had found, not realizing that these were outdated and did not match any of the part numbers in the kit… Go team! We must have spent the first hour scrambling around, trying to figure out why things weren’t matching up. Luckily, we had an expert from Ultimaker there that was able to point us in the direction of the new guide; things went smoother after that.

Another part of my responsibilities included staining the wood paneling and components. Accompanied by Grace, one of my Industrial Design friends, we broke down all of the wood components and painstakingly applied two coats of an oak colored stain. Aside from the aesthetics of the stain, I wasn’t sure what the purpose was. Diving further into manuals and forums created by makers who assembled previous kits, the stain helps protect the wood from the high heat of the extruders – it totally makes sense now! We didn’t do half bad on the job, and I really enjoyed it.

Overall, I think this experience was an important one. To me, it brought the maker revolution back to the grassroots and into the hands of the people who are most important. It’s a beautiful thing that Ultimaker is producing kits like these. I feel that it makes a complete circle for us: We started learning about 3D printers in order to make things, and now we are using that making knowledge to build a printer!


Soddering or Soldering?…

To poke a little fun at Lois, or myself depending on how you look at it, we learned the art of soldering (sODDering for those of you who speak American as it seems). This week, we had a guest lecturer, Mitch Altman – you may recognize his name; he invented TV B Gone. This was the perfect example of a pet project that turned into a profitable product. Basically, it is a universal TV remote on a keychain that can shut off TVs in public places; how cool is that?!

So unlike some of my colleagues with no computer experience, this was not my first time soldering… I went to the FabLab a few weeks back and taught myself 🙂 It was super cool to have someone with tons of experience there to show you little tips and tricks, and as a result, I think I’m pretty decent at it now.

There were two parts of the experience that were supercool to me. The first was being able to learn from someone who had so much experience, not only in soldering, but in the making community and business world in general. The great thing about Mitch is that he was very warm and easy to talk to. You could tell that he really enjoyed what he did for a living. The other extremely awesome part was actually having our finished products in series. It was so cool to see everything light up in synchrony, and it was as the name implied, really trippy.

Fab Lab Fast Cow

So week two in the Fab Lab brought with it an old friend – Fast Cow! He’s our unofficial, official team mascot and has been for several years; if you want to know the background to that story, feel free to ask me! I was excited for this week because I knew we were making patches with digital embroidery, and quite frankly you can never get too much of Fast Cow. Below is the image that I modified in order to create the patch, and as for a finished version – I’ll have to wait until I see the teammate that stole it from me.

The team’s unofficial mascot – Fast Cow

The whole process of digital embroidery was very straight-forward. It was far less intuitive, however. I’m used to using the Adobe Creative Suite of software: Illustrator, Photoshop, and InDesign, so the lack in program features and capabilities in the software that we were using was a little frustrating. Regardless, the end product came out far better than I thought it would have. I don’t think I’ll be dabbling in the world of digital embroidery anymore than making more patches, but I was incredibly thankful for the shot at learning how to sew.

Quick note about that: Monday was my first time ever using a sewing machine, so I had about 2 hours of experience after class was finished. That night, I came back to the FabLab and created a UofI themed body pillow for my friend’s birthday the next day! Be sure to check out my Twitter for a picture in the near future 🙂

Week 7 was also very productive in regards to our semester project. Nick, Andrew, Pri, and Toheeb created a pressure sensor prototype for the glove. Later in the week Toheeb and I met with Dr. Ian Rice who’s a professor in the Kinesiology department and he gave us some great ideas, and some inspiration to keep moving forward. I’m really looking forward to working with my team, and I am extremely glad that they are willing to help me tackle this task.


Fab Lab Inspiration

Six weeks have passed since I’ve started my journey of becoming a maker, and I can honestly say that this one was probably the best so far. Our trip to the CU Fab Lab was our first outside of our classroom setting – and I’d like to say the change of scenery was inspiring. Walking to class last Monday, I must have passed the Fab Lab at least two times; it’s housed in one of the oldest buildings on campus, and to be honest looks quite unimpressive… until you open the door.

For the first part of class, we were introduced to the volunteers and were given a tour of the facility’s three main parts: fabrications, electronics, and design. I was then fortunate enough to be placed in Colten’s group, working on Arduino’s. I have some coding experience, but I’ve never had the chance to interface code with actual equipment. It was really cool to play with the code and see how the Arduino, LED, and motor would react.

The best part of class though was when I figured out exactly what I was going to do for my semester project, and it was all an accident! Vishal and Colten were talking about the uses of conductive PLA (one of the types of plastic used in 3DP) and an idea was ignited in my head. I’m not going to talk too much about it here, for the moment, but I can tell you that this idea takes Arielle’s printed racing glove and makes it “smart”. I’m hoping to use it as a training tool, where we can gather data. Shout out to Toheeb and Pri for taking on this with me!

The Fab Lab has a relaxed atmosphere and a great making vibe, and I would say it’s almost impossible to not come up with something cool to work on when you’re there.

Week 5: Fusion Confusion

As Toheeb so wisely put it in his post, this class has gone from 0-100 in about 2 seconds, or more realistically 2 class meetings. For the past two weeks, we’ve been learning how to use Autodesk’s Fusion 360 CAD software.

In our first class learning how to use this program, we were joined by Autodesk expert Lucas Ewing. The first half of class was spent learning more about Lucas, his qualifications and experience, and navigating the general layout of Fusion. The second half of class is when things got very interesting. Our first task was learning how to create a pen tip, inspired by a Bic ballpoint pen, guided by our expert.

Now, I’m going to take a guess and say that there are two types of people reading this post: those who are familiar with Fusion or CAD in general, and those who are not. Both are probably saying to themselves, “A pen tip… What’s so special about that?!” Well, for the 20 of us using this program for the first time this task seemed like a mammoth undertaking. I had no problem following along with Lucas, but when I tried to recreate the process at home, I could not select the sketch plane that I wanted revolved. A week and a class later, and after asking a few people, it turned out my problem had a simple solution. I was in the wrong workspace *facepalm*. This took me days to figure out.

Screen Shot 2016-02-28 at 10.15.58 PM

The pen tip I created in class.

For our next class, Vishal brought in campus Autodesk experts Gina Taylor and Nicole Chimienti. Our task this week was to create a lamp in fusion. However, there was a problem for me; for our homework the previous week, I had decided to be a little ambitious and create a lamp! Luckily for me, I was still able to get something out of the lesson as Gina and Nicole used different processes than me to create a similar product. It was very enjoyable getting to see multiple workflows.

Screen Shot 2016-02-28 at 10.13.55 PM

My beautiful lamp 🙂

All in all, despite the slight confusion I had navigating the layout, I can see that Fusion is a very powerful modeling tool that will come in extremely handy this semester! I can’t wait to see what else there is to learn.

Shifted Perspective: Visions of Making

It’s the end of week 3 in our #DigitalMaking journey, and this week like all of the previous was amazing. Design for America, a Registered Student Organization here on campus- as well as a national one, came into BADM 395 to help us on our journey to “Making Greatness”; their goal was a simple one: turn our ideas into great ideas so we could create some awesome change. Basically, they provided us with a basic overview of a workflow, and guided us through the process from idea, to finished marketable product. How cool is that?

Continue reading