
Wires are wrapped together and dangle like gruesome tentacles. A foul smoke rises in the air as the iron touches the metal. Silvery blobs form between two pieces of metal. The process of soldering is underway in the laboratory.
The third and final workshop at the Fab Lab was learning how to solder. I had no prior experience to soldering before, so I was extremely interested. The process of soldering is joining multiple pieces of metals together by melting and adding a filler metal. This results in a permanent connection between electronic components.
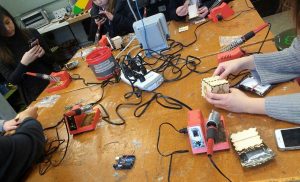
Looking back the process was fairly simply. We had to connect all our materials together using a soldering iron. A LED would be connected to a resistor, which would then be connected to a wire. The main concern was using knowing how to safely handle the soldering iron.
The three main safety procedures were to place the soldering iron back into its holder when finished and to never pass the iron to another person, the second was to not breathe in the gas being released when joining metals together, and to wash our hands afterwards since the materials contained lead.
During the workshop, I had difficulty getting the two pieces of metal to stay connected. In addition the metal wires were hard to twist together since they were small. I was one of the last to finish after carefully soldering all the wires together to create an octopus-shaped creature.
Once the soldering was finished, we tested them on our Arduino boards to see if the LEDs worked properly. Taking my time soldering had paid off as mines did not run into too many issues.
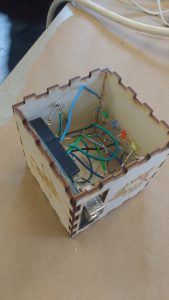
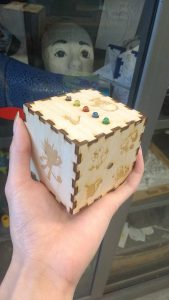
I laid out all of the components for my box on the table and began putting everything together. We had to make sure the wires were not touching one another and that the battery component was sticking out of the backside of the box. A couple drops of hot glue and a few burns later, the Arduino Light Box had been completed!
Instructables provides an easy to follow guide on soldering that can be used to apply these skills for your own project along with other projects that can help you practice your skills. Additional resources include a comic of soldering guidelines by the NASA standard.
Hi! I agree that when looking back this was a simple process. I feel it was intimidating because they told us to be very cautious and telling us how bad it would be if we burnt ourselves or touched our faces. Although those precautions needed to be taken and our products turned out great!
Hi,
I love the way you started off with your reflection. I agree with you, twisting the wires was tough. Even after having small hands I was not able to twist them together. I finally ended up not twisting the wires but rather just soldering them as straight joints. I didn’t think that soldering could take that long.