
I have to say the third session of the three-week workshop is the best and most intensive one. This workshop breaks into two parts. At first, we learnt how to code the program for the most of workshop; then we combined the wooden shell, Arduino, LED lights, and light sensor together to get an integrated and functional unit.
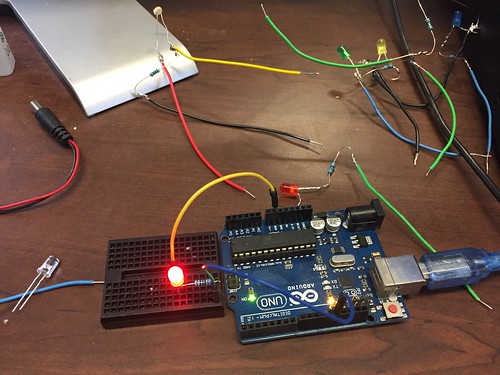
At the very beginning, we used one single LED lights and one extra circuit board to test simple program we made. As you can see from the picture below, I connected the 5V power source to the positive side of the LED light. There was a resistor placed along with the negative side of the LED light.
The first challenge for us was to send SOS signal in the form of Morse code. SOS in Morse code is a continuous string of three dots, three dashes, and three dots. To express the SOS signal with LED lights, I adjusted the time of LED flashed. I coded the program that required LED lights to flash quickly three times, slowly for another three times, and then quickly for three times. From the eye of an observer, he/she could easily discover the form of “…—…” and interpret the signal as “SOS”.
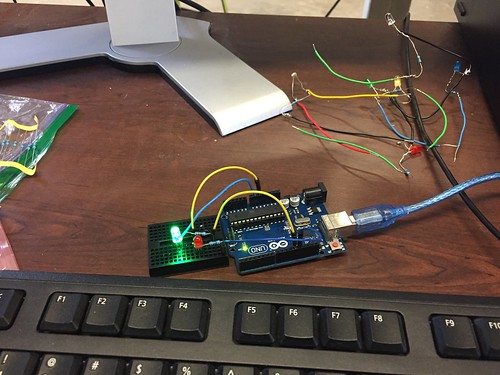
The second challenge for us was to make two LED lights flash alternatively. Although I knew that I should make one LED flash quickly and another one slowly, I could not transform my idea into actual code. Fortunately, after I thought for about 5minutes, the instructor reminded me to create two objects so that I could input different commands for each LED lights. This picture below displayed the moment that I successfully made the two LED lights flash alternatively.
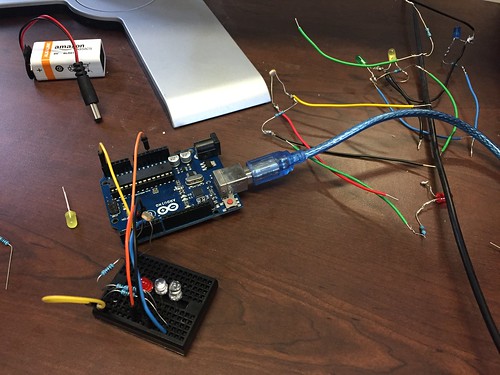
The third challenge was to integrate the photo sensor into the circuit and use the sensor to control the LED lights. This challenge should be tough. However, instructor gave us the blueprint of the final circuit because most of us did not have solid background in electric engineering. Following the blueprint, I quickly connected these components. The short video showed the functionality of my circuits.
Now, it was time to combine all the work we had done in the past three weeks. It was supposed to be easy since all we needed to do was to place the circuit in the shell and use the glue to solidify the box. Well, unexpected things happened. The board with one hole and the one with six holes should be attached together so that the photo sensor could work properly. Somehow, the shapes of these two boards I had were identical, which meant that these two board had to be placed parallel to each other.
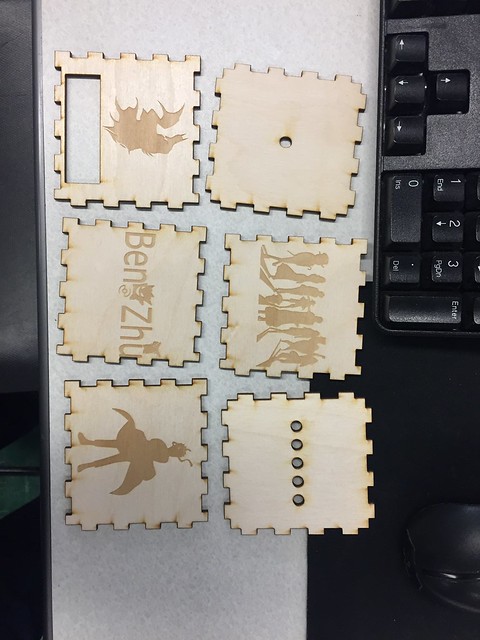
Thus, I had to put the photo sensor and other four LED lights on the same plane. Though a little bit frustrated with the final result, I did learn how to solder the circuit, design the pattern, and code the program for Arduino in the last three weeks. I believe that I will use the knowledge a lot from these workshops for the final project.
Hey Ben,
Sorry to hear about your end result! I’m glad you were able to take a lot of way from the three weeks at the FabLab. Just like you, I plan on using the skills I learned to my final project! I look forward to hearing about your final project in the upcoming classes!
Hi! I would have to agree with you about the third week being the best week. I ended my week differently with soldering, but being able to spend three weeks learning different skills working towards a final product made me feel accomplished! I also had troubles when assembling my product, but it all turned out great!
Hello Ben,
I loved the visuals your provided to your post. Your laser engraving designs add a nice touch to the overall design to the box, props for adding Pokemon to your name. I’m sorry to hear what happened with the end result, but I’m glad you took away the important skills from the workshops. I also plan on applying these skills when creating the final project.