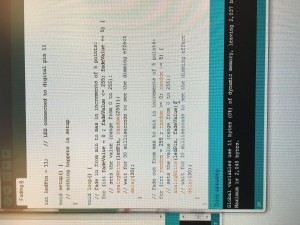
Our “mood shirt” is a representation of how the younger generation can access newer technology. Saadman and I took inspiration from the Champaign-Urbana Make, where the theme was wearable technology. We decided to produce a prototype that reflected a user’s “mood” or in this case the fluctuation of temperature and moisture in a user’s body. We connected an analog temperature and moisture sensor to an Adafruit Flora which was then connected to programmable LEDs. The Adafruit Flora is a version of the Arduino but specifically designed for wearables. With open-source software available, we were able to find code online that could produce the patterns of lights that we wanted. Within a certain range, the LEDs would flash any pattern of red, green or blue. All in all, this was an eye-opening project to realize that technology can be intertwined in any aspect!
Author Archives: mhndrkr2@illinois.edu
3D Printing Prosthetics
Prosthetics have become an increasingly popular field in the past decade, especially with the advent of 3D printing. This class, BADM 395 Digital Making, has provided students the tools and knowledge to understand the process of producing prosthetics. The process is fairly simple, but the results are revolutionary. The first step would be to utilize a CAD (computer-aided design) software. Such software is mainly based on geometric shapes and structures, thus prosthetics in particular can be designed through freeform and sculpting tools to structure the design to each unique individual. Fusion 360 by Autodesk includes freeform models and mesh modeling, both of which creates custom designs that conform to the surface of a human’s skin. After creating a base shape, Fusion 360 allows the user to use existing geometry to create forms using T-Splines. T-Splines can form curves and surfaces specifically towards a unique surface, and also will allow the prosthetic and the surface to connect effortlessly.
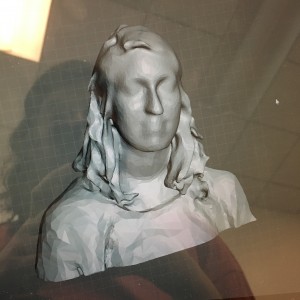
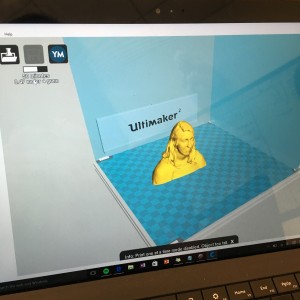
Another skill we learned in BADM 396 was the use of scanning utilizing both the Sense Scanner and the Structure scanner compatible with the iPad located in the Illinois MakerLab. This process is called reverse engineering, by scanning the surface of an object and then programming it with CAD software. In terms of prosthetics, this would collect data directly from the source, instead of measuring it without precision. These scans are compatible with existing CAD software, and we used MeshMixer in our case. Meshmixer is another design tool that uses a different method of displaying surface resolution, which is through dynamic triangle-meshes. A triangle mesh is a group of triangles rather than software that reports individual triangles. This method is more efficient because the software does not have to process every corner of every individual triangle. Say, for a prosthetic hand, after the surface of the body is scanned, MeshMixer picks up this surface, and the user can design a connecting part.
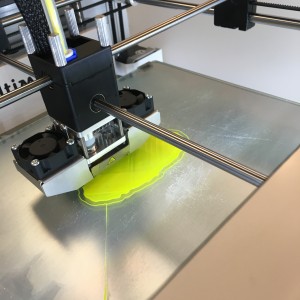
After designing the piece in CAD software, actually 3D printing the prosthetic is the next step. The 3D printer used in the MakerLab are the Ultimaker and Ultimaker 2+. A “How-to-build-a-3D-printer” workshop was held at the BIF this semester, which broke down the parts of a sample Ultimaker 3D printer. The way a 3D printer works is that it has a design for every cross section, and it layers on the object until you receive an entire 3D piece. For prosthetics in particular, the filament is the most important part. The standard type of filament is PLA, which stands for polylactic acid, and it is compatible with the Ultimaker 3D printer. PLA is biodegradable and is generally quite easy to work with.
A newer type of filament called NinjaFlex is made from thermoplastic polyurethane. For example, the “Knick Finger” is a 3D printed partial finger replacement. Nick Brookins, an engineer at Akamai Technologies, suffered from an accident that left him with an amputated finger. The e-NABLE community, those who collaborate to make 3D printed hands free, inspired him to produce a prosthetic finger for himself. Ultimately, this add-on to his hand has become to be very beneficial and easy to use on a daily basis. Many a times, amputees possess a certain mindset where there is PTSD and pain around the area where they were injured. Prosthetics can protect these areas and it is mentally calming as well.
Conventional prosthetics are often ill-fitting and are not comfortable for the user. 3D printed prosthetics allows for a much cheaper and more comfortable option. The conventional prosthetics process begins with a mold from plaster which makes the cast. This material is very uncomfortable and also does not have a nice smell. All in all, 3D printed prosthetics are a much better option, but the main con that is present is that it is not yet popular and accessible to all. But, technology always progresses with time, and always pushes the next boundaries.
Week 11 Reflection: Meshmixer
Arduinos Week 10
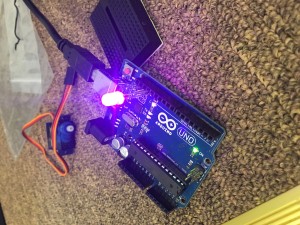
This was our last week being in the the Champaign-Urbana Community Fab Lab. I participated with the Arduinos and I really enjoyed this station because it is quite widely appliable. Arduinos are a piece of hardware that excutes software code. An Arduino is a specific kind of circuit board. It attaches by USB to the computer where the code can be developed. Arduino software was developed for beginners, so this is quite common for novice makers.
I’m happy that I learned how to work with Arduinos after the soldering workshop, because the soldering workshop not allow taught the class how to put a circuit board together, but Mitch explained all the parts and pieces of the LED board and their functions. The cool thing about working with Arduinos is that you do not have to be fluent in any programming language, since a lot of the code is available online, depending on what action you want to hook the Arduino board up to.
In this session, we hooked the Arduino board up to an LED light and and tiny motor.
This type of hardware is related to my semester project, “wearable technology”, using a circuit board called Flora, specifically used for electronics that can be worn, such as in T-shirts or hats, etc. I also believe that such technology will be more prevalent with the younger generation; students may present such technology in science fairs or school projects. With all this open-source software available, this will make daily projects for the individual more accessible and easy to DIY.
Final Semester Project
Since we thought of this over the weekend, we haven’t exactly made a prototype, but using the materials in the lab will allow us to put this idea into reality. Since the idea is fairly simple, we may add on ideas and have a finalized plan by the end of the week.
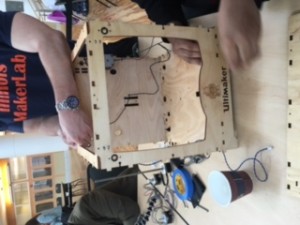
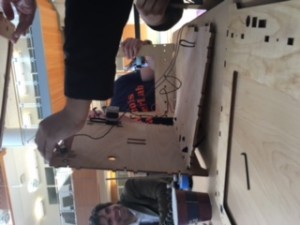
Building 3D printers Week 9 Reflection
What is soldering?
What is soldering?
Soldering.
n. any of various alloys fused and applied to the joint between metal objects to unite them without heating the objects to the melting point.
v. to join (metal objects) with solder.
Before coming to the workshop, I really had no idea what soldering was, and looking up this definition was not exactly the clearest of definitions. When our class began the workshop, it finally hit me that this word was familiar to me from the dreary PHYS 212 class I took long ago. Soldering can be used to hold parts of a circuit board together. In this particular workshop, Mitch Altman was teaching us how to make the “Trippy Synchronized LED”. The parts we used are shown in this picture:
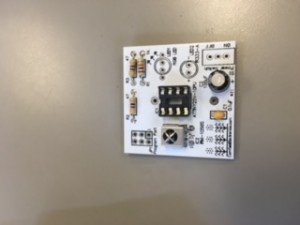
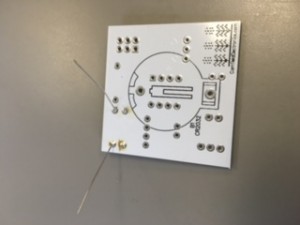
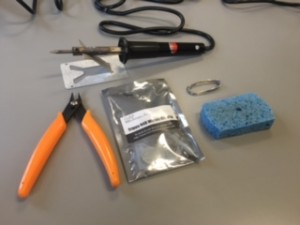
The soldering gun is the heating agent that heats up (to about 365 deg Fahrenheit) the solder, the metal wire that allows the parts of the circuit to adhere to the board. A wet sponge is provided to wipe the oxidized excess solder from the tip. The wire cutter is what it’s usually for, to cut off excess wire. The contents in the bag are the parts of the circuit board. The LED light is controlled by micro controllers in the board to produce a pattern of different colored lights. When someone passes their hand over the board, that sequence starts over, in this case from red on, caused by an invisible infrared light emitter and detector.
This week was especially eye-opening for me because circuits are something that I have encountered only in theory (and in class!) knowing only key words like resistor or capacitor. Especially now that electronics are being entwined with all “things”, namely the concept of the “Internet of Things”, this is an at-home skill that can prove to be very useful.
The CU FabLab Week 7 reflection
In week 2 of 3 in the FabLab I worked in the laser engraving and laser cutting station. So much design was available in this part of the FabLab, where users can utilize more than one station to achieve their masterpieces. Duncan showed us many examples of work using the laser engraver, like this cube, for example.
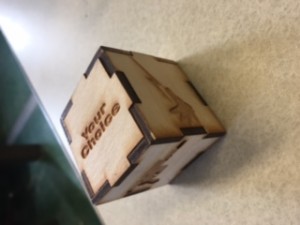
The laser engraver has two modes: rastering and cutting. Rastering is what is on all six faces of the cube: not cutting all the way through the material, but just etching a design. The minimum size of line the machine can raster is 0.1 cm. Cutting is exactly what the word means: cutting all the way through the material. To achieve the cube required both modes, but putting the cube together required use of the woodshop section of the FabLab. The laser cutter would cut the shape of the cube and then the cube could be hammered together to fit nicely. Since a laser is isolated high intensity light, it basically burns whatever material it is directed at. This limits the amount of materials that a laser cutter can be used on, within a safe level. The materials offered at the FabLab included wood, acrylic and glass. Unsafe examples would include PVC (poly vinyl chloride) pipes, which not only would melt under a laser cutter, but also releases chloride gas when cut.
I wanted to raster an image onto a piece of wood. I chose my image from the Internet and saved it onto a program called Inkscape, an open-source software with vector based graphics. Converting an image to a vector graphic allows the laser cutter to pick up a solid image and not be muddled with many pixels. This was my end product.
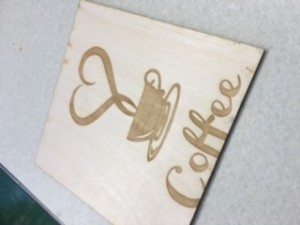
My takeaway from this week was focused more on the technology offered to allow a user to achieve his/her design. The laser cutters have many options to allow the user to design with a larger variety of materials. Another aspect I noticed from this week and also with the embroidery station is that these machines worked like printers. Both the laser cutter and the digital embroidery machine started from the top and worked its way to the bottom in straight lines. This is why the hardware is so precise because it will not miss a spot. My experience in the FabLab is becoming more and more interesting by each session, so I can’t wait to see what’s in store next time we visit!
The CU FabLab Week 6 reflection
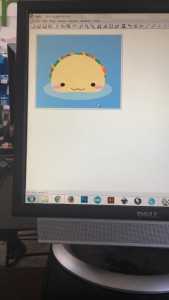
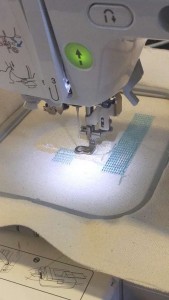
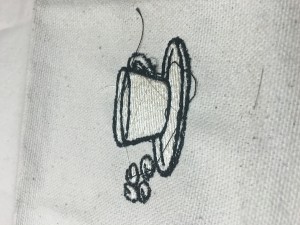
I’ve learned that any innovative technology never works on the first try. This week we met at the Champaign-Urbana Community Fab Lab, not short for Fabulous, instead Fabrication, but it might as well be called that. There is so much technology available including laser cutters, 3D printers, CNC (computer-controlled cutting machine) routers, and what I worked with: digital textile machines. I chose an image from the internet which the digital sowing machine would recognize and ultimately replicate with thread onto a piece of fabric. I had originally picked a taco with a total of 6 colors, meaning I would have to replace the machine 6 times with different colors of thread. As with every piece of new technology, there can be flaws in execution. Changing the thread so many times takes up time, and in doing so the fabric was misplaced, so the thread started sowing in the wrong place. Basically taco did not work out. I chose another image that included only two colors and a smaller size and it was a success!!
Image from Internet:
Taco while being embroidered (mess-up):
Coffee cup (only two colors):
I really enjoyed the FabLab as a community, and this concept of “makers”. My experience entailed taking something as age-old as sowing and mixing technology and design with it. There is so much technology available there. As I was exploring the website I realized there was much more available than what I had at a first glance. Based on the MIT Fab Lab Inventory categories, the CU Fab Lab has many tools available to the public ranging from a laser engraver to 3D printing to Electronics. Not only was I exposed to this, but the fact that I was running into so many problems exposed me to how technology is not perfect on the first try. Technology is constantly improving and changing. I can’t wait to see what is in store for the next class!
Autodesk Fusion? More like Autodesk Revolution: Week 5 reflection
Image
I made probably the ugliest lamp stand ever designed on Autodesk Fusion 360. This experience, however, was quite enlightening in the sense that I realized how much effort goes into designing the seemingly most trivial of objects. Since I was not able to attend the second workshop, I turned to YouTube tutorials to guide my way through the program. Luckily they were incredibly easy to follow along. I first designed a lampshade, one of the more popular tutorials from the Autodesk channel. This was relatively simple to follow and manipulate.
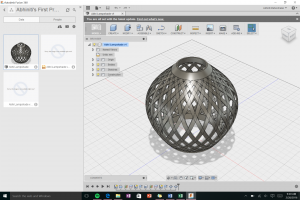
Secondly, I designed a lamp stand that required more of a steady hand and sense of artistic design. I still didn’t achieve an aesthetically pleasing lamp stand, but I eventually picked up the tools better than I initially had. This definitely made me appreciate computer design even more, and that I should invest in a mouse. Even though the program itself takes practice in terms of learning all the tools and options, after getting over that initial hump I learned that the overall purpose of the program is incredibly useful.
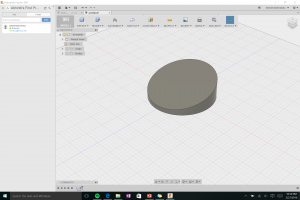
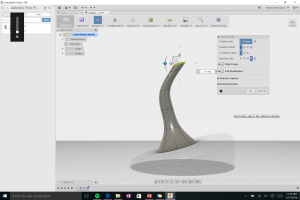
3D printing is considered to be the next “Industrial Revolution”. When the concept was first popularized, the general public did not really have access to it. Luckily we go to a university with access to many printers so I can have a firsthand experience to something so revolutionary. When I was following the tutorial of designing the lampshade, I really enjoyed the mathematical art design of the end product. Ultimately, replicating shapes and figures can result in artwork, which is what a program like Autodesk Fusion 360 can allow a user to achieve.
3D printing is so applicable to all fields, and as a chemical engineering student I sometimes worry how much technology can really be applied in this field. Depending on what field I would like to delve into, 3D printing serves a distinct purpose. Of course there is the medicine route, but after doing some more research on Autodesk Fusion 360, I found that they have recently updated their system to include a “Thermal Study and Stress” feature. This provides insight to the user to see thermal effects, namely thermally induced stress, on the design. I found this to be such a cool feature and that this is perfect for designing a chemical reactor at a plant, especially in a safe and controlled environment: a virtual space!

