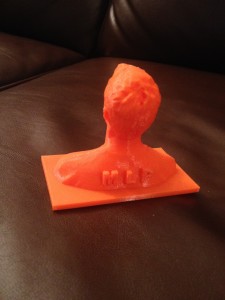
Digital Making has been a true experience for me. Entering the class I had no idea what 3D printers were capable of doing and how the entire process worked. What I also did not know was that Digital Making involved so much more then 3D printers, including, digital embroidery, laser etching, sewing, metal fabrication, arduinos, and 3D modeling. My learning curve was established when in the first couple weeks of class we had a skype call with a Professor from Indiana University and she told us that grade school kids were learning by “making things”. I was shocked to hear that young kids were learning tangible skills like sewing, 3D printing, crafting, etc. My learning curve was established. Starting off, I gained an understanding of 3D modeling and scanning, printed off my first 3D object and thought I had a solid base of knowledge. What I did not understand was what separated my prints from all the others? Anyone can go on and download the print file and print the same exact thing. From here on out, about week 3 or 4 of Digital Making, I decided I needed to add creativity and a special touch to my makings. My first special design touch came while modeling and printing my upper body and head. I made a major leap of faith and added my initials on my back! Wow what a crazy addition.
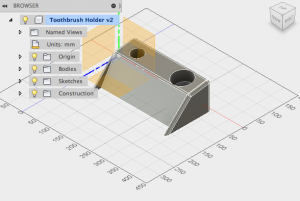
My next test of design came with modeling in Autodesk Fusion 360. We were challenged to model an object form scratch and incorporate skills used in our Fusion workshop. I started with a cube and ended with a toothbrush holder. Again, not super creative at all, but I measured it so it would only fit my specific toothbrush. Making the holder specific to my toothbrush gave me a good feeling that I had design a perfect product for me and I felt the maker buzz because of that. See toothbrush holder below:
After working with Autodesk for a couple weeks, we visited Beckman’s 3D modeling lab. Looking back I was not too found of working at Beckman because it was less hand ons then what the rest of the semester had in store.
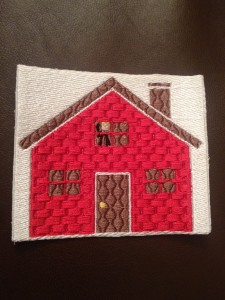
After Beckman we entered into the Champaign-Urbana Fab Lab section of the class. 3 weeks at the Fab Lab allowed us to work on metals, arduinos, digital embroidery, and laser etching. My experiences at the Fab Lab brought out the true “maker” in me and took my personal design to the next level. The second week at the Fab Lab, digital embroidery, was were I truely felt like I had created a unique and well designed item. To start, I chose an image of house off of google, imported it into paint and customized the image to my perfection. I added a waving person in the window, changed to colors of the house to red, with brown accents, and gave it a brick style of stitching. See image below:
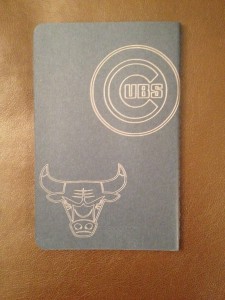
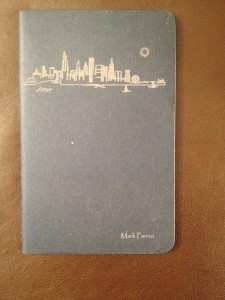
I was pumped to have an item that felt so at home with me and personalized to my choice. Next came laser etching, another creative experience for me. I chose to start with a silhouette of the Chicago skyline and began modifying my image in InkScape. I readjusted the color ratios at least five times until I felt it was perfect, deleted sail boats, and added the sun and a yacht. I thought the best views of the Chicago skyline I have ever seen are when the sun is shining and tons of boats are out on the water. Finally, I added a Cubs and Bulls logo to the back, another special touch. Finishing the laser etch, I felt like a true maker and excited to have been able to be apart of such a cool experience. See the images below:
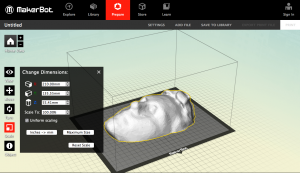
The final segment of the class was turning my 3D head model into a wall hanging and wrapping up my group project. I decided to turn my 3D head model into a 3D printed wall hanging to have a displayable object from class in my apartment for everyone to see. Here is a link further explaining the project: 3D Print a Wall Hanging of Your Head
The print turned out great, see the model below:
Wrapping up the group project, 3D printing wheelchair racing gloves, was a lot of fun. Week after week it was exciting to hear about Arielle’s, project teammate and wheelchair racer, races using her new 3D printed gloves. Working with Sebastian, other project teammate, and Arielle gave me two other perspectives on how to go about 3D modeling and printing an object. The project was a success and will continue on as Arielle and the crew at Beckman, who 3D scanned her original gloves, works to 3D model the rest of the racing team.
Overall I have grown tremendously in how I approach projects. After a semester long of making, I believe all my projects, whether for work or school, from here on out, should be given my personal design and touch. The personal design I have nurtured and grown in Digital Making will stay with me forever and I better prepared to create anything from the ground up here on out. Skills I learned about design and modeling can be applied to most anything in my future. Looking forward, I want to 3D print items necessary to life, but that would usually be bought at the store. For example, next time I need a clothes hanger, I can 3D print it instead of buying it at the store!


