
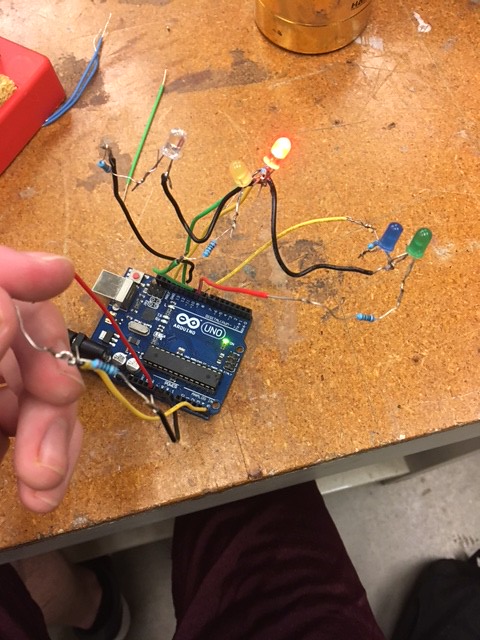
This was week 2 of our lessons at the Fablab, and it was just as interesting as the first week. Last week, we got to create an Arduino circuit using a breadboard. This week, we had to solder the wires together. For those of you who aren’t familiar with soldering, it is basically bonding two wires together using an easily melted metal such as lead. The two wires are heated up using a solder pen, which is just almost screwdriver-like in form, but is heated to very high temperatures using electricity. If you want to learn more about soldering check out this link. Soldering is a much, much harder process compared to the breadboard, and it makes you appreciate how easy the breadboard was. We started the day by learning about soldering and safety procedures. It turns out, being in contact with hot solder for even half a second could leave very severe burns so we had to be extremely careful when making our circuit. After about 2 hours and a lot of frustration, all my work paid off. I got to see my creation of what looked like a bunch of random wires turn into a light sensor that went off if it sensed that it was too dark. I attached a picture below.
Learning soldering was a very cool and important skill because as our team continues to develop and think of our project, there is a good chance that we will need some sort of electrical circuiting that will require us to solder. Luckily, we will now be able to do this thanks to the awesome people at the Fablab. This could also come in handy for me down the road, as I will definitely be making other projects in my classes in the years to come and my knowledge of soldering will help me to stand out from the other students.
Now that I have a basic knowledge of soldering, I hope to use it in the future, whether it be on this project or one in a Mechanical Engineering class. I can now add soldering to the list of awesome skills I have learned about during this class. Next week is our last week at the Fablab and I can’t wait to see what they have in store for us then. If it’s anything like the first two weeks, I wont be disappointed.
John, I like how you expressed how cautious you have to be to solder as I almost burned myself last week too. But I also liked how you talked about how rewarding it is to see you create something and then have it come to life. I think the FabLab is a great resource for seeing our project come to fruition. Since you already did the coding and the soldering I believe that your next step is to utilize the laser cutter and finally finish your box next week. I have found a helpful resource for you since I was new to laser cutting too and found it helpful.
http://www.instructables.com/id/10-Tips-and-Tricks-for-Laser-Engraving-and-Cutting/?ALLSTEPS