
There was a short period of time when a lot of my friends were having their birthdays. This “Birthday Season” drove me a little crazy because I really wanted to give them a present that make them feel surprised special.
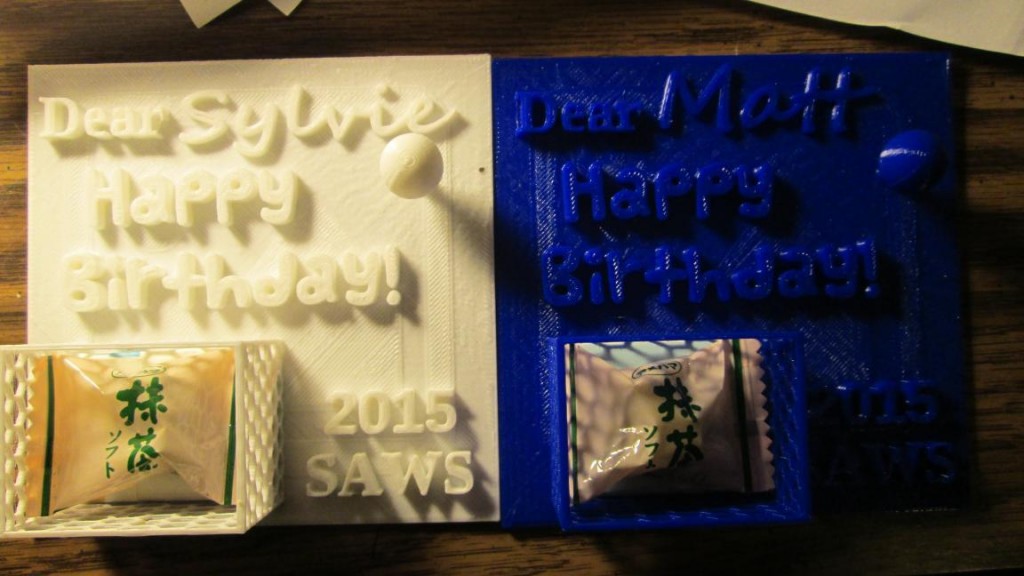
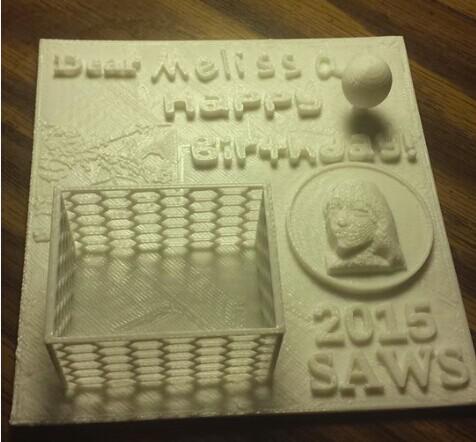
And while I am taking this class about 3D Printing, and I am quite awed by this interesting technology, I thought, could I design a birthday card for them using 3D Printing? And finally I did. On the birthday cards, I wrote their name down on the paper first, and then put the image on the computer and convert them into 3D form and print their name down. This is because personally, I feel that it’s important to write down someone’s name in my own handwriting, rather than the fonts provided on the computer, to show my good wishes and sincerity by adding these kinds of “handmade” elements. Also, in one of my birthday wish card, I put my friend’s 3D half-face on it as well, which really gave her a surprise.
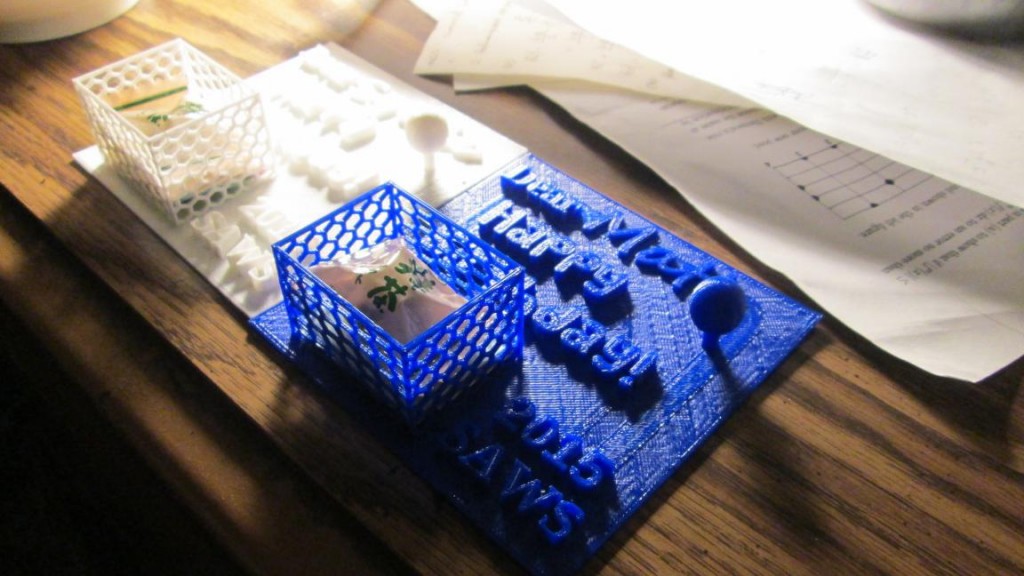
Here are some pictures of my birthday wish cards:

And in the process of making these birthday wish cards, I learned some interesting technique of how to convert 2D image into 3D forms (limited). I put them into two different categories here, one is adding “height” to your handwriting/ drawing lines, while another one is using some software to make the 3 dimensional face out of a 2D picture. The following steps will show you how to do so:
A.Convert 2D lines to 3D form

The basic idea here is to make the lines in the picture extrude out. We will first convert the lines in your picture to a .svg format using InkScape, and then convert your .svg lines to our familiar .stl format using Blender.
Software needed:
InkScape (free): https://inkscape.org/en/
Blender (free): http://www.blender.org/
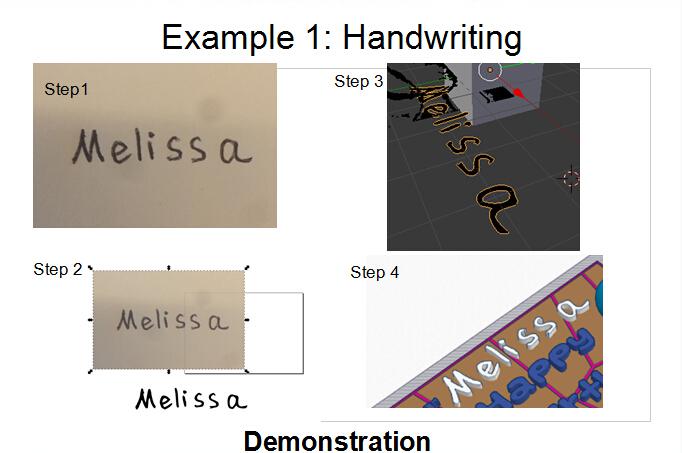
Take a picture of your handwriting. (Requirement: Dark-colored handwriting contradicting to a bright background. The lines in the picture are clear.) Before using the picture, you can consider editing it a little bit first to satisfy the requirement, by changing the comparison and lighting of the picture, etc.
> For detailed process please view my video demonstration here:
(I figured the best way to present the process clearly is to do the demonstration video and let you see it. 🙂 )
★★What are the other things we can do with the same technique?
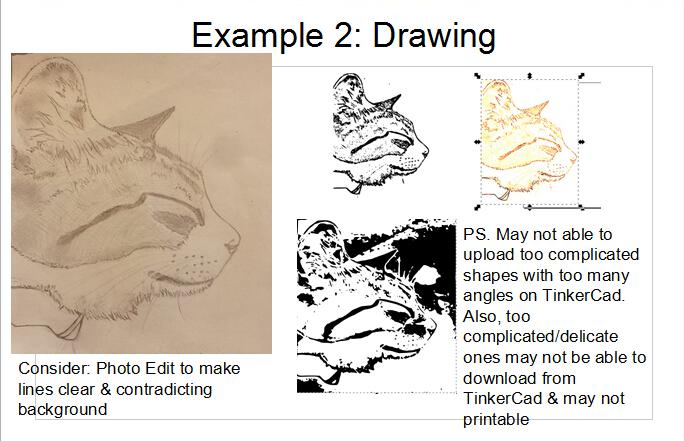

If you like drawing, you can edit the picture of your drawing and make the lines of your drawing more clear, and the background lighter and more contradicting to your lines. And you can make your drawing extrude and then print it out!
B. Make a 3D Face from a Picture
Software:
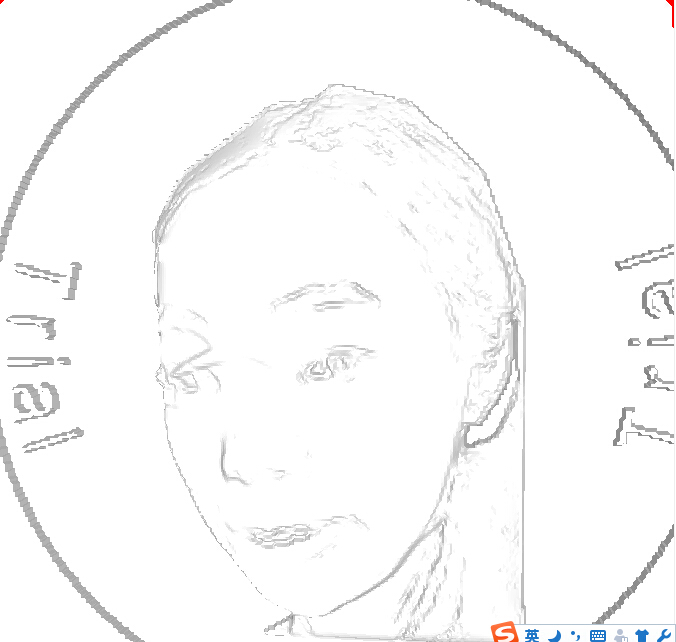
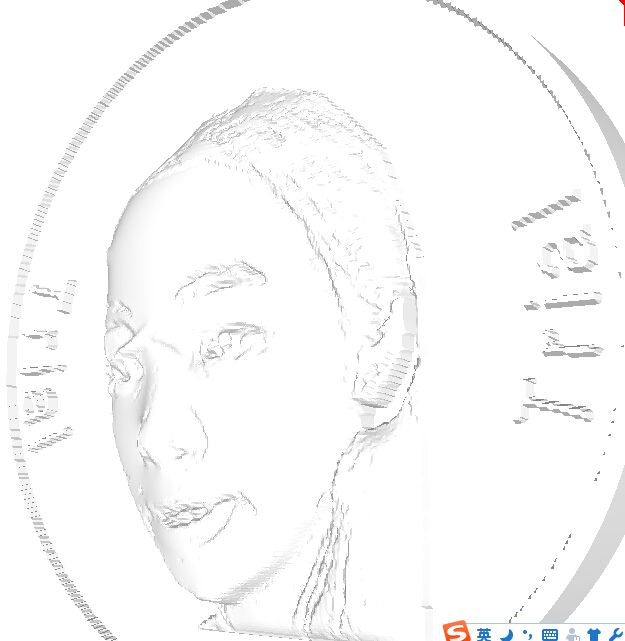
I. FaceMaker 6.0 by Pantomat (15 day free trail)
Download: http://facemaker.software.informer.com/6.0/
It is very easy to do this if you have the software: You just import the face image on the FaceMaker, and then follow the instruction by selecting different important points on the face and drawing different important lines on the face as well.
There’s a very helpful Youtube tutorial video available here:
II. Faceworx (Totally free)
Download: http://www.looxis.de/looxis-faceworx-tool/
Tutorial is available here:
Both of the software are very easy to use, but they both have their shortages and strength
FaceMaker:
> It’s not free
> Only Coin-shape 3D face with “trail” text on the coin
> However, the photo used here can be very random photo with whatever angles to the face, and it only requires one picture
Faceworx:
>It’s totally free
>Can shape the whole head
> However, it requires two pictures: The front picture and the side pictures, and both pictures have to be taken seriously from the right angle.
(I personally didn’t use this so I don’t have screenshots of examples for pictures here, but you can see the examples on the Youtube video link I provided. 🙂 )
Lastly, this shows my wish card that combines two techniques:
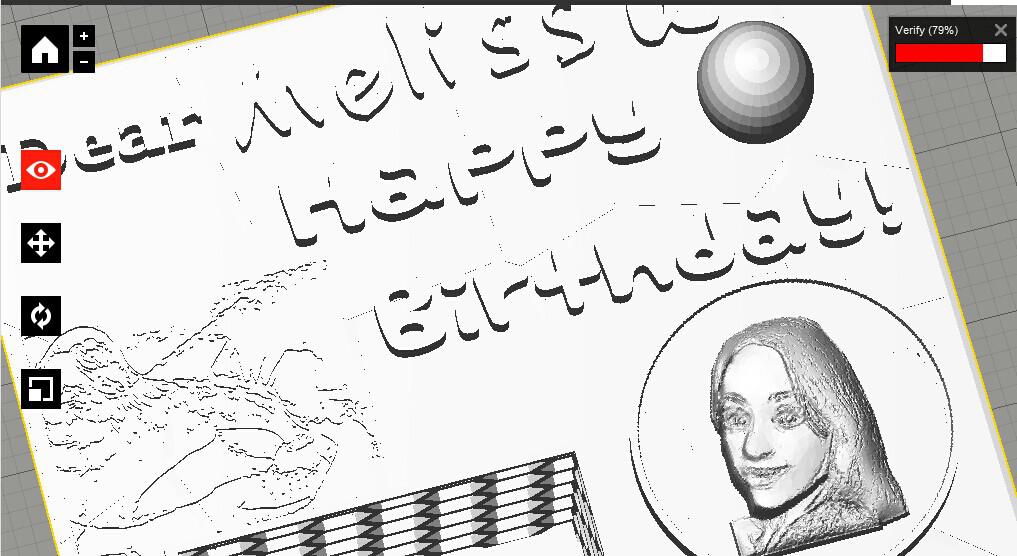
(PS, on this model, my friend’s name Melissa and the cat drawing was created using the first technique – Making lines in an image extrude- and the head coin was made by using FaceMaker and a random picture of her. )
I hope that this article helps if you are interested in making a customized wish card for your friend! Thanks!