This week in the Fab Lab I learned about arduinos. I was a little nervous at first because I didn’t know anything about them or where to begin in order to code them. I have taken an introductory computer science class, but it was awhile ago and I assumed the coding for arduinos was going to be harder.
I was completely wrong! Arduinos were nothing to be afraid of. They are very beginner friendly and a lot of the coding is available online.
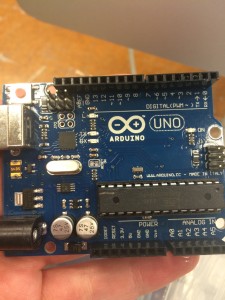
Here’s an arduino for anyone who hasn’t seen one before:
We started with the simple blink program. As you can probably guess, a small light on the arduino blinks when you run the program.
It wasn’t too exciting, but it was a way to learn the basic steps of uploading a few lines of code to the arduino to make it do something. We also ran the fade code to see the same light fade on and off.
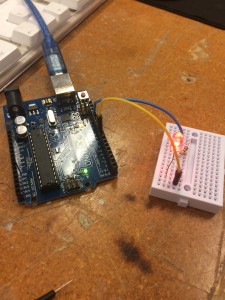
The next step was to connect it to a led light and run a similar code sequence to make it blink or fade. We used a breadboard to connect all the wiring and the led.
Here’s the completed sequence:
Not too complicated. It kind of reminded me of taking physics in high school. The arduino was like a power source and the wiring connected to the light to complete the circuit. Of course there was no blinking or fading in basic physics circuits.
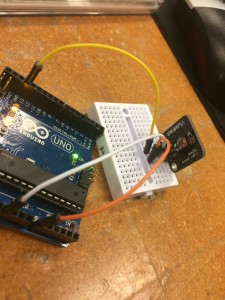
Next we learned how to use a light sensor. It is a very similar process as hooking up the led, but the output isn’t a light, it’s a bunch readings that show up on the arduino software.
Here’s the setup for it:
I messed around with different light levels to see how high and how low I could get it. A reading of 0 means no light, so I covered the sensor completely so no light can reach it. And I was able to get a reading of just over 1000 when I flashed a light directly on the sensor. The room lighting read between 500 and 700 depending on the angle of the sensor to the room lighting.
We also were able to connect a led to the light sensor and told it to turn the light on or off depending on the light level (sorry I don’t have a picture of that setup – basically, imagine the last two setups on the same breadboard).
Overall, the main thing I learned about arduinos is that there is a lot of trial and error!
Just with the coding part, a lot of things can go wrong. I didn’t do much coding myself because a lot of it was online and easy to understand. But when I tried to add things in or change parts of the code, I ran into some difficulties.
Also, the arduino setups take a lot of trial and error as well. The good thing is wiring an arduino incorrectly doesn’t hurt the device in any way. I was very glad that I couldn’t break the device by running crazy programs on it because it meant that I can play around with it. Messing up was frustrating, but also expected.
I learned a lot in this class session and even incorporated some of it in my semester project, which will be posted soon!


