My Semester of Digital Making

I have learned so much about digital making this semester! I’m going to break down some of the main things I learned, then talk about what this experience means to me as well as what I plan to use this knowledge for in the future.

What I Learned:

3D Printing and Scanning
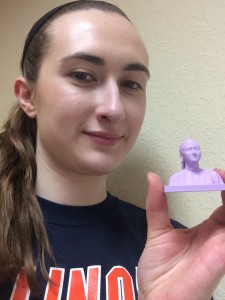
2015-02-10 17.27.40

One of the first things I learned this semester was 3D printing and scanning, which makes sense since our class was held in the Maker Lab. We were introduced to the many sources to find 3D printable files, the software to edit files, and then how to print the files.

The first thing I edited and printed myself…was myself! We learned how to use a scanner that was very easy to use, then got to edit it however we liked. I went with a simple stand to create a bust of myself.

I later printed many objects including detailed jewelry, a candle holder, and a brain.

Fusion 360
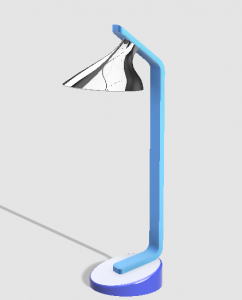
Screen Shot 2015-02-17 at 4.52.55 PM

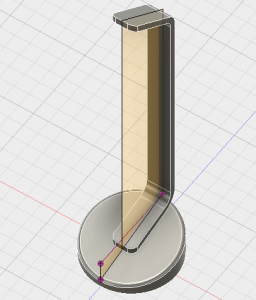
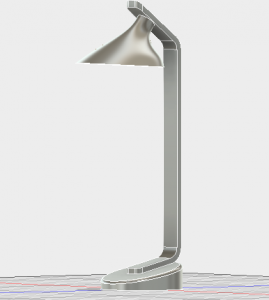
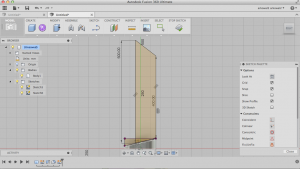
The next thing I learned about in class was how to create 3D objects in a software called Fusion 360. It is a way to make 3D designs into almost anything imaginable. It is quite complicated to learn, but once you understand some of the basic functions the possibilities are endless.

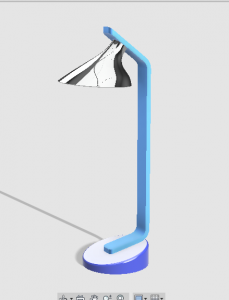
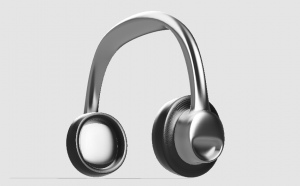
I followed the in-class tutorial to create a lamp and also tried to make some other objects outside of class including headphones. I’m not sure I will be using Fusion 360 beyond this semester, but I know it is available to me if I have a use for it.

InkScape (for laser engraving and vinyl cutting)
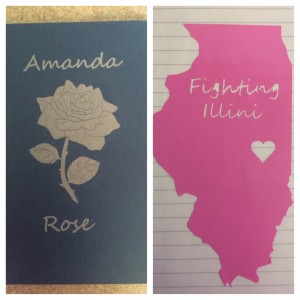
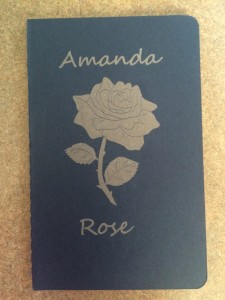
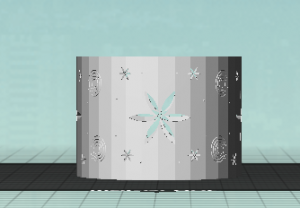
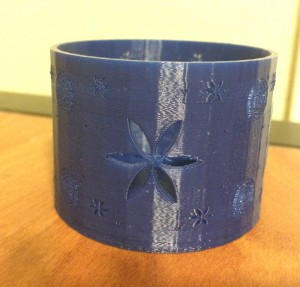
2015-03-31 17.45.49The first week in the Fab Lab I was introduced to InkScape and learned how to edit images in order to create amazing things. I first used a laser cutter to engrave a journal. I also used an electronic cutter to cut out a vinyl sticker.

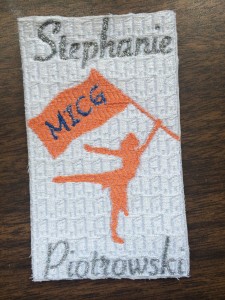
I had a lot of fun making both of these items. I was able to use InkScape in other projects as well this semester including the digital embroidery patch below.

Arduino
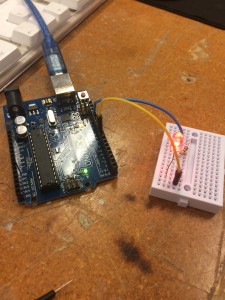
2015-04-07 15.16.09

The second week in the Fab Lab I got to learn about Arduinos. I used the Arduino Uno and we were given basic items to get started on our learning. I followed online tutorials to run programs like the basic blink and fade, then added in an LED.

I also got to learn about different types of sensors that can be used with Arduinos. I was able to use this in the CU Make-a-thon in my group project for the semester to create a pillbox for the elderly that senses when you take a pill out of the container.

Digital Embroidery

2015-04-21 17.16.24

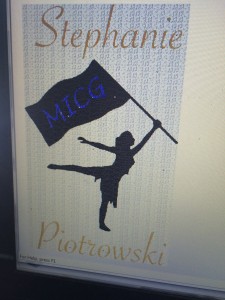
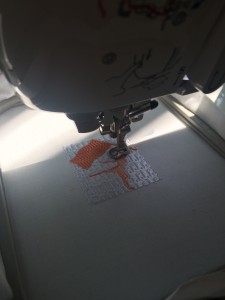
The last week in the Fab Lab I learned about digital embroidery. I had created a design in InkScape in preparation for class because I wanted to make a gift for my roommate’s birthday, so I got to focus on learning how the process works rather than designing.

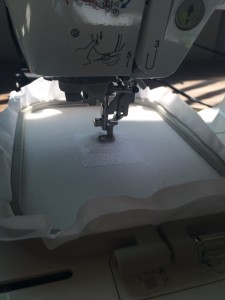
I chose different patterns for each part of the design then threaded the sewing machine and watched the magic happen. I was amazed by how accurate the stitches were.

This project, as well as all of the others mentioned above, can be found with more details on my previous blog posts: http://publish.illinois.edu/digitalmaking/author/arkowal2illinois-edu/

Take Aways:

This class taught me so much about the world of digital making. I am very grateful for the experience and I wish I could take this class again next semester.

I started in the class having no idea what I was getting myself into. I didn’t know anything about 3D printing or other digital making technologies. Also, I didn’t know about the other digital making spaces that are around campus. I was amazed from all of the information I learned in the first few class sessions. The scope of the technology that exists is so far beyond what I initially imagined.

Now that I have completed the course I can say that I am much more aware of what is available to me and have a better insight into the digital making world. And I have loved sharing my learning with my friends and family.

I plan to return to the Maker Lab and the Fab Lab next semester to teach my sister (an incoming Freshman) all about what I have learned this semester. Hopefully we can learn even more together. I look forward to exploring deeper into the technologies I learned about and beyond. I can’t wait to see all the projects that can come out of it!

I encourage everyone to try out digital making in any or all of its forms because the technology is useful to anyone no matter the age, gender, ethnicity, or interests. The digital making world welcomes all makers, no experience necessary!

Any questions about my projects or experiences in this class can be directed to my email arkowal2@illinois.edu or message me on twitter @ARoseK10.

Biomedical Use of 3D Printing

The medical uses of 3D printing have grown significantly in the past few years with advancements in the technologies available. Not only can exact versions of patient organs be printed using a variety of materials, but there have been advancements that have allowed for real organs to be printed to replace the originals. Also, stem cells, blood vessels, tissues, cartilage, bones, and cancer cells are being printed.

Biomedical imaging is the main source for the files needed to be able to print the organs, cells, tissues, etc. Some types of biomedical imaging include CT scans, MRIs, X-rays, and ultrasounds. Most of these produce DICOM (.dcm) files that can be viewed in OsiriX and edited in Meshlab, both free-to-download software that I used in my research.

1st attempt: Human Skull

Very early on in my research, I learned that DICOM files are hard to find without patient permission and many of the files are hard to work with. My first type of file that I learned how to use the software with was a human skull.

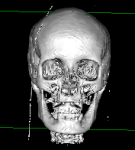
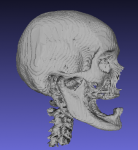
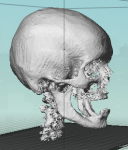
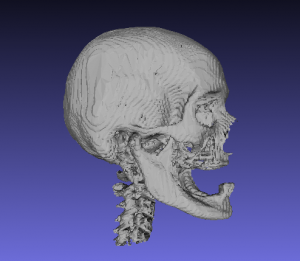
I started in OsiriX and produced a 3D rendering that was very easy to work with since it had very little editing involved. Here is a progression of the file:

Screen Shot 2015-02-26 at 1.58.05 PM

3D surface rendering in OsiriX

Screen Shot 2015-02-26 at 2.08.30 PM

Edited file in Meshlab

Screen Shot 2015-02-26 at 2.24.45 PM

Edited file in Maker software


I found out quickly that while the skull was easy to edit, it was not going to print without some major cuts and super glue.

2nd attempt: Human Heart

I decided to challenge myself to a more advanced file to learn more about the software and the world of biomedical 3D printing. I chose to work with a heart because I knew it was a little more interesting than a skull, but I was not prepared for all the challenges that comes with editing an organ file.

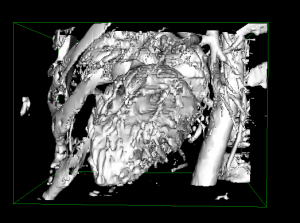
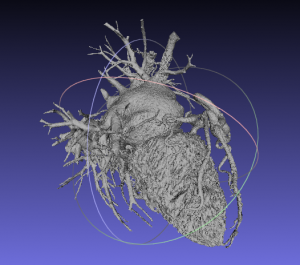
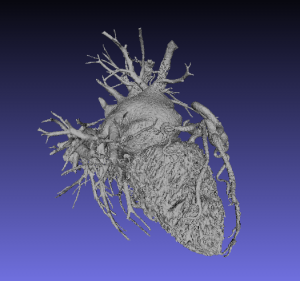
First of all, finding a heart file that rendered clean was pretty much impossible with the resources I had. Most files came up very messy or were not what I was looking for. Also, once I had a file, it was basically impossible to edit to a printable form. Here’s my attempt to edit a human heart:

3D rendering in OsiriX

3D rendering in OsiriX

Edited version in Meshlab

Edited version in Meshlab


Clearly, there was not much I could do with the file I had. There was too much to work with and I didn’t know enough about the file or the software to make it printable.

Final attempt: Human Brain

After a lot of frustration working with heart files, I talked with a good friend of mine from back home who is studying medicine at another university. She was very interested in my project and told me she had some MRI scans laying around from a few years ago. She was a pleomorphic liposarcoma patient and went through 2 surgeries in 2009. The files she gave me were from a check up in 2012.

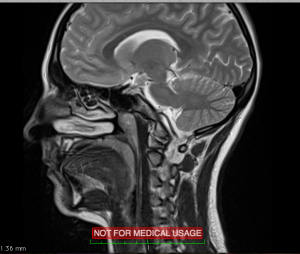
Her cancer was below her cheek, so the MRI was from her neck up and cut off the very top of her head. This was semi-unfortunate for me, but I still wanted to work with her files because of the story behind it. She is now a 5 year cancer survivor and I was excited to see what I could do with her MRI. Here is a progression of the file:

2D rendering without editing in OsiriX

2D rendering without editing in OsiriX

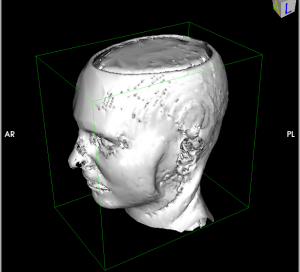
3D surface rendering in Osirix without editing

3D surface rendering in Osirix without editing

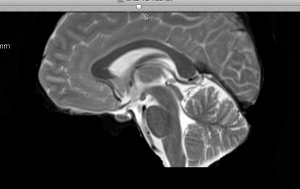
2D slice with individually edited out non-brain parts

2D slice with individually edited out non-brain parts in OsiriX

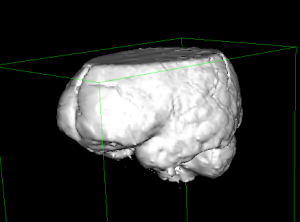
3D surface rendering of edited version in OsiriX

3D surface rendering of edited version in OsiriX

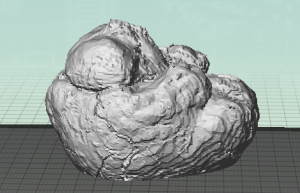
Ready-to-print file in Maker software

Ready-to-print file in Maker software

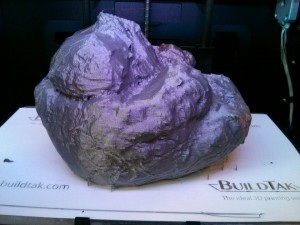
Successful print

Successful print


The top of the file being cut off in the MRI was almost helpful with the actual print because it created a flat surface. I would have liked to have a complete brain, but what ended up printing was enough for me to be satisfied. Also, I learned that it is possible that I cut out too much while I was editing the individual slices, so more knowledge with MRI scans is encouraged before taking on this type of project. But, overall, I am thrilled with the results and I’m excited to give my friend a 3D print of her brain!

Biomedical 3D Printing Community

While there are not many resources to get the files necessary to 3D print organs and such, the small community that exists for this type of work is amazing. I found a great resource here: http://www.embodi3d.com. This resource includes blogs, forums to ask questions, and a source for files ready for printing. It’s great to see that there are people out there that want to teach what they know about 3D printing and making it useful in the biomedical field.

I am very interested to see where biomedical 3D printing goes in the coming years. I believe it will continue to grow and become even more popular as the technology advances.

I encourage anyone interested in the topic to explore the basic software and try out 3D printing at the Maker Lab or your local Makerspace. I’ve learned a lot from just messing around with the different functions in the software, and there are some tutorials that go step-by-step online that are pretty useful for beginners. If you are interested in hearing more about my research, feel free to contact me at arkowal2@illinois.edu or via twitter @ARoseK10.
Fab Lab – Week 3 (& Reunion)

This week we returned to the Fab Lab for our final session. I already had an idea what I was doing based on my classmates’ work in the prior weeks, so I was excited to learn the last topic. I got to try out digital embroidery!

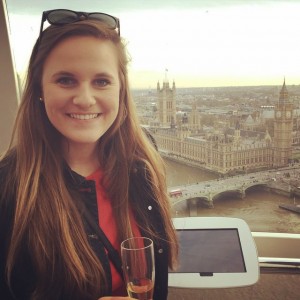
I was excited to return to the Fab Lab this week, so I planned ahead and made a design that had some meaning behind it. So this week was especially exciting because my roommate for the last 3 years was returning from her semester abroad in London! She actually was meeting me right after class that day and planned to stay through the weekend. Here is a picture of her from the last day in London.

2015-04-17 23.49.10


Since I knew she was visiting me and it was also her birthday a few days before, I decided to make her something in class this week. After a brief introduction to the sewing machine I was using and the software, I was off to importing my design and choosing my patterns and colors. Here is the design as I was choosing the patterns and trying to pick some colors.

2015-04-21 15.32.05


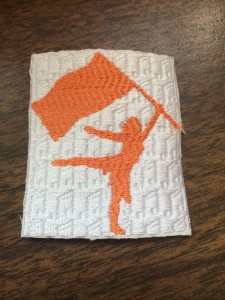
Before I tried the intricate design with the lettering, I did a test run of a smaller scale version. I should note why there is a girl holding a flag…my roommate is on the Marching Illini Color Guard, and is a returning captain for the upcoming season. Anyways, here was the test run and some of the process.

2015-04-21 14.28.55 2015-04-21 15.00.53      2015-04-21 15.23.06


I was really excited that there was a pattern of music notes, and I loved how it looked in the background. Since the smaller scale one was quick and easy, I tried out the one with the letters added on.

2015-04-21 17.16.24

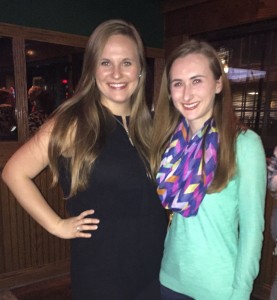
I was so happy with the results! I had a little trouble with the letters, but I didn’t have a lot of time to perfect it because I had to go meet my roommate and show her what I made! The main issue I was having besides the loose thread between the letters that I needed to cut off, was the bobbin thread got pulled through for some of the letters. So I ended up going over a few parts to correct the problem. I wanted to go over the blue letters again, but I was already running late by correcting the silver letters. But it turned out that my roommate loved it and was not expecting it at all! She wants to sew the patches onto her duffle bag for this season! Here’s a picture of us reunited.

2015-04-22 22.58.20

I had a great week in class and with her. I’m so glad I got to see her and I can’t wait to see the patch on her duffle bag. I may have requests from the rest of the team so they can have matching ones. I hope that I can return to the Fab Lab after this semester for fun projects like this.

Update!

This week was a work week for everyone. We spent our time making some progress on the many individual and group projects going on for the end of the semester.

Group Semester Project

I talked with my group formed from an event called the Make-a-thon that happened last weekend. We are planning to continue the project past the scope of the event. Here is an explanation of where we are at this point:

During the Make-a-thon we came up with the idea to have a pill box hooked up to an arduino that could sense when you take the pills out. The goals was to set up some kind of alarm system that would alert the user when to take their pills.

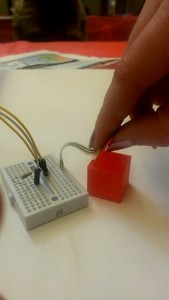
We ended up with a semi-working prototype that included a pressure sensor. We had the sensor working perfectly with some simple coding. And we decided to quickly 3D print a small box to represent one of the days of a 7-day pill box.

Here’s what our prototype looked like:

2015-04-11 16.38.18Not too fancy, but we liked the idea and learned a lot during the event.

Since we didn’t stay overnight at the Make-a-thon we didn’t go into detail how the alarm system would be hooked up. We had the readings from the pressure sensor coming in, but we didn’t know how to send that information anywhere to make an alarm.

We are looking to update our prototype in the coming weeks by making a complete 7-day pill box and trying out multiple light sensors since we were limited to only the one pressure sensor. We may even laser cut a press fit pill box, but we are faced with a bit of a challenge with the lid. Watch out for future posts to see where we end up with our idea!

Individual Semester Activity

This week I also worked a bit on my individual semester activity. Over the past few weeks I have been learning about converting medical data such as CT scans or MRIs into a 3D printed object. I have run into a lot of problems, but I have learned so much.

The coolest thing I learned was that there is a community of people out there that do this already. It’s a small community, but what they have done so far is amazing. Here is a website I found where they share their files, write blog posts, and answer questions in a forum regarding anything to do with biomedical 3D printing: http://www.embodi3d.com

Something I have noticed from my research is that the files I need are very rare. Medical data is not readily available to the public. I have asked around and searched all around the depths of the internet, but everything I have stumbled across is too complex or just not what I’m looking for.

Also, I was hoping to work with a human heart scan, but every file I have tried to edit has been impossible to get to a printable state. Here’s the closest I got:

Screen Shot 2015-04-14 at 9.32.18 PM

And this was after a long process of cleaning! So, you can tell that this is not an easy task.

At this point I am either going to print one of the ready-to-print files from the biomedical website or switch over to another body part…basically anything but a heart.

When I first was learning how to edit files I tried out a skull, which was super easy and probably was printable with a bit more editing. Here’s that file:

Screen Shot 2015-02-26 at 2.08.30 PM

Bones are much easier to work with! I knew that a heart would be a challenge, but it was way more than that. It was a nightmare!

I’m going to play around with files from a friend’s MRI scan later this week and see if I can work with her data. I am super excited that she is allowing me to use her MRI and I hope I can print her something! She’s a medical student, so she would love to have a 3D print of her brain. We’re both super excited to see what I can do! So be sure to keep an eye out for any progress with this project.


Fab Lab – Week 2

This week in the Fab Lab I learned about arduinos. I was a little nervous at first because I didn’t know anything about them or where to begin in order to code them. I have taken an introductory computer science class, but it was awhile ago and I assumed the coding for arduinos was going to be harder.

I was completely wrong! Arduinos were nothing to be afraid of. They are very beginner friendly and a lot of the coding is available online.

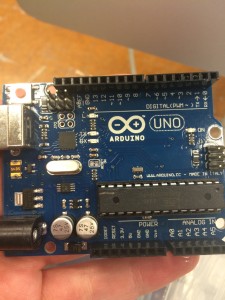
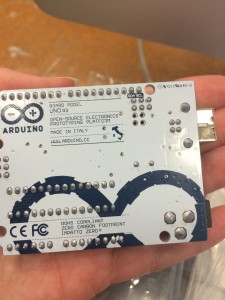
Here’s an arduino for anyone who hasn’t seen one before:

2015-04-07 14.16.35 2015-04-07 14.16.45


We started with the simple blink program. As you can probably guess, a small light on the arduino blinks when you run the program.

It wasn’t too exciting, but it was a way to learn the basic steps of uploading a few lines of code to the arduino to make it do something. We also ran the fade code to see the same light fade on and off.

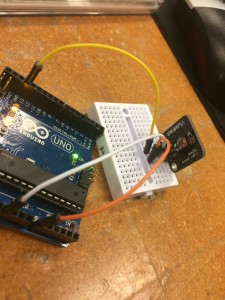
The next step was to connect it to a led light and run a similar code sequence to make it blink or fade. We used a breadboard to connect all the wiring and the led.

Here’s the completed sequence:

2015-04-07 15.16.09

Not too complicated. It kind of reminded me of taking physics in high school. The arduino was like a power source and the wiring connected to the light to complete the circuit. Of course there was no blinking or fading in basic physics circuits.

Next we learned how to use a light sensor. It is a very similar process as hooking up the led, but the output isn’t a light, it’s a bunch readings that show up on the arduino software.

Here’s the setup for it:

2015-04-07 15.54.13

I messed around with different light levels to see how high and how low I could get it. A reading of 0 means no light, so I covered the sensor completely so no light can reach it. And I was able to get a reading of just over 1000 when I flashed a light directly on the sensor. The room lighting read between 500 and 700 depending on the angle of the sensor to the room lighting.

We also were able to connect a led to the light sensor and told it to turn the light on or off depending on the light level (sorry I don’t have a picture of that setup – basically, imagine the last two setups on the same breadboard).

Overall, the main thing I learned about arduinos is that there is a lot of trial and error!

Just with the coding part, a lot of things can go wrong. I didn’t do much coding myself because a lot of it was online and easy to understand. But when I tried to add things in or change parts of the code, I ran into some difficulties.

Also, the arduino setups take a lot of trial and error as well. The good thing is wiring an arduino incorrectly doesn’t hurt the device in any way. I was very glad that I couldn’t break the device by running crazy programs on it because it meant that I can play around with it. Messing up was frustrating, but also expected.

I learned a lot in this class session and even incorporated some of it in my semester project, which will be posted soon!

Fab Lab – Week 1

These next couple weeks we are venturing away from the Maker Lab and get to learn a bit about the variety of things that the Fab Lab has to offer. We split into three groups for the different sessions, and my group got to start in the front area of the lab. This area has computers available to design products using any of the available software they have installed, multiple 3D printers (that we won’t be using at all since we have access to them in the Maker Lab), a laser engraver, and multiple electronic cutters.

Laser Engraver

We first focused on the laser engraver, a hot spot in the lab. We were given small journals that we got to design a cover for. After a brief introduction to the Inkscape software, we were off to designing. Our instructor for the session, Jeff Ginger, set up the laser engraver and showed us the safety precautions that were in place to prevent fires.

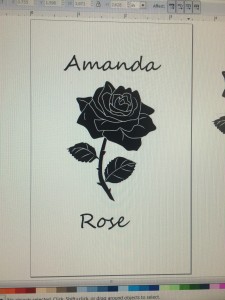
Here’s what I designed on Inkscape and my completed journal cover:

2015-03-31 15.11.572015-03-31 15.11.39 I am very happy with how my journal turned out, and I am so glad I got to watch it be made. We learned the difference between raster and vector as we watched. Raster takes off a layer of the material, which is what we did to the journal cover, and vector cuts right through the material. I hope in the next couple weeks we can see the machine vector something.

Electronic Cutter

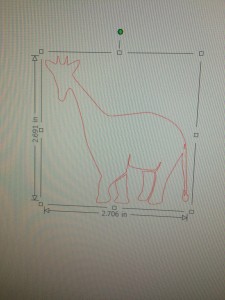
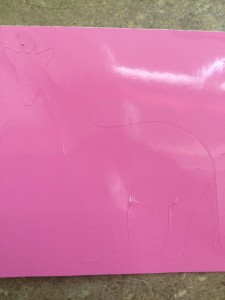
Next we learned about the the electronic cutters. We continued using Inkscape to learn a few more of its functions as we designed our next project. This project was to cut out stickers from sheets of vinyl. We chose two animals and learned how to morph them together to create one creature. Unfortunately, I wasn’t too creative in my choices and went with an elephant and a giraffe. The next step was to bring our design into the Silhouette Studio program. We learned how to set our designs up to send it to the cutter.

Here is my design and cut out sticker:

2015-03-31 16.03.00 2015-03-31 16.03.15


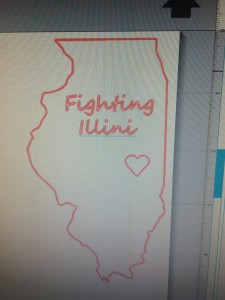
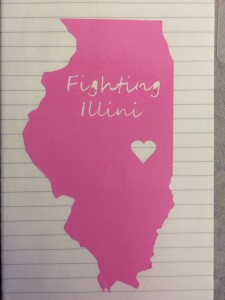
I wasn’t too pleased with my design, and I never even peeled the sticker off. (It was pretty lame compared to some of the other creatures that my classmates created.) But I decided with the remaining time left of the session that I would print out a better design that I would be proud to show off. I went with a school spirit filled design. It took two tries to cut properly because I did not set up the machine correct the first try, but I am very pleased with the results!

Here is my design and sticker:

2015-03-31 16.36.392015-03-31 17.08.44

I placed my sticker in my journal so I could keep them together. I am so glad that I got the chance to use the laser engraver and electronic cutter this week. I learned a lot and had a great time in the lab. I can’t wait to see what next week will bring!

Week 7 & 8: 3D Scanning at Beckman & Geomagic

During these two weeks we learned all about 3D scanning and an editing software called Geomagic. We had already done a bit of 3D scanning a few weeks ago when we made our busts, but this was a completely different process.

First off, Travis Ross, our tour guide and guest speaker led our session in Beckman and taught us how the basics of Geomagic. We split up into groups because of room size constraints in the lab with the 3D scanner we were working with. I was in the second round group.

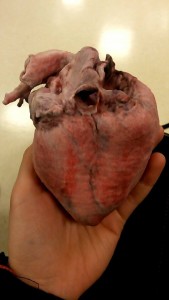
I started on the 4th floor of Beckman and got to see a bunch of 3D printed objects using a variety of materials not used in the Maker Lab. We got to compare the materials and really see what other 3D printers could do. My personal favorite was the heart print.

2015-03-03 14.43.03


The heart looked so realistic and opened up my eyes to the capabilities of 3D printing.

I’m working on a project right now about medical uses for 3D printing, and this heart may come up again so look out for that post in the coming weeks.


During my time on the 4th floor, I also got to watch a small scale 3D laser scanner in action. It was extremely slow, but it gave us a good idea of the larger scale one we were going to see in the basement. Also, we were told that the smaller scanner could be more useful for certain scans do to limitation on the larger one. The main limitation was surface type. The larger scanner could not process shiny material very well, but the smaller one could.

Moving down to the basement where the main purpose for the trip was intended we got to hear all about the larger scanner. The main component to the scanning process was the platform that the object sits that is being scanned. It was on a rotating disk to reach all side angles, and was capable of tilting up or down to see any missing spots.

When I got down to the basement, there was an object already being worked on that I’m sure the owner (Arielle) will write about in her post. We ended up focusing on that scan the whole time I was in the basement. This is where we were first introduced to the editing software, Geomagic. Once the object was successfully scanned in at many different angles, Geomagic is used to cut out unwanted parts of the scan (like the table it rests on and any components holding the object into place). Side note: every individual scan that is taken must be edited, so the goal is to get the whole object in one scan.

After editing the unwanted parts of the scan, there were some holes that needed to be filled. Most of the time, the holes were minor and could me manually filled without any issues. But sometimes, depending on the object being scanned, there are areas that the scan cannot reach and must be estimated. Travis ran into this issue with the object he was scanning, so he attempted to rotate the platform to a specific angle to try to reach a bit more of the object.

The next time we saw Travis was in our home, the Maker Lab. During this time we were directly using Geomagic on the lab computers (also the main reason why I don’t have any pictures for you this week, sorry). Travis taught us how to trim or fill parts, how to smooth a surface, and how to divide the object into pieces for further editing. Surprising most of his instructions were pretty easy to follow and I was able to do a lot of the things he was showing us how to do. The hardest for me was the dividing up the object because I got a bit behind and missed a step and didn’t get a chance to catch up. But overall, I can say I know how to use some basic functions of Geomagic after this experience.

Again, stay tuned for more with the 3D heart! And apologies for the lack of pictures.

Week 5 & 6: Fusion 360

I’ve learned so much in the past two weeks. Week 5 was an introduction to Fusion 360, a super cool software that can be quite complex even with step-by-step instructions.

The workshop I participated in to learn Fusion 360 was great. Our main task was to create a model of a lamp.

Here’s a progression of that process:

Screen Shot 2015-02-17 at 3.45.48 PM Screen Shot 2015-02-17 at 4.24.11 PM Screen Shot 2015-02-17 at 4.44.22 PM Screen Shot 2015-02-17 at 4.52.55 PM


My lamp turned out pretty well in the end. It took some time for me to figure out a lot of the steps, but after a lot of trial and error I managed to get to the final product. I definitely struggled through it and got frustrated a few times, but I never gave up.

After that workshop, we were assigned to try to create a new design on our own by following a tutorial on youtube. I chose to try out some headphones.

Here’s the headphones I ended up creating:

Screen Shot 2015-02-21 at 6.28.54 PM

I ran into some major problems with this design even though I was following a pretty straight forward tutorial. I messed up one little step without realizing it would cause problems later, and I didn’t know how to fix it without undoing all the progress I had made after that step.

Basically, the best way to explain the mistake was that there were two faces merging together and they were somewhat overlapped, which is not good. Here’s what it looked like after I “fixed” it:

Screen Shot 2015-02-21 at 6.26.39 PM

Yeah, there’s a lot of extra faces there. I had to mess around with that for a long time until they weren’t overlapping anymore. I did try to use some functions like smoothing and merging faces, but I couldn’t get it quite right so I mostly stuck with the simpler steps until it looked decent and wasn’t overlapping.

After going through that mess I was very frustrated with Fusion 360 and just wanted to move on. But then week 6 came and we were supposed to 3D print our design. I did not want to print my headphones, so I decided to try to make a custom design with no tutorial.

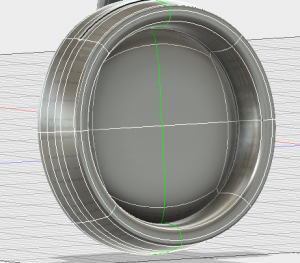
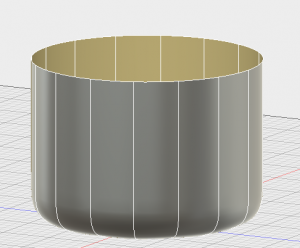
I chose to try to make a candle holder since I had recently purchased a couple candles. Well, Fusion 360 didn’t get any easier for me. This is how far I got after a long hour of attempts:

Screen Shot 2015-02-24 at 4.11.28 PM


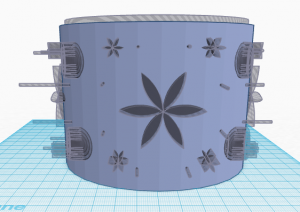
I hated it. And I really wanted to print something, so I moved over to the simpler modeling option, tinkercad. I made this in about 30 minutes with no issues at all:

Screen Shot 2015-02-24 at 4.09.49 PM

But then I thought why not try to use a function in Fusion 360 where I import what I made in tinkercad and edit it more in Fusion 360.
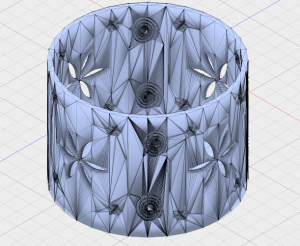
This is what happened as soon as I uploaded it:

Screen Shot 2015-02-24 at 4.10.13 PM

Yeah…there was way too much going on and I just wanted a simple candle holder. So I took the original tinkercad version and printed the design just like in week 4 with the bust I made of myself.
Screen Shot 2015-02-24 at 4.09.30 PMAnd here’s the final product:

2015-02-24 18.58.19


My lesson over the past two weeks was a big one. I learned that I am not good at Fusion 360. I need a lot more practice! It is so fulfilling when something I designed is printed, so taking it to the next level by printing something designed in Fusion 360 would be incredible.


Week 4

This week’s class was my favorite so far. I got to directly use a 3D printer! I’ve watched things being printed in the lab before and recently learned how to make designs, but this week I did the whole process in a few hours.

We started with learning about scanning objects. And then we found out the project for the day was to 3D print our own heads! I was excited to get started.

Scanning people turned out to be quite difficult. For example, my nose would not properly scan in unit about the 5th try, but then my chin wouldn’t process, then the top of my head. Basically, scanning requires a lot of patience.

It was fun to see how this technology worked. I never realized that it was possible to digitalize an object with one device. Plus, it was relatively easy to use in terms of the editing process. Once I finally had a scan that had all of my face in it, the flyaway hairs could be virtually cut off in seconds.

The next step was to take the file from the scan and edit it a bit more in tinkercad. This was quick and easy for me because after we were first introduced to the website a few weeks ago I played around with it until it a lot. I put a base under my scanned head to create a bust of myself that could now be printed.

This is where I got really excited. I even took pictures! So once the editing in tinkercad was finalized, the file was imported into the makerware program that directly translates to the makerbots in the lab.

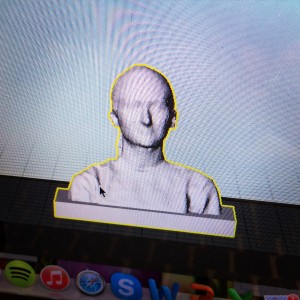
Here is my bust in the MakerBot program (sorry for the poor quality):

2015-02-10 15.37.54-1I was so excited to print my head that I went straight for the first available machine while others stayed in tinkercad to edit fun things onto their bust. While I waited for it to print, I went crazy and posted this poor quality picture from my phone taken of my laptop’s screen to every social media platform. (Don’t ask why I didn’t think to take a screenshot.)

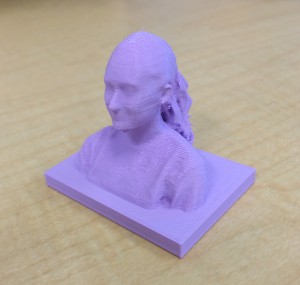
Finally, after what seemed like hours even though it was probably only 30 or so minutes, my head was printed!

Here it is:

2015-02-10 16.40.23-2

I was thrilled! And, again, posted this picture on every social media platform. Including snapchat which is how I communicate with my roommate who’s abroad in London right now. (So my print was seen by people across the world!)

The rest of class I helped out others with their editing in tinkercad and got to admire my completed project. Later I sent a picture of me with my bust to my parents and directly to my friends who I was most excited to share it with.

Here’s the pic of me with my mini-me:

2015-02-10 17.27.40

As you can tell by the picture, my print was very tiny. But I’m so happy with how it turned out and it made me even more excited for what projects are coming next in this class.

As Professor Rindfleisch (the guest speaker of the week) mentioned, there’s a sense of pride in making things with your own hands. I agree that after this experience I feel much more accomplished now that I have gone through the whole scanning and 3D printing process.


Week 3

This week’s class was run by Design for America (DFA) a group that promotes designing to create an impact. I had never heard of this organization before and I had no clue what to expect from a Design Thinking Workshop.

As soon as we formed groups we were given various art supplies including modeling clay, pipe cleaners, popsicle sticks, sharpies, and plenty of post-its. Everyone was excited to relive their childhood through these items to hopefully create something fun.

At the start of DFA’s presentation almost everyone had molded their modeling clay into some funky shape and was anxious to know what was coming next. I know I was.

Our first activity was a warm up to get our minds ready to be creative. We played a fun game that was very difficult to explain but quite easy once we got the hang of it. Basically you had to shout out random things and act it out. The point was to create a scene and then later recreate that scene, but we pretty much failed because we couldn’t remember past the first one.

Later on we were given a scenario that included a variety of distracted drivers and we used this for the rest of the workshop. We started by interviewing members of our group regarding distracted driving. Then we finally got to put some of our supplies to use for the next task. We took all of the information we collected from our interviews and wrote down all the important ideas onto post-its.

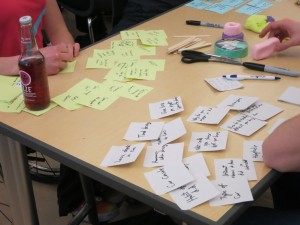
Here’s some of the post-its from another group:

10835324_10152958424506084_2076016294675823301_o

At first I had no idea where this was going and where the post-its were going to lead us. I went along with it and tried my best to use the tools and examples they provided us to come up with my own ideas.

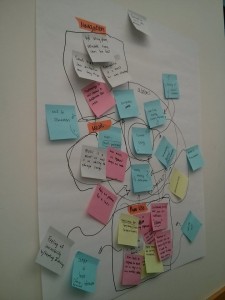
Next we talked with our groups and tried to organize all of the things we wrote down onto one sheet of giant post-it paper. Pretty soon our papers were filled and a little chaotic.

Here’s what ours looked like at the end:

2015-02-04 01.01.37


Yeah, we know, too many arrows and lines. Trust me, we knew what it meant.

Eventually we went through a process of adding more post-its onto more giant post-it papers that eventually led us to a solution to the over problem of distracting driving.

Oh, and in the middle of all the post-its we played a little game that was supposed to get our creative juices flowing even more. The premise was to have one person have a treasure box and the other person asks what’s in the box. This led to a lot of strange discussions and was a lot of fun. Since I am not a particularly creative person I built off of my partner’s ideas to try to push myself a bit.

The last task, and the most anticipated part of the day, was the prototype designing of our solutions. For my group this was a lot more discussion about how realistic our idea was, but we were eventually directed to just build something even if it’s not feasible cause that’s not the point. We need to have bad ideas in order to eventually have good ideas that lead to real products.

This was probably the hardest part for me because I like to be realistic about things, not just make a bunch of failed prototypes. But let’s be honest, no one could have come up with a 100% successful idea in a workshop that’s only 3 hours long. And even if we did have a good idea, there were always going to be flaws with it.

I learned a lesson a valuable lesson that day about designing. It’s not easy!

Having gone through the process of designing following the guidelines that DFA directed us through, I will take the tools they offered and transfer the skills I learned into future projects in the course and beyond.