
The embroidery workshop at the CU Fab Lab was a lot of fun. I have a few suggestions for picking your design. The embroidery machines handed thicker lines better than thin ones. I was advised to stay away from letters or writing in my design, however I already had my heart set on making my yoga studio’s logo. As you can see below, you can print letters and they can come out well, but I had to spend a lot of time rendering the image in the SewArt software. I hand to increase the thickness of every line by hand. There is both a free hand tool and also a line tool that I used. After you complete your patch, they will give you a sticker that you can iron on to the back of your patch so that you could iron your patch onto whatever fabric you like after. A word of caution: don’t hold the iron straight down on the patch for too long, it will burn your patch! You also don’t want to place the iron directly on your threads when you iron your patch onto something; it can burn your design. A few other side notes:
- The machine is limited in length to ~4 inches.
- The border of your patch will fray if it is not stitched, so you can either stitch a border (which is best done in your initial design) or you can hem the ends like I did with my patch.
Here is a picture of the patch that I made:
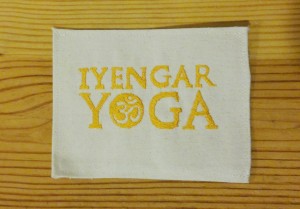
My studio loves the patches. I hope to make a few more to give out to other Iyengar yoga enthusiasts and friends.
I also stumbled upon this awesome bag that Jessica is making:
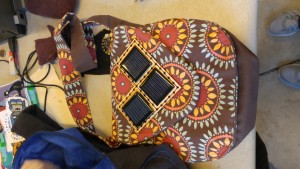
Those black panels are solar panels and it has a USB charger inside so you can charge your phone! This would be a GREAT travel bag!
https://twitter.com/GwendolynDerk
That’s so cool that you can iron your patch to something else after you’ve created it. I’m really excited to try my hand at creating my garment with my own logo on it. Hopefully in the future, we can also gain enough knowledge to create a garment with a practical application as well.
Hey Gwen,
This was awesome to read about. I didn’t get to spend any time at the embroidery workshop so this gave me a lot of insight! I would’ve never known that lettering was tricky when it came to thickness. Did adjusting it after being printed take a long time?
Plus, I agree the solar powered bag would make a great travel tool! Especially to charge your phone while you’re out and about exploring.
Hi Gwen,
Awesome post! I saw Jessica’s bag as well, isn’t that crazy, I would love a bag like that. Maybe something that can charge my laptop as well, haha.