While many services and accounts expire after graduation, some services will continue for a period of time. The Help Desk has compiled a list of services you can still use for a while after you leave the iSchool. Make sure to review it over the summer and save any information from these services before the Fall. 
Tag: outlook
Tech Tip of the Week: Safe Senders in Outlook
Have you ever missed an email because it was sent to your junk mail folder? You can avoid this issue by ensuring your contacts are listed as Safe Senders in Outlook. Adding contacts to your Safe Senders list depends on the version of Office you have on your device. Microsoft has detailed instructions on how to add contacts depending on the version of Office you use. The Help Desk can help you with any questions you have about utilizing Safe Senders.

Tech Tip of the Week: Graduation!
Records Service Center Transcript Unit
https://registrar.illinois.edu/academic-records/transcripts/
University of Illinois
901 West Illinois Street, Suite 140
Urbana, IL 61801
Office hours: 8:30 – 12, 1 – 5 Monday through Friday
(217) 333-9778
transcripts@illinois.edu
Tech Tip of the Week: Scheduling Outlook Emails
Have you ever been writing an email only to realize that it’s the middle of the night and you’d rather not have the email be delivered at that time? This week’s Tech Tip covers how to schedule emails in Outlook!
If you use the Outlook application here are instructions on how to schedule emails.
If you use Outlook in a browser you can still schedule your emails! After composing an email you will have to click on the carat next to the Send button and then you will have the option to Send later.
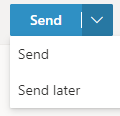
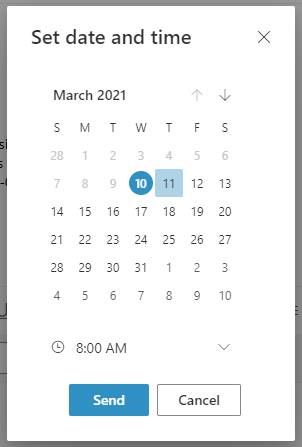
After clicking on Send later you will be directed to a calendar where you can then select a date and time to send the email. Once selected you can click Send and your email will be scheduled!
Tech Tip of the Week: It’s a New Semester!
Welcome to the new semester!
This week’s Tech Tip covers some of the most relevant and helpful resources and tips to prepare you for the start of the semester.
- 2FA
- 2FA, or 2-Factor Authentication uses your smartphone to keep your university accounts secure.
- Learn more about 2FA here.
- Outlook
- You can access your university email in Outlook once you have claimed your NetID.
- Learn more about Outlook here.
- Moodle
- Moodle is where you will access your course pages. Each course will look a little different, but this is often where you will find your syllabus, assignments, and grades.
- Learn more about Moodle here.
- Zoom
- We use Zoom for our synchronous online classes.
- Learn more about Zoom here.
- Join us for our Zoom Workshops here.
- Wiki
- The iSchool Wiki is a great resource for information about the iSchool. The wiki includes information on student resources, technology resources, instructional resources, research, human resources, communications resources, and more!
- You can log into the iSchool Wiki here.
- VPN
- A VPN can be used to gain access to some on-campus resources from off-campus.
- Learn more about the free Cisco AnyConnect VPN here.
- Box
- Box is an online cloud-based storage system that is useful for collaborating and sharing files and for accessing files digitally.
- Learn more about Box here.
Follow us the rest of the semester for a new Tech Tip each week!
Tech Tip of The Week: How to Quickly Move Between Tabs
Working on a project and opened way too many tabs to navigate? Finding it difficult to switch between the calendar and inbox in Outlook? This week we have just the quick tip for you!
You can move between tabs in a browser quickly by pressing “Control” if you are using a Windows computer, or “Command” if you are using a Mac computer, and “Tab”. This shortcut will take you to the next tab to the right.
You can also move directly to a specific tab by pressing Control/Command + [insert tab number here]. The tabs are assigned a number with the tab open on the far left being number 1 and the numbers going up as the tabs open to the right.
This tip can also be used in the Outlook application (not on the website) to switch views. Control/Command + 1 will switch to the Mail view, Control/Command + 2 will switch to the Calendar views.
Replacing the number with 3 will show the Contacts view, 4 the Tasks view, 5 the Notes view, 6 the Folder list, 7 the Shortcuts, and 8 will open the Journal.
Tech Tip of the Week: Forwarding your Email
Time for this week’s Tech Tip!
Graduation edition!
Graduation is just around the corner. Are you ready? A good first step, before you take that first step on the commencement stage, is forwarding your Illinois email account.
When you graduate, you will be able to access your inbox for one more semester. If you want continued access to your email, set-up forwarding to a non-Illinois account! If anyone sends you anything on your Illinois account, you’ll still be able to see it.
Check out how to get that set-up here.
We will continue to provide you with tips regarding accounts, services, and what to do after your big day.