Class Wrap-Up

This Monday we ended our fantastic class with our portfolio presentations describing our semester-long projects. Elaine, Harina, and I were able to present to the class our GlassFlex design. I knew from the beginning of the semester a lot of people didn’t really understand our concept, nor did they think it would be useful in comparison to what other people were creating. But I was very pleased with the responses we got from everyone, such that not only would people be willing to use the product but actually purchase it as well!

The idea stemmed from a brief discussion at the beginning of the semester about the power of the Maker Movement, in finding small and subtle solutions to every day problems based off of what we could come up with in our heads. We were shown previous things that former students in the class had made. One that really stuck out to me was the dynamic door stopper, that could hold the door open at any angle. This idea wasn’t as glamorous as building an artificial intelligence robot or anything having to use arduinos period. But I felt a connection to this idea that it was something you didn’t even know you needed until you realized you were living without it. This shaped how I thought about what my project would be for the semester.

After diligently trying to come up with some sort of idea, I realized as I was lying in bed how uncomfortable I was when trying to carefully place my glasses against my pillow. And then the idea for GlassFlex was born. I spoke to Vishal about my idea and he mentioned that people have been finding uses for a flexible filament, but not much experimentation has been made with it. With Harina (a fellow glasses-wearer) joining the team, she was able to do a good amount of research when it came to understanding the variety of different flexible filaments available. The one she concluded would be best for our project was Ninja Flex, which worked out awesome. Elaine (another fellow glasses-wearer) joined the mission and assisted in coming up with some prototype designs.

The first design we had created was a simple hot dog-style piece that fit on the brim of your glasses. It was too small, uncomfortable (because we hadn’t ordered the Ninja Flex yet so we used traditional plastic filament), and fell out easily and needed to be held in place. But that’s the beauty of trial and error!

The next design we made expanding upon the first one, with the opening having a little slit to keep the edge of the glasses from moving out of place. This was also quite hard and uncomfortable, as we still weren’t able to use the Ninja Flex. Even if we were able to use the flexible filament, we decided to keep expanding upon our models.

The third design was the first model we actually made with Ninja Flex. We had also made it taller for comfort, but tried using 20% fill density which was not sufficient enough for the level of comfort we were trying to achieve. So we kept on.

The fourth model was made wider instead of thicker, thinking that would be easiest to absorb the pressure from the pillow and keep your glasses in place. However, this was not the case. And it once again became an issue with the fill density. We had avoided increasing the density just because of the time it takes to print a model with anything more than 20% fill density. Printing with flexible material requires slower printing speed as well as a cooler plate temperature. All of these factors simply increased the time it takes to print exponentially.

Our fifth and final model we had decided to not only change the design but also increase the density to 50%. This model expanded more so upon our third prototype by fully enclosing the opening at the top so that the user would slide his or her glasses frame through the hole and then use the GlassFlex. This worked tremendously well. The 50% density was able to absorb the pressure from the pillow without shifting your glasses out of place, and the enclosed edge allowed for the piece to not move out of place. This was the most comfortable and successful model we had created.

Because of this class, we have been able to expand upon our thought process when it comes to fixing a problem in our every day lives. Through the sessions with Design for America, lessons in the FabLab, and lessons to understand software on how to make and mold products, we have been able to create something beneficial to all glasses wearers.

To see our presentation slides, click here.

Thank you for a great semester!

2016-05-01 23.51.23

Mood Shirt documentation

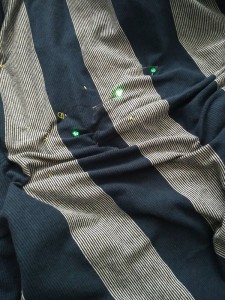
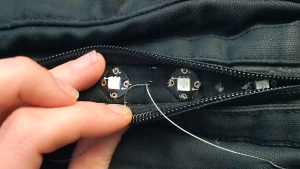
Our “mood shirt” is a representation of how the younger generation can access newer technology. Saadman and I took inspiration from the Champaign-Urbana Make, where the theme was wearable technology. We decided to produce a prototype that reflected a user’s “mood” or in this case the fluctuation of temperature and moisture in a user’s body. We connected an analog temperature and moisture sensor to an Adafruit Flora which was then connected to programmable LEDs. The Adafruit Flora is a version of the Arduino but specifically designed for wearables. With open-source software available, we were able to find code online that could produce the patterns of lights that we wanted. Within a certain range, the LEDs would flash any pattern of red, green or blue. All in all, this was an eye-opening project to realize that technology can be intertwined in any aspect!

Project

3D Printing Prosthetics

Prosthetics have become an increasingly popular field in the past decade, especially with the advent of 3D printing. This class, BADM 395 Digital Making, has provided students the tools and knowledge to understand the process of producing prosthetics. The process is fairly simple, but the results are revolutionary. The first step would be to utilize a CAD (computer-aided design) software. Such software is mainly based on geometric shapes and structures, thus prosthetics in particular can be designed through freeform and sculpting tools to structure the design to each unique individual. Fusion 360 by Autodesk includes freeform models and mesh modeling, both of which creates custom designs that conform to the surface of a human’s skin. After creating a base shape, Fusion 360 allows the user to use existing geometry to create forms using T-Splines. T-Splines can form curves and surfaces specifically towards a unique surface, and also will allow the prosthetic and the surface to connect effortlessly.

Another skill we learned in BADM 396 was the use of scanning utilizing both the Sense Scanner and the Structure scanner compatible with the iPad located in the Illinois MakerLab. This process is called reverse engineering, by scanning the surface of an object and then programming it with CAD software. In terms of prosthetics, this would collect data directly from the source, instead of measuring it without precision. These scans are compatible with existing CAD software, and we used MeshMixer in our case. Meshmixer is another design tool that uses a different method of displaying surface resolution, which is through dynamic triangle-meshes. A triangle mesh is a group of triangles rather than software that reports individual triangles. This method is more efficient because the software does not have to process every corner of every individual triangle. Say, for a prosthetic hand, after the surface of the body is scanned, MeshMixer picks up this surface, and the user can design a connecting part.

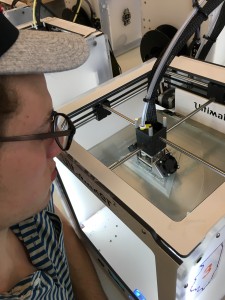
After designing the piece in CAD software, actually 3D printing the prosthetic is the next step. The 3D printer used in the MakerLab are the Ultimaker and Ultimaker 2+. A “How-to-build-a-3D-printer” workshop was held at the BIF this semester, which broke down the parts of a sample Ultimaker 3D printer. The way a 3D printer works is that it has a design for every cross section, and it layers on the object until you receive an entire 3D piece. For prosthetics in particular, the filament is the most important part. The standard type of filament is PLA, which stands for polylactic acid, and it is compatible with the Ultimaker 3D printer. PLA is biodegradable and is generally quite easy to work with.

A newer type of filament called NinjaFlex is made from thermoplastic polyurethane. For example, the “Knick Finger” is a 3D printed partial finger replacement. Nick Brookins, an engineer at Akamai Technologies, suffered from an accident that left him with an amputated finger. The e-NABLE community, those who collaborate to make 3D printed hands free, inspired him to produce a prosthetic finger for himself. Ultimately, this add-on to his hand has become to be very beneficial and easy to use on a daily basis. Many a times, amputees possess a certain mindset where there is PTSD and pain around the area where they were injured. Prosthetics can protect these areas and it is mentally calming as well.

Conventional prosthetics are often ill-fitting and are not comfortable for the user. 3D printed prosthetics allows for a much cheaper and more comfortable option. The conventional prosthetics process begins with a mold from plaster which makes the cast. This material is very uncomfortable and also does not have a nice smell. All in all, 3D printed prosthetics are a much better option, but the main con that is present is that it is not yet popular and accessible to all. But, technology always progresses with time, and always pushes the next boundaries.

Presentation


Project Showcase: The Adafruit Flora, What We Made From It and What’s Possible

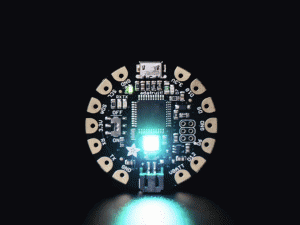
The Adafruit Flora is a new addition to the foray of microcontrollers out in the market now, alongside Arduinos and Raspberry Pi’s.

ezgif-982726395

The Flora is made specifically to be compatible with wearables, with holes drilled into the contacts where conductive thread can be sown into to create circuits. This is one large leap in the steps that have been made to make wearable technology affordable and widespread.

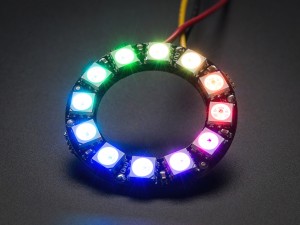
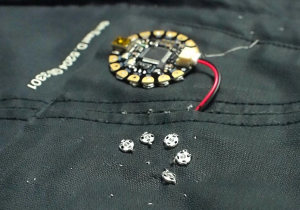
Along with the Adafruit Floras have come their NeoPixel RGB LED lights and a plethora of resistors and specialized sensors that are water-resistant. Below is a round band of 12 RGB NeoPixel LED lights that are individually programmable.

1643-01

The Flora has many uses, and below is a showcase of all the things that can be done with them, beginning with the final project that Abhiniti Mahendrakar and I made:

13138755_10153756148214671_8665567037327579363_n

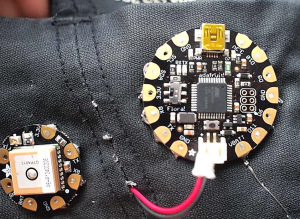
A GPS Jacket:

flora_Screen_Shot_2013-01-09_at_1.29.05_PM

flora_Screen_Shot_2013-01-09_at_2.19.24_PM

flora_Screen_Shot_2013-01-09_at_2.24.49_PM


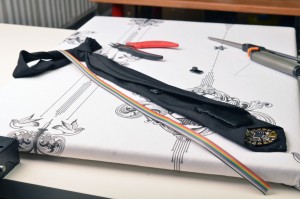
And a tie that lights up to the amplitude from a microphone.

flora_ampli-tie-21

Now while those may be entertaining, and some useful, this is just an introduction to how small we can make these controllers and the processing potential they hold for us in the future.


Semester Wrap-Up

The decision to take this class was one of the best decisions I have made in my college career. Week in and week out I found myself inspired by a new piece of technology that I had never heard of. Even more inspiring was the way these technologies were making the world a better place. I think it is incredible that machines like 3D printers can be applied to so many fields to save lives and make the world a better place.

When deciding on my semester-long project, my head was all over the place. I considered helping with the smart glove (fantastic idea), or pursuing some sort of business-related application so that I could sell my idea. Instead, I settled on solving a different need. Jack Carlson and I spent the semester working on a light-up, fully functioning and wearable DJ-helmet, similar to ones used by professional DJs such as Deadmau5 or Daft Punk.

File_000File_000-2

While this idea sounds ridiculous, there is a reason why these artists choose to perform the way they do. Anonymity is a huge part of art in the 21st century, as many artist choose to “make art for arts sake”. Additionally, many performers choose to obscure their identity out of embarrassment. I would say that I fall into the second category. This semester, I entered a DJ competition at a local bar. I knew that my performance would benefit from light effects and added mystique, so my friend and partner Jack had the idea to create a DJ mask similar to the ones shown above. While the mask was not ready by the time of my performance,we still were able to create some prototypes that could be used by DJs in the future.

File_000

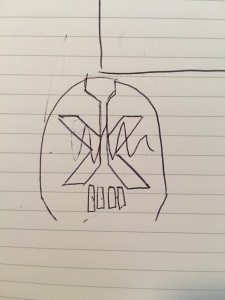
Our first step in the design process was laying out what we wanted the helmet/mask to look like. We sketched some front and side views in a notebook. We drew from many inspirations for the etchings on the helmet.

File_000-4

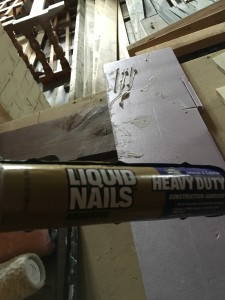
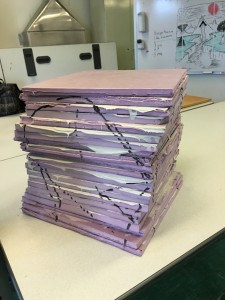
The outer, black part of the mask was designed with Darth Maul inspired insignias from Star Wars, and the red, inner part of the mask was taken from an album cover by the band the Arctic Monkeys. Next was deciding what materials to use. For the interior, Jack had the idea to use glue foam together into a large block, and then shape it with knives and cut out the middle so that a head could fit in. We glued the foam together with liquid nails, let it dry, and came back to the FabLab to check it out from day to day.

File_000-5 File_000-6

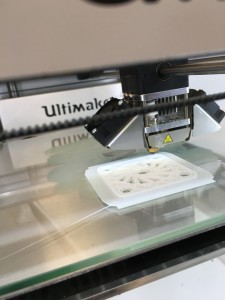
During the drying process, we rasterized and cut acrylic to form the red and black shiny parts of the mask. We also 3D printed ear and mouth holes for the mask.

File_000-3File_000-7

After that, we returned to the FabLab workshop to realize we had used to much glue, and that we would be unable to cut through the foam. Essentially, prototype 1 had failed. Our next idea was to buy a helmet from a costume store, and attach our pieces to that. while I have been away from campus, Jack has been working on putting all our pieces together. Hopefully we will have time to use arduinos to the helmet so that it will light up during a performance. I would say the biggest thing I have learned from this project is that like any tech-related project, it is an iterative and incremental process. At times, we worked too quickly which led to us making stupid mistakes. Luckily this is only prototype 2! Hopefully in the future Jack and I can collaborate on future creative projects and make them more effective and efficient.


Semester Wrap-up


Ran Jin & Jiaqian Claire Chen


Idea Inspiration

Jin Ran and I get our inspiration from a Youtube video in which Mike Francesa spilled soda all over the desktop during his radio talk show. As a naughty girl growing up, there were countless times I spilled my drink all over the place. I personally found it very easy to spill your drink when you are concentrating on other things, like when you are typing a report on your laptop. So we came up with this idea of adjustable can/cup/bottle holder that can fit container that of any size and that can even charge a cellphone. The designed main function is to hold the container stable on the desktop.

Initial Design

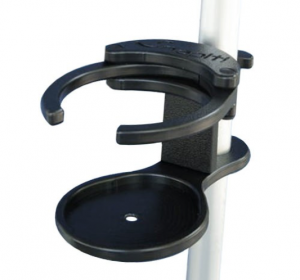
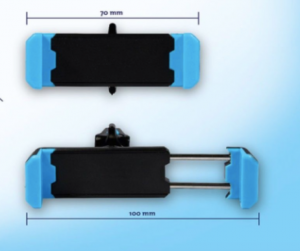
After exploring more about charging function and adjustable structures and considering our time budget, we decided to lower our expectation to design and print an adjustable cup holder that can fit most common-sized cans. We looked several existing products online (as shown below) and accessed their doability. For the first existing product, we were worried that if 3D printing out the sliding arms, the friction at the touching parts would be too big to allow the arms to slide out smoothly.  For the second existing product, even though it’s a very good bottom part that can fit a lot of different-sized can, we need a vertical supporting structure that can change corresponds to the bottom, and we didn’t come up with a doable idea and we decided to look for more designs.

455123


Design Process (C&R)

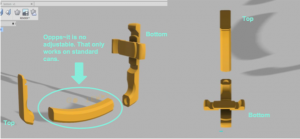
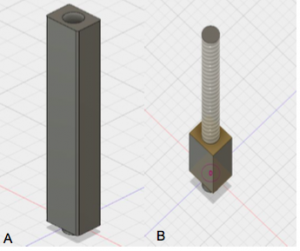
To create our own design, the initial step we did was collecting a variety of cup/can holder models from thingsverse.com. After analyzing the pros and cons of those projects, Clarie and I start to sketch the design on the paper. Later on, we transfer the final drawing to Fusion 360. The first prototype only works for standard size can because we ignore the large size drinks, such as Monster Energy or Arizona. Hence, we redesign the vertical holder part to be more adjustable so that it can fit any height of cans. Thanks to the suggestions from our classmate, we solve this problem with a spiral structure design. Part A applies for general size of cans, and depended on needs, Part B as a complement to adjust the height of Part A.  

IMG_1641[1]

ll9


Difficulties and Challenges

The most challenging work of completing this project is utilizing Autodesk Fusion 360 to design the model. We are the beginners to learn this brand new software, although the course offered two relevant workshops to help us get familiar with the interface. Particularly, in the beginning, we spend lots of time and efforts on creating and modifying models. Thanks to the collaboration feature of Fusion 360, we are able to work individually on each small part and combine the designs together. However, the shortcoming of this feature is mismatching the sizes or measurements when we work separately. Another difficulty that we confront is size differences between the design and printing versions. For example, the diameters of the joint part are 10 mm on Fusion 360, but the printed sizes are changed somehow because these part are either larger or smaller to fit together. Last but not least, during the 3D printing, we find that there are several failures happening; particularly, the shape of the vertical holder is messed up due to the need of support.


Alternative Design

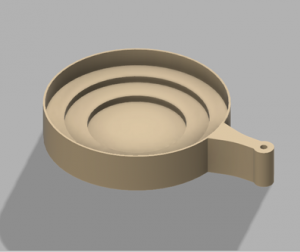
After printing out all the  component parts, Jin Ran and I explored more in the Fusion 360 software. We found Fusion is a very efficient tool to design simple but useful everyday designs. For instance, if you want to design a cup holder, you can easily create one that is good for three different sizes by just using the cylinder and extrude function. (See below) We human once to live in a way that whenever we need any tools we make them, now I think it’s a great time to inherent this spirit given the presence of 3D printing technology.

77

Summary

The goal of our project design is to build an adjustable can/cup holder which will give the users the best drinking experience. The design should be comfortable and user-friendly for daily usage. The project also tries to prevent the issue of freezing hands when people hold cold drinks. In addition, the temperature sensor works as a reminder to help the users be healthy. The major reason why adding the monitor on the can holder is that cold drinks decrease human immune system function according to health researches/studies. Furthermore, long term taking cold drinks shrinks blood vessels and impacts digestion system. Therefore, with the temperature sensor add-on design, users could easily find out the optimal time to drink the beverages. Additionally, our design is strong and stable enough to protect personal property safety caused by spilling.


Takeaways

This project not only gives us a good learning opportunity to get hand-on experience on product design and 3D printing, but also inspired to use technology in solving small problems in our daily life. Although the current model we have is not perfect because several improvements can be done in the future, we still believe that the can holder is a meaningful product which makes drinking easier and safer. Design For America-UIUC workshop encourages us to brainstorm the idea, and Fablab workshops motivate us to make it practical for daily usage. In addition, we realize the importance of using a simple and creative design to solve difficulties through this project. A simple design and a small correction of existing design can make a huge impact on individuals and communities.


Completing our prototype, we try to self-questioning and think about future improvements to make the can-holder and even 3D printing become better and efficient. First and foremost, during the printing process, the printers do not function very well since the the object fails two times. Fortunately, we break down the design into couple of parts which allows us to print separately. However, unnecessary material and time waste still happen in this case because if the project fails in the progress, we have to restart it in the beginning. The possible solutions on this issue include perfecting design in advance or increasing the functions of 3D printing machines. In addition, one thing we should take care in the future is having a product design plan before starting the project The plan covers details on different stages, such as define, ideate, prototype, build and analyze. Without a successful plan, it will be difficult for each team member to follow the instructions and make right decisions. Lastly, focusing on the project itself, we would like to continue to work on the design by adding other useful features. For example, the product is able to collect the energy from drinks (hot/cold) and convert into electricity for cellphones, watches, any USB applied products. The holder is a sustainable design that transfer energy and also be able to collect water on cold drinks due to liquefaction. Another interesting function we are discussing is adding the bluetooth design that connects to phone or car. Similar to the popular sports bands, the can holder could provide personal drinking and health records.


John O’Gara Semester Activity – PPT Slide and Flyer

For my semester activity I have chosen to advertise this course to more freshmen. Being the only first year student in this course was intimidating at first, but the knowledge I gained was impeccable! Now that I know of all these resources available at the university, I have a much greater appreciation for digital making.

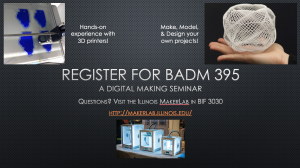
I noticed in my first semester here that professors of very large lectures will display an information slide before class so people will notice it when they are walking in. I remember seeing slides for different RSOs, business organizations, and tutoring hours, but never another course. This sparked my idea of creating a slide that could be displayed one or two weeks before Fall registration so that more freshmen would register for the seminar. This is the slide that will be displayed:

Screen Shot 2016-05-05 at 11.02.24 AM

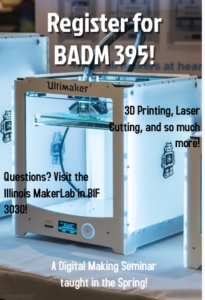
In addition to the slide being displayed, I have also made a flyer that could be posted around BIF and the engineering quad around the same time as registration. The flyer below is a draft from postermywall.com, however we could place a large order next spring to begin placing them around BIF and Wohlers. I understand that this course was promoted through College of Business emails, however it was my dad who is on UIUC Course Explorer every day, who first told me about this course. If more people knew about it and hopefully more applications be sent in, the MakerLab would continue to grow and maybe even another section of the seminar could be created! Again, the amount of resources I have gained through this course is amazing and all freshmen in the College of Business should know about the awesome things happening in BIF 3030. I am excited to see the increase in volume for next year and reach out to my former professors to see their responses!

Screen Shot 2016-05-01 at 10.43.19 PM


3D Printing Hearts from MRI/CT images


Why is printing a 3D Heart from a patient’s MRI or CT scans useful?

There have been several cases in which a surgery was designed based on a 3D printed model. In some cases, the surgery was thought to be inoperable, until the 3D model helped surgeons to plan an alternative access point. http://www.cnn.com/2015/10/06/health/3d-printed-heart-simulated-organs/

3D Printing can allow surgeons to design patient-specific surgeries which could lead to smaller incision sites, better access, reduced surgery time and if a graft or device is being inserted, it could lead to a better fitting model/device. Patient-specific surgeries are very useful in the congenital heart disease community. Patients with congenital heart disease have unique anatomies and complex physiological systems. Surgical planning is often critical to a successful surgery in this patient population. Surgeons can even practice surgeries on the 3D printed models. 3d heart practice


Models can also be used for patient, provider, and medical student education. It is much easier to understand the physiology of an organ when you can hold it in your hand, versus scanning through images on a computer. http://www.jumpsimulation.org/innovation/3d-heart-library.html

A hub for 3D printing from medical images is the NIH 3D print exchange: http://3dprint.nih.gov/

The NIH has created a library of different medical models. These models will be able to make large morphological comparisons possible.

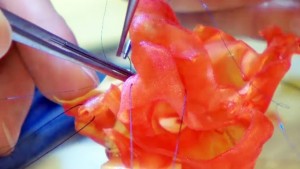
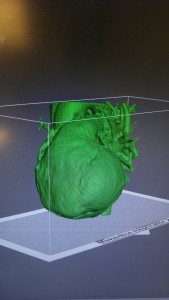
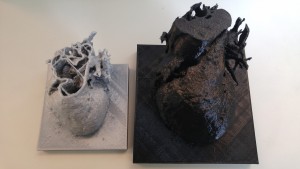
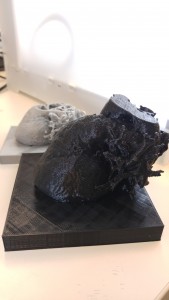
For my semester project, I was able to successfully print a heart from MRI images using Osirix and Meshmixer. Here is a picture of the final project.

20160425_150451 (1)20160425_143238 (1)20160425_143032 (2)


In the future, I hope to write a full tutorial of how to print the internal structures of the heart and how to optimize the printing supports in an extruder print setting.


“Time” for a semester project?

So here it is: design, ideas, progress, challenges, and workarounds for my semester project. Part 1 of 4. ***(note at end of post)

Screen Shot 2016-05-02 at 01.44.08

Sneak preview… So can you guess where this is heading?

My project, what is it?
Over the last semester we’ve been introduced to an array of techniques. A theme I’ve tried to keep in my own work and posts has lead from my very first posts on the beauty of equations; the natural world and pure concepts. This resulted in my climber key hanger, coin trap, and interest in mathematical shapes. An area of these pure concepts that I’m interesting in developing into a project, is time. A timepiece, a clock device, is something I can design and create, where I can draw on combining a range of the processes and techniques that I’ve tried out this semester.

Screen Shot 2016-05-02 at 01.50.56

#throwback

Talking with a classmate (Steve), I came out with the line: “It’s going to be a clock, a wonderful clock, a really really great clock. I bring you…. a clock that trumps all other clocks.” I’m aware that saying “I’m making a clock” sounds like quite an anticlimax, considering the plethora of possibilities that we can work on, but its definitely something that I can develop to touch on most aspects of making that I’ve had access to. I want to use my final project to build on, and demonstrate these skills/techniques.

Looking at ways to jazz up a clock and add aditional functionalities, considerations include:

-sensors to interact with its immediate environment?

-feeds from online data?

-electronic circuits sewn into the face of the clock for visuals?

-motor motion still with arduino?

-led stuff?

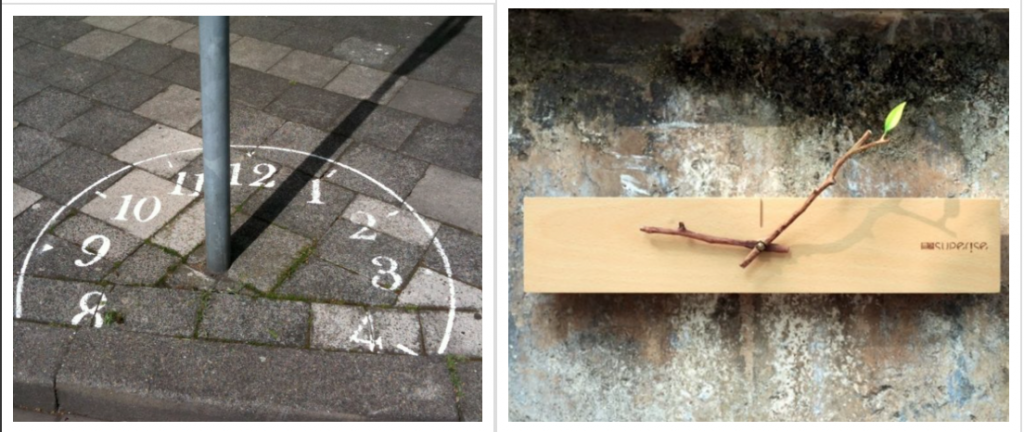
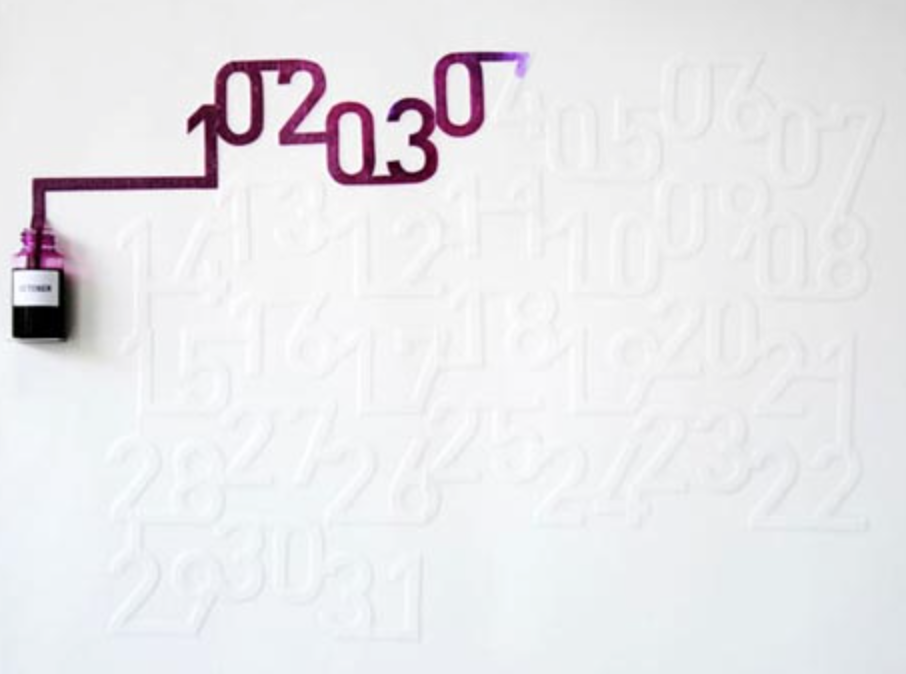
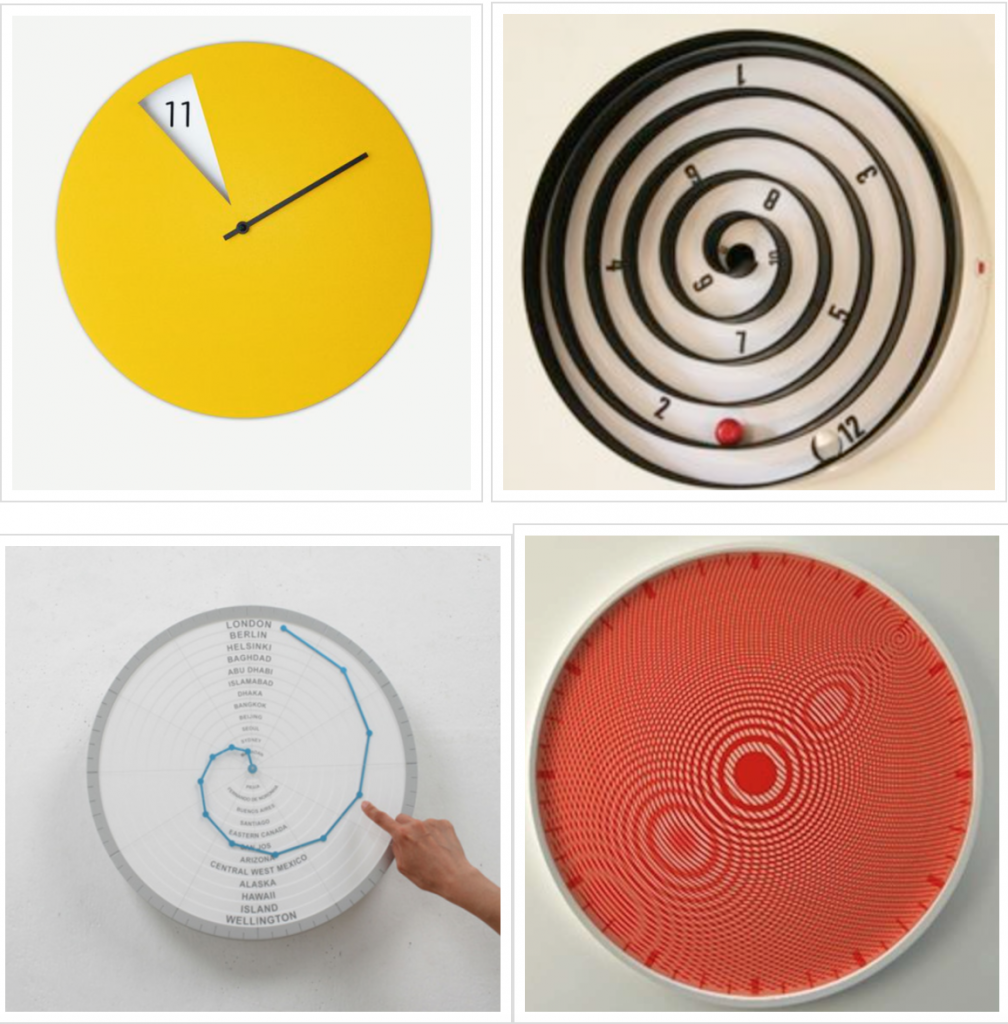
Browsing online for unique clock concepts as inspiration and an initial hunt for ideas:

Screen Shot 2016-05-02 at 01.28.25

Passing of time on this calendar is demonstrated through the slow capillary action of the purple ink

Screen Shot 2016-05-02 at 01.38.24

Classic circular clock face with unique designs that utilise different interactions and concepts for denoting time


***(Sorry Vishal: I went down the route of powering through, redesigning and adapting until I have my final piece, without stopping to write about it until its done. Documenting it now instead of as I go along means this is a more cohesive piece of prose and takes less time away from the creation of the project!)


In this series of posts:

Part 1: Time for a semester project? (this post)

Part 2: Progress through time

Part 3: Tick tock goes the clock

Part 4: What’s in a face?

Part 5: Closing Time

(return to main navigation menu)