Mesh Mixin’

This week we learned how to use Mesh Mixer and how to scan things and prep them to be printed. Though there weren’t a lot of intricacies to this week. It was still pretty interesting to be scanned and to scan people. Below is a picture of a scan of me! 🙂

2016-04-11 21.04.44Screen Shot 2016-04-17 at 11.48.07 PM

I think what I found valuable this week is the fact that I now know how to can anything, manipulate it in mesh mixer, then port it to Cura, and prep it to be printed. I don’t know about you all but that’s a pretty big feat.

So now, I think this will be super useful for our group project! I can’t wait to scan those gloves.


Pew! Pew! Lasers!

This week was quite interesting. Contrary to what the title of this post my imply, we were not shooting lasers, we were using them to etch!

This week, I was in the lasers group and we learned about using lasers to print images. The week was pretty brief, we were able to learn about the lasers and its capabilities and then we were able to use illustrator or a different 3rd party editor to make our images. We learned that the best images that work with the lasers are flat ones with not many gradients. So we were directed to choose silhouettes so that the printing could be easier. I chose to print on a small notebook (below)!

13010277_1149351878432780_782707863_o

Lasering is really cool because stuff that might take hours and hours of workmanship can be accomplished in a couple minutes. The majority of the work is done on software and the rest the laser handles. I think this can make a lot of design and printing processes much faster

I don’t know if this means much to me, maybe because the work wasn’t really hands on, but I found it really cool though.

From 2 to 2+

This week was pretty awesome. Though I didn’t know what to expect, it turned out the be very productive. The set up for this week was quite interesting. We held a Build A 3D-Printer in the Business Instructional Facility atrium. The class was split into three different groups. One group was building an Ultimaker, another group upgrading an Ultimaker 2 into an Ultimaker 2+. I was in the group that was upgrading the Ultimaker 2. The third group were manning a scanning station.

Here are the 3 different groups:

Pic 3 Pic 2 IMG_4650

I think what I realized from this experience was how sustainable and efficient Ultimaker is. I was so surprised that we could turn an Ultimaker 2 into a 2+ very easily. Usually with things like this, you would have to purchase a completely new system. This was very eye opening to me.

After this experience, I think I’m able to see how beneficial it is to be efficient and lean. I think I will continue this efficiency practice with my software endeavors. More specifically, in my projects, I want to be more efficient by not reinventing the wheel but by adding on to it.

Sawh-dering vs. Souhl-dering

That is the question.

Our session this week started off with a conversation about how to pronounce the word “soldering”. Quite an interesting conversation it was; it ended with several comments about how American insist on being different.

After that conversation we got to meet the awesome Mitch Altman. Mitch Altman is a San Francisco-based hacker and inventor, best known for inventing TV-B-Gone, as featured speaker at hacker conferences, as international expert on the hackerspace movement, and for teaching introductory electronics workshops. Mitch is also the founder of Cornfield Electronics. Mitch taught us how to solder!

Here’s Mitch himself!

IMG_1351

Armed with soldering irons, lead, and various electronics parts, we were off. Mitch gave us step by step instructions on how to solder the parts together. It was actually very cool and I feel like I’ve gain an awesome new skill. What we were putting together was a little light emitter which was made up of a micro controller, some led bulbs, a small battery, various other small parts. After about an hour, we ended up with this:

IMG_1355IMG_1354

I’m not sure if what we made means much, however, I think what we did (solder) meant a lot! I read this interesting thought from sparkfun.com

Soldering is one of the most fundamental skills needed to dabble in the world of electronics. The two go together like peas and carrots. And, although it is possible to learn about and build electronics without needing to pick up a soldering iron, you’ll soon discover that a whole new world is opened with this one simple skill.

So that means that I am well on my way to working with electronics, the very road I expected to be through this class!

I think that learning how to solder was an amazing skill to pick up and though this was my first time, I think that this is a huge barrier being broken and I am excited to continue to work with electronics!

Digital Embroidery


This week was a bit different as I wasn’t necessarily tinkering with electronics and ardiunos as the past week, however, it was still a very interesting time.

This week, I worked with the Digital Embroidery. Essentially, I got to play with a sewing machine times like 100. Machine embroidery is an embroidery process whereby a sewing machine or embroidery machine is used to create patterns on textiles. It is used commercially in product branding, corporate advertising, and uniform adornment. Hobbyists also machine embroider for personal sewing and craft projects. In the scope of the Fab Lab, the machine are more for hobbyists.

So this is how the process went. We started on computers and were instructed to find a picture. However, we had to do this with wisdom. We needed to make sure that our pictures weren’t composed of a lot of colors as when the picture is loaded into the machine, each color recognized by the machine will mean a swap of thread. So in order to make sure our images were simplified, we used the Sew Art software to deprecate the colors of our images to just a few. After doing our edits in Sew Art, we then pushed things to a USB drive and headed for the sewing machine. We loaded the image into the machine via a wired connection and here comes the hard part–threading the sewing machine. To thread the sewing machine, we had to follow a very simple, but important, 7 step process which compared to threading a simple needle, was a lot more… different.

After we threaded the machine and push our fabric down, I was only a button press away from my awesome design. Below are some interesting images and videos of what the machine looks like and how the machine works.

IMG_1335IMG_1343 IMG_1337.MOV, IMG_1340.MOV

What does Digital Embroidery mean for me? I don’t know if it means much for me as I’m not sure if I would be interacting with such technology on a regular basis, however I think this could mean a world of a difference for the maker. I feel that this expands the domain of what a maker is. I think that this technology can also have a huge effect on design as it would allow for intricate designs to be created and produced in a very quick manner. Small time designers or hobbyists would find it very easy to put their designs on different products.

With that being said, though I don’t see myself being a regular user or enthusiast in this technology, however, I would say that I am definitely an ally for the increased popularity of this technology!

0 to 100 with Arduinos

This week was quite interesting, by far my favorite week–thus far (hoping next week will top this).

This week we got to go to the Fab Lab over on the Urbana side of campus. The Fab Lab (short for fabrication laboratory), is specific kind of makerspace. The Fab Lab in an advanced workshop for rapid prototyping and designing using various machinery and computer-aided designing tools. The space is community driven by people referred to as Makers. The Fab Lab encourages people to become makers by exploring the entire design process.

This was my first time visiting the fab lab and it was amazing. Our visit started off with an overview on what the Fab Lab is about and all the services and opportunities it provides. From there we were split into groups of 3 and given tours of the space. The space is sectioned into roughly 3 areas; electronics, fabrics, and computers. After given tours of the space we were able to work in the area of our choice. Given the nature of my project and because of my general interests, I ended up in the electronics section.

I LOVED IT

In this section, our instructor Colton was able to teach us all things arduino. Through the session we were able to interact with the Arduino Interactive Development Environment, actual arudinos, lightbulbs, and other bits of electronics.  The result of our session was a arduino powered lightbulb and motor that functioned with responses to our touch. I LOVED IT.

I loved it for a couple of reasons, firstly, because I’ve never really interacted with hardware before. I’ve written code which eventually interacted with hardware before (haha), but I haven’t had the opportunity to work directly with the hardware. The other reason why I loved it is because of the potential learning more about this topic would holds!

Project Outlook

From this session, I gained the confidence to go ahead with my semester project and even felt comfortable with joining in another project with my fellow classmate Steve Koziel! I am excited with what the next couple weeks will bring and produce!

Here are some pictures of the Fab Lab and my work.

IMG_1322 IMG_1323 IMG_1325 IMG_1326 IMG_1327

T-Spline, All the Time

Wow, things went from 0 to a 100 in two class sessions, its really amazing actually. Needless to say, I’m excited for what’s to come. But first, a little about what has been going on these last couple of weeks.

The last two weeks have been focused on working with Autodesk 360 fusion. 2 weeks ago, we got our first introduction to working with fusion via a tutorial and a Q&A sort of session with Lucas Ewing, applications engineer at Autodesk. Lucas ran us through the basics of fusion and what it is used for. After battling through technical difficulties, we were able to get started with some modeling. The first hour and a half was filled with listening and taking down notes on the capabilities of fusion. We were able to learn about differences in the functionality of the fusion environment from lets say Revit. After the first hour and a half, we got the opportunity to try to replicate a design Lucas had made for his personal use. It was a pen. We were able to see how intense things could get when it came to modeling as making even just the pen tip was crazy complicated. However, I think much of was because we were first time users.

Pictured on the left is us learning about fusion for the first time, on the right is the pen tip I made.

CbSgExnUkAA69Hm12597076_10204521393474682_40913007_o

Then next week we were able to do a little more hands on work, Vishal brought in Autodesk experts, Gina Taylor and Nicole Chimienti, to teach us some awesome skills using fusion! Talk about hands on experience, we got to fire up Autodesk and follow along with a tutorial of a lamp. It might not sound like something special, but whew what a ride. Below is a cool picture of the lamp I made. One last think thought was really cool is the fact that fusion can operate on the cloud, meaning that my information is stored on an external server, meaning that I can log into my account on any computer anywhere and access my projects!

Screen Shot 2016-02-27 at 7.15.47 PM

I think the two tutorials we received were really beneficial in helping me really get into fusion. After those two tutorials, I was able to go home and whip up my own pair of headphones. GO T-SPLINES! Check out the awesomeness below.Screen Shot 2016-02-27 at 7.20.49 PM


One of my main concerns for my semester long project was how I was going to do the designing. However, I think going on from here.. I’ll be good!

Design, Design, Design

This week was quite interesting. Firstly let me mention some coincidences that came to be during the course of this week. Prior to our session with the Design for America reps, we were to read the design thinking article by Tim Brown. This was interesting as I had received the Creating Confidence book, written by Tom & David Kelly from IDEO,  from one of my friends earlier in the semester! He gave it to me to help me with my designs relative to software (I was to take a web programming class in the semester). So today, in my web programming class, talking about the topic, UI Design, guess who comes up in the conversation? Tom & David Kelly! Pretty interesting series of coincidences. Anyway.

IMG_1279 IMG_1278 IMG_1276 IMG_1275

During our session we learned about design, more specifically, how to design things with the end user in mind. We were introduced to four different users we were to design for. Each of the four users are blind and are having difficulties acclimating to changes in their environment. We got to do a series of brain storming on ourselves and then group together to group think and come up with different ideas. After the group brainstorming session we were then given time to create a product for our chosen user. We had a young college student, Jessica, who was struggling to acclimate to campus life due to her blindness. Our group came up with DrinkSafe, a drink handle and cup system that allows her to drinks closed and safe in the midst of a crowd. The handle also had a fingerprint system that personalizes her handle her use only. This way, she can be sure that the only thing is her drink is her drink, and nothing else! Our rationale for creating this product was that it would mean one less obstacle to overcome with regards to hanging out on campus. This was a very interesting experience and I was able to learn a lot about design through the exercise.

drinksafe

I’ve been learning so much about design this semester–this is not something I anticipated. However, this is something that I find extremely useful. I mean, design is everywhere, and as the article explains is becoming increasingly important. Design isn’t just something that happens at the end of creation, but something that takes place in the beginning, and often times, in the midst of creation. So what does this mean for me? I’ve got to pay attention to design. Everything from the design of my code to the actual UI, should be considered in order to produce the best product/work possible.

What’s in store for the future? Well I hope this to apply this to many of my class and personal projects. I think my most valuable take away from this experience is THINK ABOUT THE USER! That is what I’m going to do in my future creations and hopefully in my semester long product of trying to find a solution to my having to physically get up to turn off my lights problem.

Actual making

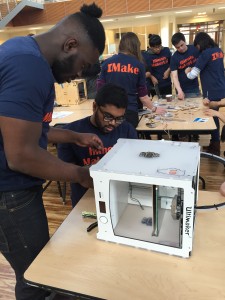
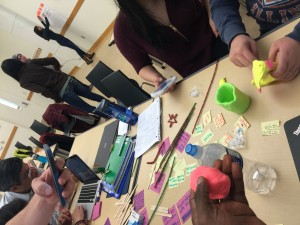
I finally did some actual making! This week was awesome as we got some hands-on action with the Ultimaker 2s! But before we get to what I made, how about a little about what I learned. We got to assigned to teams of a couple people and were able to browse assigned websites to see what they were about. Our team got to check out YouMagine and Instructables.

YouMagine

YouMagine is a website where makers get to collaborate on 3d designs. It is essentially a 3d design and file sharing platform created by Ultimaker (sound familiar?). It is essentially designed to be the Github of printing. You are able to make and push your ideas, designs, and work unto the site in which people can then use and build upon. Outside of the fancy aesthetics of, I thought that the site is an amazing idea. If we can have an open source platform for software, what not for 3dware?

Instructables

The second site we were able to visit was Instructables. Instructables is essentially a site with instructions on how to make everything there is to make in the scope of 3d printing and small electronics. Very intrigued searched how to make a drone and lo and behold there popped up many results with detailed instructions on how to make a drone with 3d. This sparked some interesting drone conversations that even crept its way into one of Professor Vishal’s talks.

Browsing these two websites really made a couple things clear to me. One thing is that there is a huge community of Makers out there and they are making cool stuff! I can agree with the Dougherty reading’s description of what a maker is, there are just people looking to create or recreate things in new, renewed, and even unorthodox ways. Dougherty states that “makers are seeking an alternative to being regarded as consumers, rejecting the idea that you are defined by what you buy” and this is made clear in the sites we visited. I mean how could this be more represented by having “consumer” essentially take on the role of designers and manufacturer; merely consumers no more!

Another thing made clear by this site is that being a Maker is likely to be the next norm. I support this statement with our Gershenfeld reading. Gershenfeld understood that there is an absolute parallel between computing and digital fabrication, “As it turns out, the “killer app” in digital fabrication, as in computing, is personalization, producing products for a market of one person.” We all know how personalization in computing changed everything! I think that printing has that same potential.
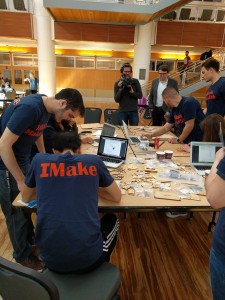
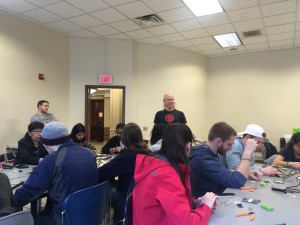
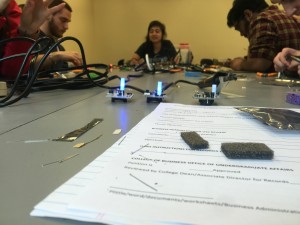
Class activity!

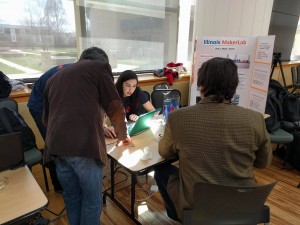
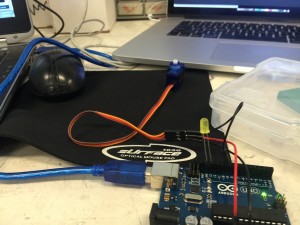
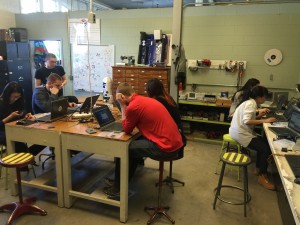
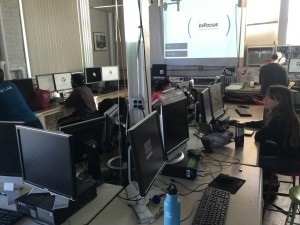
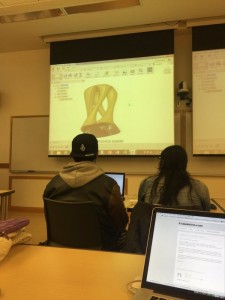
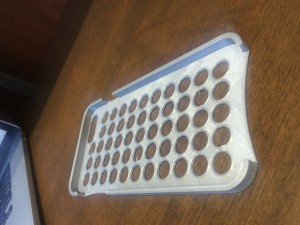
Finally to what I made in class. I was able to use the Ultimaker to print myself a iPhone 6 Plus phone case! Also below are shots of the action that went on.

IMG_1229

IMG_1219.MOV

IMG_1221.MOV

4 things!

drone, because it’s awesome to fly those things! however, I would love to have a where to make it so that it would be safe indoors.

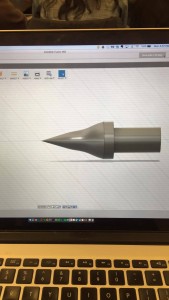
iPhone case, I think this is explained above. It seems to be a bit loose though, so I would make it fit more snuggly.

shark comb, because I have long hair. I would make prongs wider and longer!

teddy, because it’s cute! If it was possible to make this cuter, I would. Doubt it, though.

3D printing: The New Move?

Evaluation

I’m going to be honest, 3d printing (3Dp) seemed kinda silly to me. Not having direct interaction with the field, all I was able to see from those who were involved in the technology were small keychains, toys & knick knacks, and your occasional functional item, like a comb. However, foregoing a required course, I decided to pick up this class because I promised myself to try new things this year—especially in the field of technology. After being introduced to what Making is conceptually, I think I might see an opportunity here. In the case of 3Dp, though the technology itself is not new, its applications are. Listening to the lecture given my John Hornick this week, I was able to learn about different types of applications 3Dp is useful for. Though I wouldn’t entirely say I classify 3Dp as a “disruptive game changer” as I’m not sure if I’m sold on its significance, I would point out that some people probably doubted the wheel.

My Interests

I’m a big software focused person, consequentially, I haven’t been able to really get involved with hardware. I want to change that through this course. After our first class I quickly consulted some of my double E friends and started brainstorming on possible projects that I could work on this semester. I was interested in working on a drone a couple semesters back but that idea, I believe, is out of the scope of what this class can offer. I came up with a couple ideas that, coupled with an arduino and maybe a raspberry, pi, just might work. I’m excited to share with the class the next time we meet!

Twitter!

Here’s something cool I found on twitter. A dog that lost his limbs to a lawnmower gets a 3D printed limb! Click the picture for more information.