
Motivation
Building a stirling engine has been a project that I have wanted to tackle for a long time now, but never had the resources. Through everything that we learned this semester, and the wonderful opportunities that were presented to us through Digital Making, I decided that now was my chance to finally fulfill this dream. Unlike many of the other projects, mine was focused on the question of whether I could actually complete a working engine, rather than its application in real world problems. However, an engine like this could be used to power any number of electronics like a desk light or a phone charger.
Ideation and Design
My research into this project began with understanding exactly how a stirling engine works, and the physical orientations that were possible when it came to designing the structure. There are multiple orientations for the layout of the pistons such as inline, side by side, offset, etc. I chose to do a side by side engine because it seemed like the most simple to design and offered the least amount of complicated pieces. Shown below is a nice looking stirling engine that has the same layout as the one I designed.
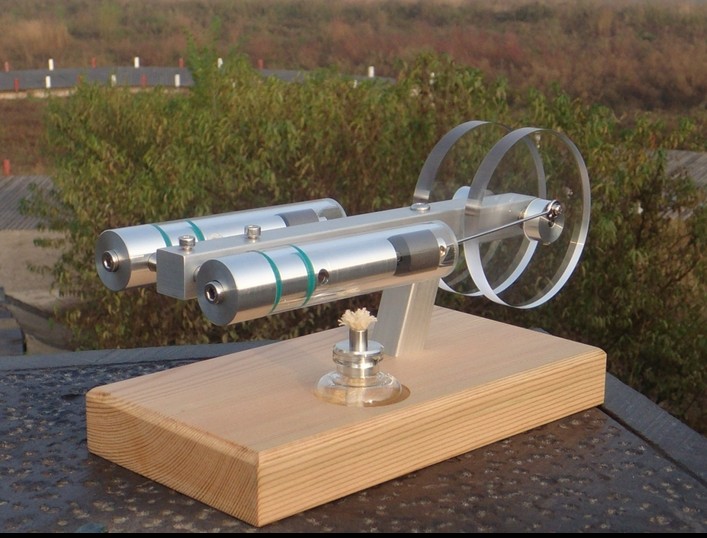
As you can see, the pistons are side by side, offering convenient support locations as well as easy flywheel design.
The main problem I encountered while designing the engine was trying to come up with a suitable material for the pistons. Since a flame would be used to heat the air, I couldn’t 3D print the pistons as they would melt under the heat. After much research, I noticed that a lot of home designs used these  borosilicate glass syringes as the work and displacer pistons. They are perfect for heat resistance and also offer the air-tight property that is needed for a stirling engine.
The build
Unfortunately, I did not take pictures of the pieces as they were being printed because I was just too excited to put them all together. 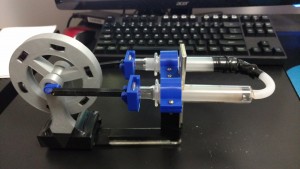
This is the finished engine, in all its glory. Unfortunately, the glass tip of one of the syringes broke off when I accidentally dropped it, so some tape was needed to attach the silicon tube to the end of the piston. Also worthy of noting is the metal L-bracket that is attached to the engine. I neglected to account for the strength of the support connecting the flywheel to the pistons, and the whole engine tends to flex as a result. The L-bracket prevents the bending from getting too severe.
Success (or lack thereof) and future work
To my disappointment, the engine does not work, the finished product should function something like this. I suspect that the issue is that I have made the displacement volume too much for how little inertia the flywheel provides. When the engine would be operating, a small low pressure environment should be created between the two pistons, however the force that this creates on the flywheel is too much to allow it to smoothly run between cycles. To correct this, I need to shorten the distance that the crank arms are away from the center axle, and possible make the flywheel heavier. Some other modifications I will make is thickening the base to prevent flexing, and sink the screws in the base to make it a flat surface.
Pingback: buy ivermectin for humans uk