Learning the Ropes of Making

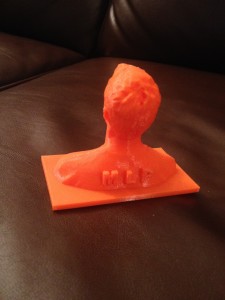
Digital Making has been a true experience for me.  Entering the class I had no idea what 3D printers were capable of doing and how the entire process worked.  What I also did not know was that Digital Making involved so much more then 3D printers, including, digital embroidery, laser etching, sewing, metal fabrication, arduinos, and 3D modeling.  My learning curve was established when in the first couple weeks of class we had a skype call with a Professor from Indiana University and she told us that grade school kids were learning by “making things”.  I was shocked to hear that young kids were learning tangible skills like sewing, 3D printing, crafting, etc.  My learning curve was established.  Starting off, I gained an understanding of 3D modeling and scanning, printed off my first 3D object and thought I had a solid base of knowledge.  What I did not understand was what separated my prints from all the others? Anyone can go on and download the print file and print the same exact thing.  From here on out, about week 3 or 4 of Digital Making, I decided I needed to add creativity and a special touch to my makings.  My first special design touch came while modeling and printing my upper body and head.  I made a major leap of faith and added my initials on my back! Wow what a crazy addition.

IMG_5215

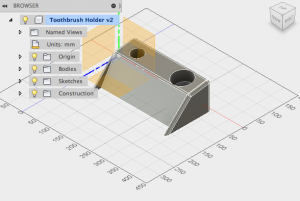
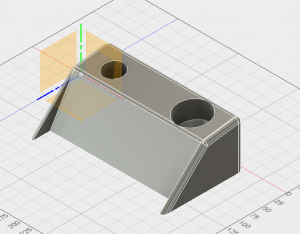
My next test of design came with modeling in Autodesk Fusion 360.  We were challenged to model an object form scratch and incorporate skills used in our Fusion workshop.  I started with a cube and ended with a toothbrush holder.  Again, not super creative at all, but I measured it so it would only fit my specific toothbrush.  Making the holder specific to my toothbrush gave me a good feeling that I had design a perfect product for me and I felt the maker buzz because of that.  See toothbrush holder below:

Screen Shot 2015-05-08 at 6.15.45 PM

After working with Autodesk for a couple weeks, we visited Beckman’s 3D modeling lab. Looking back  I was not too found of working at Beckman because it was less hand ons then what the rest of the semester had in store.

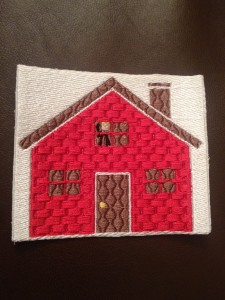
After Beckman we entered into the Champaign-Urbana Fab Lab section of the class.  3 weeks at the Fab Lab allowed us to work on metals, arduinos, digital embroidery, and laser etching.  My experiences at the Fab Lab brought out the true “maker” in me and took my personal design to the next level.  The second week at the Fab Lab, digital embroidery, was were I truely felt like I had created a unique and well designed item.  To start, I chose an image of house off of google, imported it into paint and customized the image to my perfection.  I added a waving person in the window, changed to colors of the house to red, with brown accents, and gave it a brick style of stitching. See image below:

IMG_5216

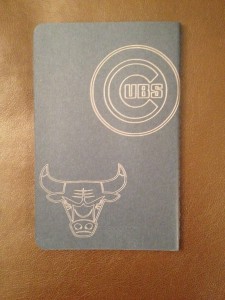
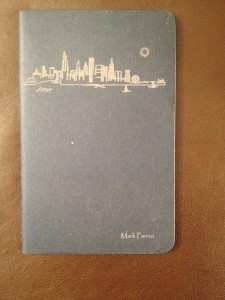
I was pumped to have an item that felt so at home with me and personalized to my choice.  Next came laser etching, another creative experience for me.  I chose to start with a silhouette of the Chicago skyline and began modifying my image in InkScape.  I readjusted the color ratios at least five times until I felt it was perfect, deleted sail boats, and added the sun and a yacht.  I thought the best views of the Chicago skyline I have ever seen are when the sun is shining and tons of boats are out on the water.  Finally, I added a Cubs and Bulls logo to the back, another special touch.  Finishing the laser etch, I felt like a true maker and excited to have been able to be apart of such a cool experience. See the images below:

IMG_5218 IMG_5217

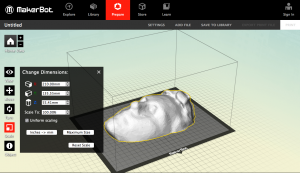
The final segment of the class was turning my 3D head model into a wall hanging and wrapping up my group project.  I decided to turn my 3D head model into a 3D printed wall hanging to have a displayable object from class in my apartment for everyone to see.  Here is a link further explaining the project: 3D Print a Wall Hanging of Your Head

The print turned out great, see the model below:

Screen Shot 2015-04-09 at 5.52.36 PM

Wrapping up the group project, 3D printing wheelchair racing gloves, was a lot of fun. Week after week it was exciting to hear about Arielle’s, project teammate and wheelchair racer, races using her new 3D printed gloves. Working with Sebastian, other project teammate, and Arielle gave me two other perspectives on how to go about 3D modeling and printing an object. The project was a success and will continue on as Arielle and the crew at Beckman, who 3D scanned her original gloves, works to 3D model the rest of the racing team.

Overall I have grown tremendously in how I approach projects.  After a semester long of making, I believe all my projects, whether for work or school, from here on out, should be given my personal design and touch.  The personal design I have nurtured and grown in Digital Making will stay with me forever and I better prepared to create anything from the ground up here on out.  Skills I learned about design and modeling can be applied to most anything in my future.  Looking forward, I want to 3D print items necessary to life, but that would usually be bought at the store.  For example, next time I need a clothes hanger, I can 3D print it instead of buying it at the store!

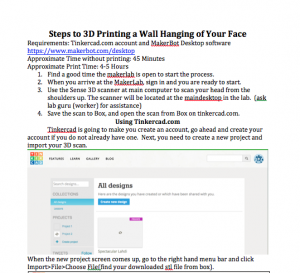
Steps to 3D Printing a Wall Hanging of Your Face

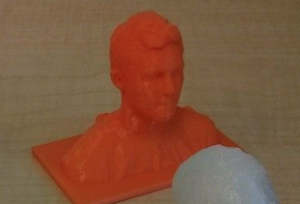
Early on in the semester I was working on 3D printing a miniature model of my head from my shoulders up.  See below:

Screen Shot 2015-02-16 at 6.29.14 PM

As I was tinkering with the file in Tinkercad, I thought, what if I could 3D print this file as a full size head that could hang on a wall.  After maneuvering the file around on Tinkercad, I came up with the right model, downloaded it and printed it.  I have put together my steps in a pdf and shared it with the masses so everyone can have a 3D wall hanging of their face. Below is a representation:

Screen Shot 2015-04-09 at 5.52.36 PM

Here is the guide: 3D Print Your Head as a Wall Hanging

Preview:

Screen Shot 2015-04-28 at 3.20.32 PM

Enjoy!

Not another FAB Lab Post!

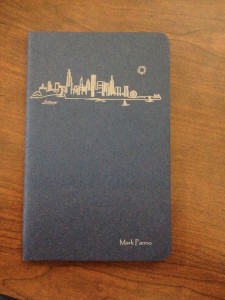
Tuesday April 21st was another day of class filled with new adventures into the “making things” world.  For the final session at the Urbana-Champaign Community Fab Lab, I set out on using a laser to etch the front and back covers of a notepad.  The first step to the process was getting familiar with InkScape, where the images would be laid out.  In order to produce a high quality laser etch, I used a silhouette of the Chicago skyline to start.  Our instructor for the day, Judy, walked us through how to take the image we found online, and create a path of the image used by the laser.  After creating the path, you have to delete the original image, and finalized your path for printing.  When I finalized my skyline path, I sought a better picture, and added a few special touches.  First, I took away a sailboat from the skyline silhouette, and added a yacht type looking boat (a better depiction of Chicago boating scene and a more stylish compliment to the skyscrapers).  Next, I added the sun in the upper right corner, because why not.  The final touch to the front cover of the notepad is my name in the bottom right. The final product can be seen below:

image1 (1)

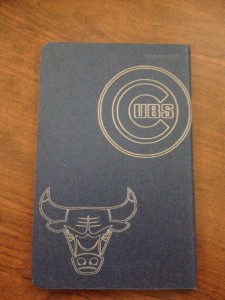
After completing the front of the notepad, I decided to keep the Chicago theme, and added some of my favorite Chicago sports team’s logos to the back cover. Chicago Cubs and Chicago Bulls.

image3

Here is link to a video of the laser etching the Chicago Bulls logon onto the notepad: Video

Below is a picture of the Laser Printer:

image1

Overall, I was surprised at how well the printer was able to etch detail of the skyscrapers. I look forward to using my notepad all the time and showing off my newly acquired maker skills to all my friends!

-Mark Panno

Working at the Fab Lab, Yeah

My title is based off the song working at the car wash, because when I hear that song I think of a fun experience of being at a car wash.  I chose a play on words of that song, because visiting the Community Fab Lab for Week 10 was a blast.  Going into the day I did not know what to expect and thought being at the Fab Lab might be boring and nerdy. I spent the majority of the day in the electronics section of the lab learning arduinos and how to solder electrical wires.

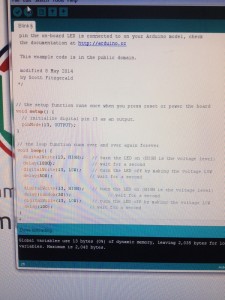
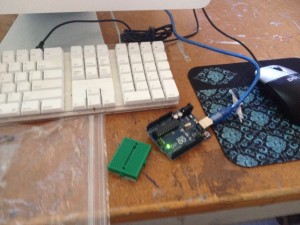
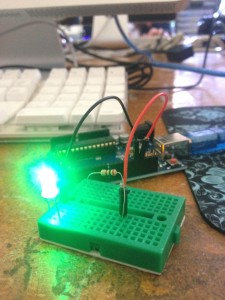
Learning arduinos was simple and fun thanks to instructors Virginia and Colten.  We starting off learning how to rig the arduino to have one LED blink, next we added a light sensor, and finally a speaker.  The most interesting part for me was changing the code to have the light blink faster or slower, and changing the code to make different pitches and volumes come from the speaker.  Below are a few pictures of my progress, including the code for the LED blink light, a preassembled arduino, and the assembled LED blink arduino.

IMG_5029.JPG

IMG_5027.JPG

IMG_5032.JPG


After learning arduino, Virginia taught a few of us how to solder an electrical wire to an electric component.  I had never soldered before, so it was a cool experience.  Solder is the material used in between the wire and the metal on the electric component.  Soldering differs from welding in that it does not melt the metal component or the wire, but only the solder.  After melting the solder in between the wire and the metal component, you take off the hot soldering tool and let the solder harden around the wire and metal and boom you have an electrical connection.  Soldering was wild to me because the melting and hardening all happens within seconds.

My overall experience at the Fab Lab was filled with fun, engaging learning.  I look forward to the next opportunity I will have to solder and work with arduinos.

From Nothing to Something

Learning Autodesk 360 has been a challenge.  I was slow to start during the workshop, but found hope following the youtube video for the screw.  On Tuesday, I decided to make a new rendering, instead of printing out the boring screw.  My decision came with a couple challenges, what to make and how to perfect the design.  I went through a couple ideas before going with a toothbrush and toothpaste holder.   The design comes together with two holes, one for my toothbrush and one for a tube of toothpaste.  I use a Sonicare, so I customized the size of one of the holes to fit the base of the toothbrush, and the other hole is bigger to accommodate all sizes of toothpaste tubes.  A look at the holder below:

Screen Shot 2015-03-01 at 1.00.49 PM

So after struggling in the workshop, to smoothly making the screw, I landed somewhere in the middle making my toothbrush holder.  I was challenged when trying to size the holes perfectly for my brush, and making the design look good, with sharp angles and curved corners.  Overall I feel like my holder is a success and has furthered my skills with Autodesk.

Week 4 Reflection

Week four consisted of digitizing and 3D printing my shoulders up, and two informative talks from the professor of Making Things course and 3D lab worker Ryan.  I enjoyed 3D printing my head because I learned how to use the digitizer, tweak the file for printing, and eventually print the file.  Seeing how a 3D print goes from nothing to the final product was very educational.  Below is a picture of my 3D print.

Screen Shot 2015-02-16 at 6.29.14 PM

My print turned out great.  The biggest struggle was trying to get the digitizer to stay stable and achieve a quality 3D image.  After working towards a good digital image, the rest of the process was a breeze.  I put my head on a rectangle on tinkercad, added my initials on my back and printed myself out!

Week Three Reflections

Week three was a fun and informative week for me in the Digital Making learning process.  Week 3 brought Design For America to our class room to put us through a workshop on design.  Before last Tuesday, I didn’t have a particular way of going about design, or a process of thinking about it.  The workshop broke down the design process step-by-step, through brainstorming, communicating, visualizing, and realizing the design.  The idea to our design workshop was “eliminating distracted driving”.  My group and I brainstormed and determined limiting cell phone communication while driving was our best solution.

We came up with a steering wheel adaption that holds your cell phone, and provides hands free calling and texting through voice communication.  Our design ended up in model form, with a slot for the cell phone in the steering wheel shaft, so the driver cannot see the phone.   In addition to that, the car will be programmed with the phone to only run if the phone is in the slot.  Our design brought in usability along with safety.  Overall, the design workshop taught me a better approach to designing and taught me the most efficient ways to go through the design process.

Learning Update Week 2

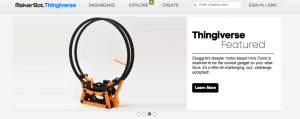
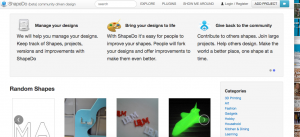
In class we have heard how 3D printing is changing the manufacturing industry, how learning by making is a big thing right now, and explored different sites exploring 3D modeling.  My group was assigned to explore thingiverse.com and shapedo.com and come up with a description of the sites and the differences between them.  Both sites feature a collection of 3D models posted by users in an open community format.  Thingiverse is a property of makerbot, and the models are optimized for makerbot printers.  I found shapedo to be more of a blog type site with open posting, commenting, and downloading of content, where as thingiverse is more professional.

Below are screenshots of thingiverse.com and shapedo.com

Thingiverse Homepage Screen Shot 2015-02-02 at 8.53.17 PM

  • Four 3D models I have chosen, all off of thingiverse.com, are listed below with links.  I chose to only find models on thingiverse because I feel most comfortable navigating thingiverse versus the other sites.
  • My first selection is a mud guard for a bicycle.  I ride my bike daily and need a mud guard with all the precipitation in Illinois.  I would not change the design at all, but rather change the color to brown, to absorb mud colors better on the surface.
  • Secondly, I have found an easy to use bag clip for any bag needing clipped, but in my case, chips.  I have a few bags of chips at my apartment that need a clip to stay fresh.  The design here is great, I wouldn’t change it at all.
  • Next, I chose a vase, not to hold flowers, but for spatulas, cooking ladles, and cooking prongs.  Instead of laying them on the counter, holding them up in an organized holder would be nice.  I would widen the top part of this particular vase to make the top better for holding wide items, like a spatula.
  • Because my first three are all serious items that would improve my life, my final pick is a fun item.  A shot glass I randomly came across while scrolling through thingiverse. The shot glass has a skull face embedded into it.  I would change the size of the skull face, to make it smaller and less protruding.  Also, the skull should be in dark grey.

-Mark Panno