About Jiayin (Kay) Lu

Hi, I am a sophomore studying Finance and pursuing minors in Maths and Statistics.

My Fun Journey in Digital Making (Semester Learning Experience)

I guess I am a girl who could easily be amazed at something, and curious all the time. I remember a year ago, when I was a freshman, I visited the engineering quad because of the annual engineering expo in the university, and saw some small things, made by 3D printing and laser cutting, showing on the table. I was immediately intrigued by them, partially because of the beautiful patterns of the laser cutting cards and the creative shapes of the 3D printed objects, and I viewed them as applications of new technologies on art and design at the time. However, as a Finance major student, I never thought I would be able to do this one day… until when I got to know the BADM 395 Making Things class! After knowing this opportunity to get hands on experience of 3D printing, I was so excited and immediately emailed Professor Vishal asking to enroll in the class… and he said “Yes!” ☺☀☺ And now comes my journey that’s filled with tons of fun…


This class is not just about 3D printing. I would like to describe it like this:

1. It serves as a start pointing that introduce different kinds of new technologies to students, regardless of what majors students are in;

2. It is a place more about learning and sharing, and a place where students can enjoy enough freedom in their own creativity and project design, which makes it a very fun class;

3. It is a class that encourage initiative, exploration and self-learning. As a student in the class, I was motivated to explore things that interest me, to do research on the topic and lean new things, to try different ways to make ideas come true.

4. It introduces so much more than 3D printing. Students got to have lots of resources allowed to use on campus because of the class, and learn things by experiencing them. A list of things that this class has to offer:                                                                                       BIF(MakerLab):  3D Printing, Fusion 360                                                                               Beckman Institute Visit: Advanced 3D scanning & printing machines                                 CU Community FabLab: InkScape, Laser Cutting, Making Stickers, Arduino, Electrical Embroidery                                                                                                                                   Chicago Deloitte “Green House” Visit: Technology consulting, how technology is changing manufacturing, operating and the ways businesses work, the importance to embrace new technologies in business to maintain comparative advantages.


Learning Experience

Here are selected works I made that represent different phases of my leaning experience in the class.

A. 3D Printing Introductory

1610874_321505618038219_4027455329613899883_n

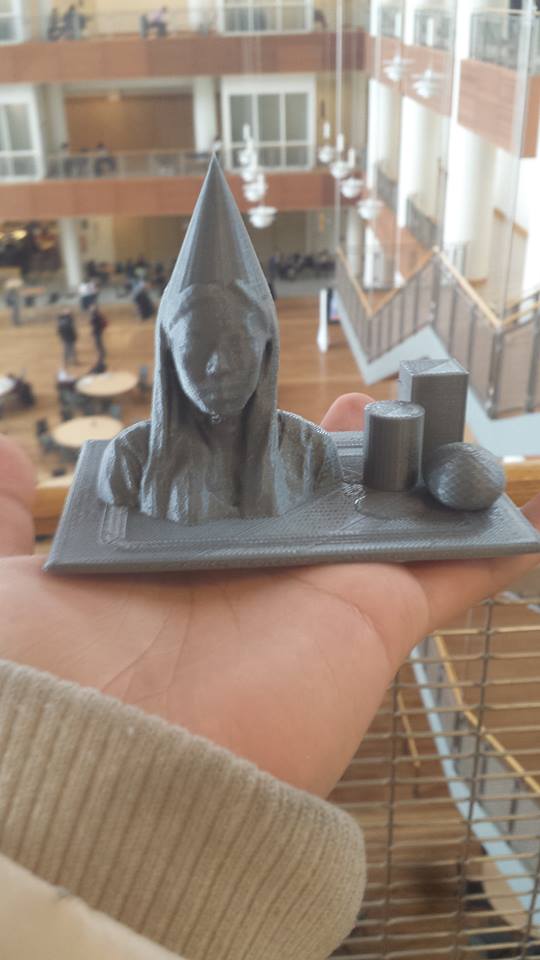
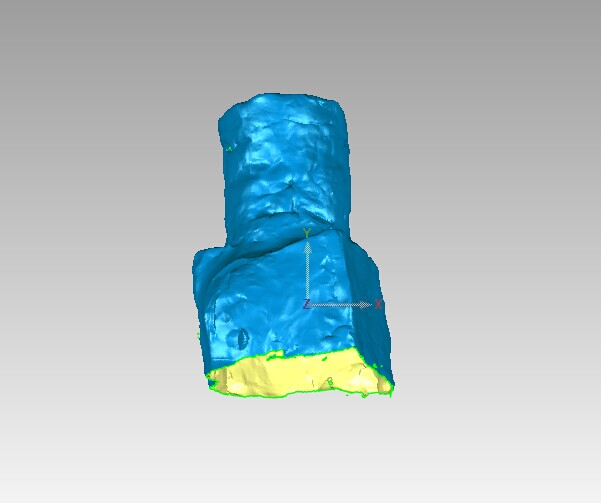
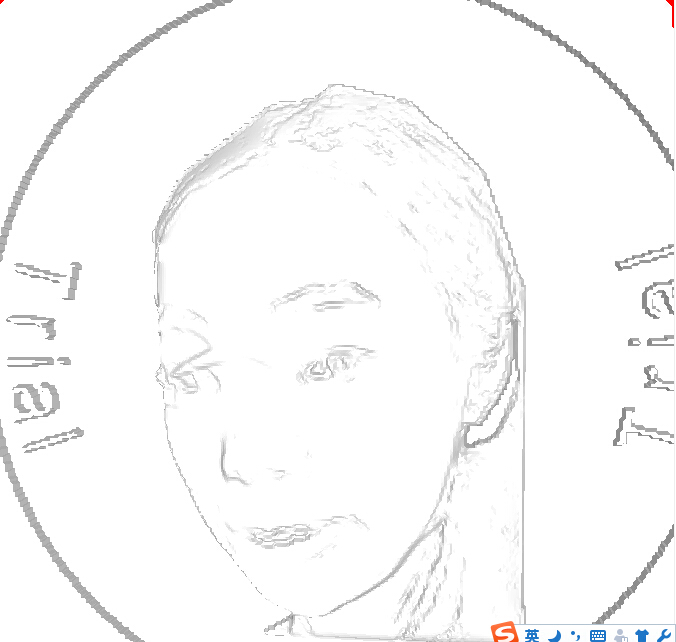
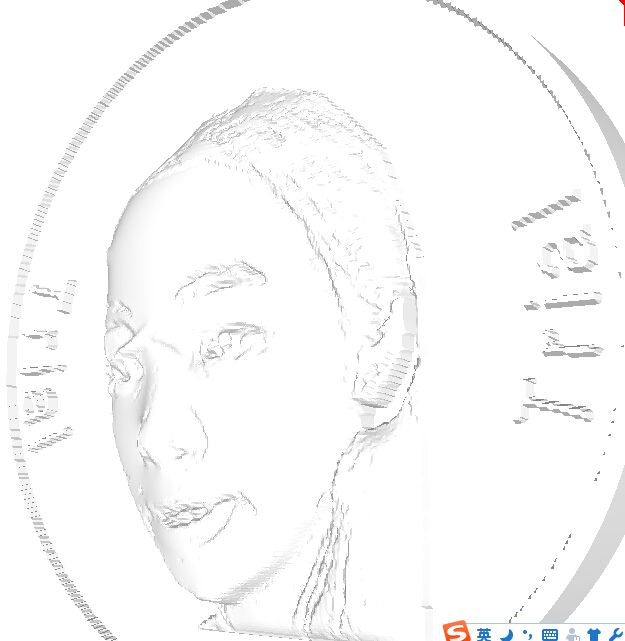
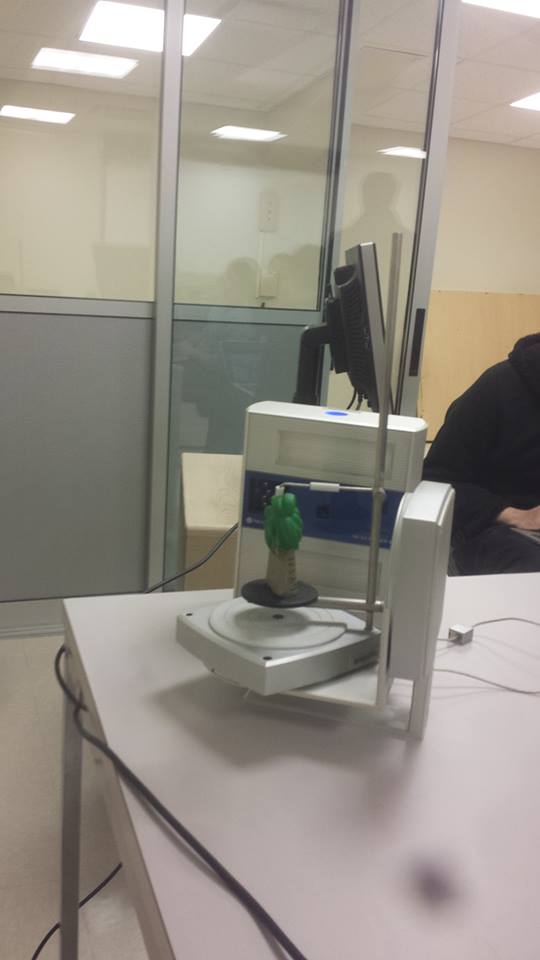
Photo Description: Scanning & Printing

Experience: I was able to scan myself and had myself printed out.                                                                Scanner: Sense Scanner  @MakerLab-BIF              Editing: TinkerCad   @https://www.tinkercad.com/              Printer: MakerBot Replicator 2 @MakerLab-BIF


B. Research & Exploring & Polishing Self-Learning Skills

QQ图片20150310021832

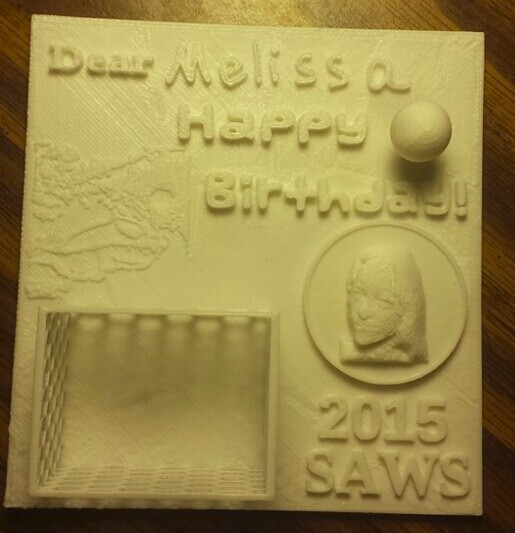
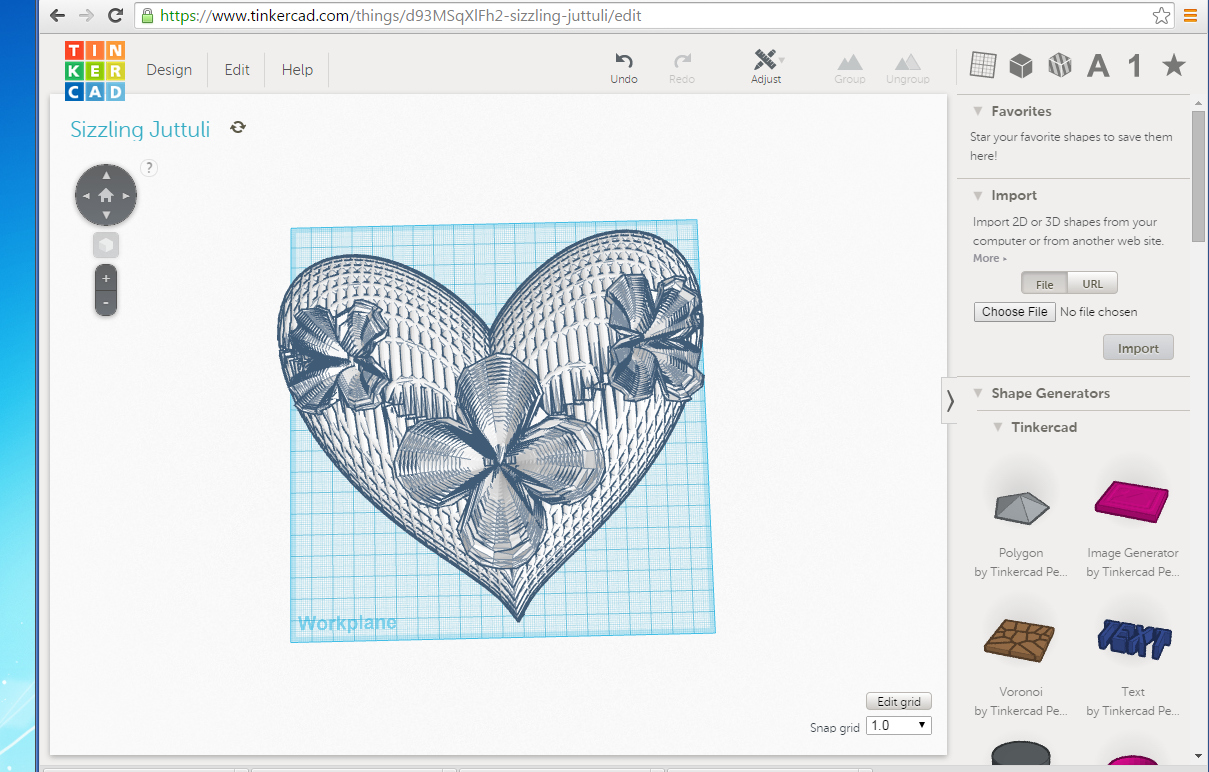
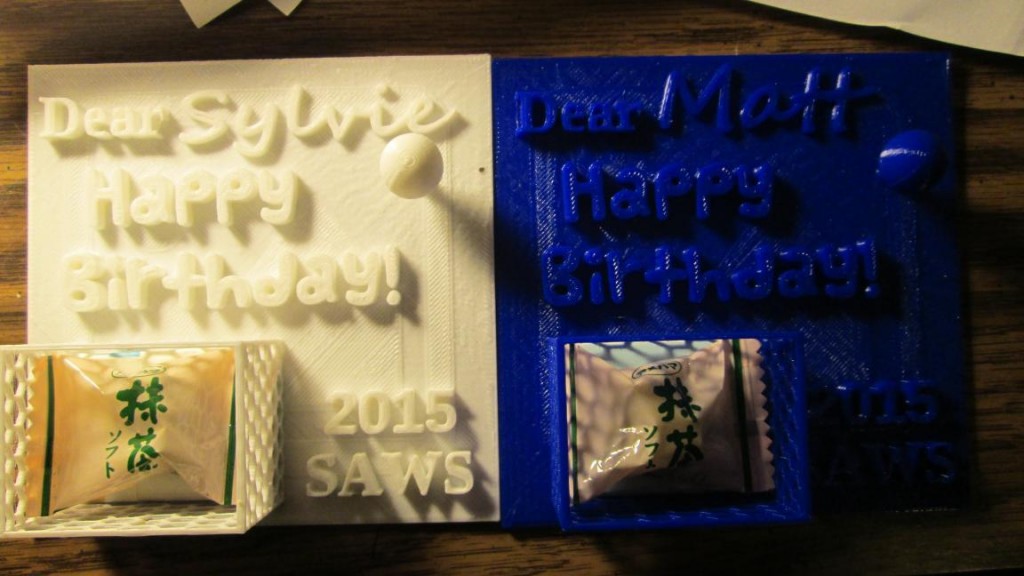
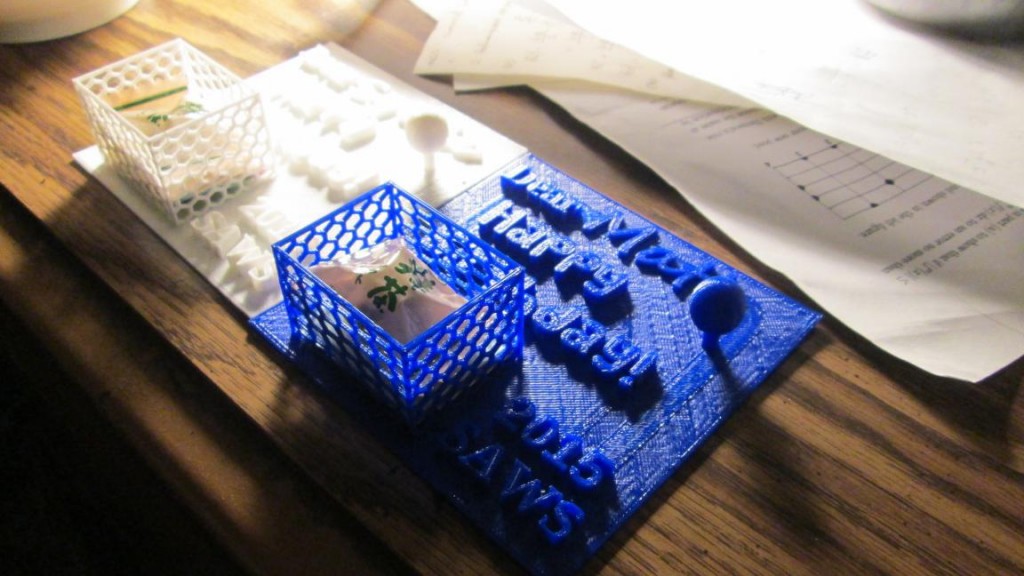
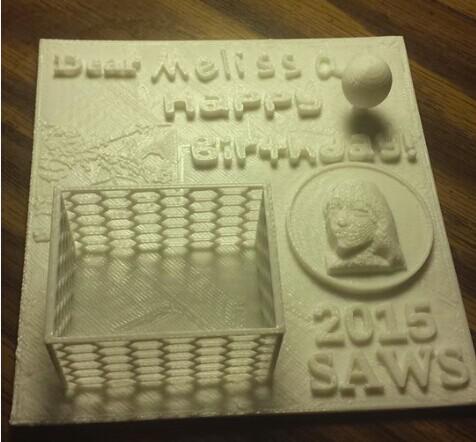
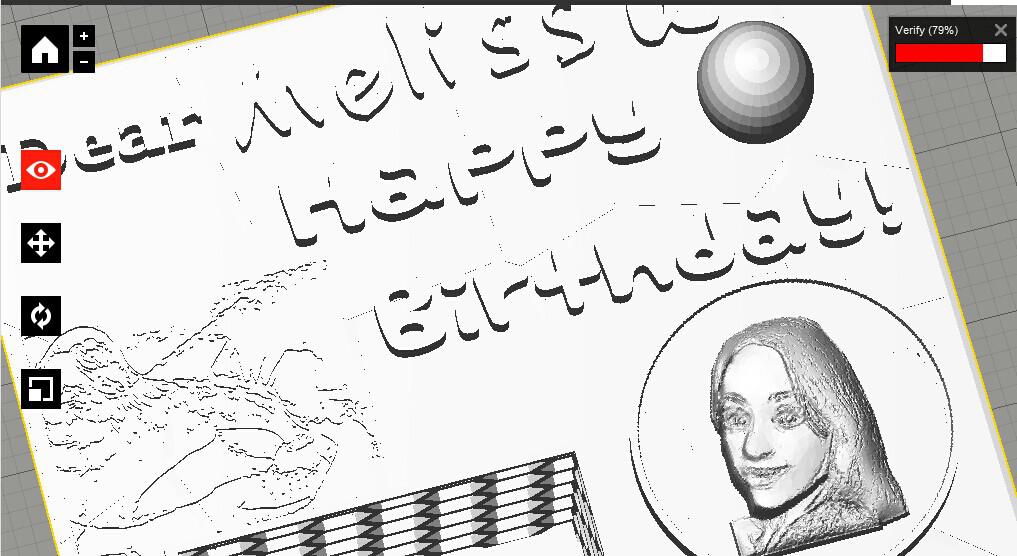
Photo Description: Wish Card (Semester Activity)

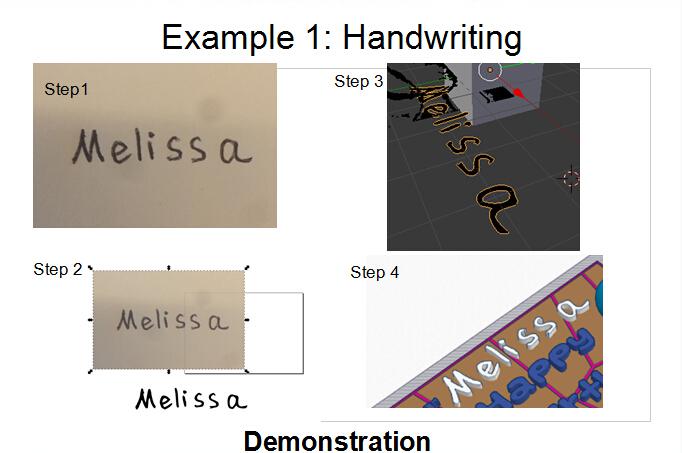
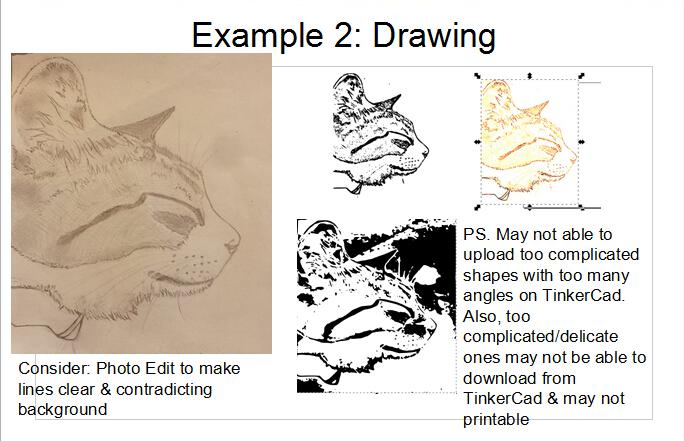
Experience: For my semester activity, I decided to make a birthday wish card for my friend from my volunteering trip SAWS. It includes the extruding of images/ handwriting, the modeling of people’s face based on photos. I also made a presentation on these techniques I explored in the class to share my knowledge. I also posted a detailed journal that tells this experience and shares the knowledge.

My Knowledge Sharing Journal                                                                                       Extruding: InkScape  @https://inkscape.org/en/                                                                                        Blender  @http://www.blender.org/                                                                        Face Modeling: FaceMaker  @http://facemaker.software.informer.com/6.0/                                                    Faceworx  @http://www.looxis.de/looxis-faceworx-tool/


C. Other Technologies Introductory @CU FAB LAB

11048723_338693786319402_3733693521406471463_n 11112717_338693859652728_836764989826327096_n 20150407_152133(0) 20150407_163643

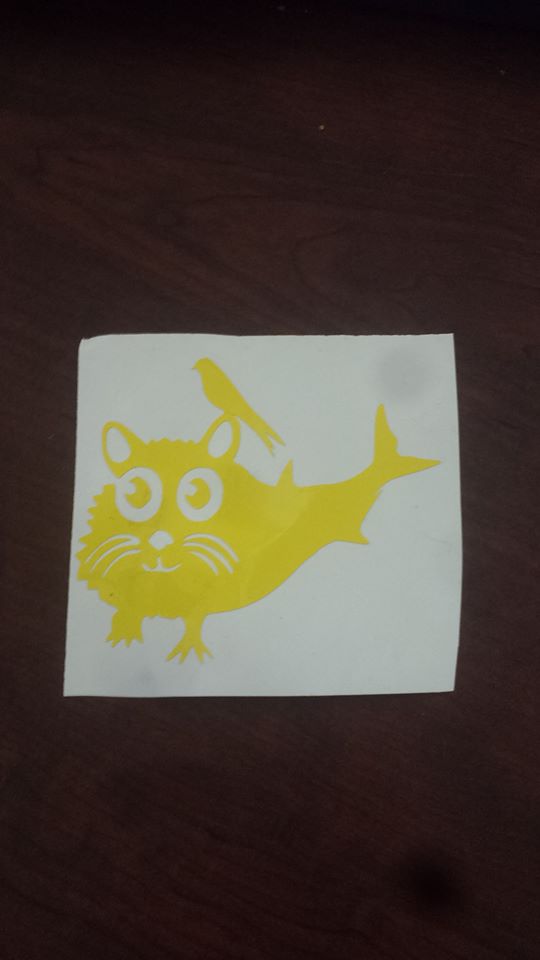
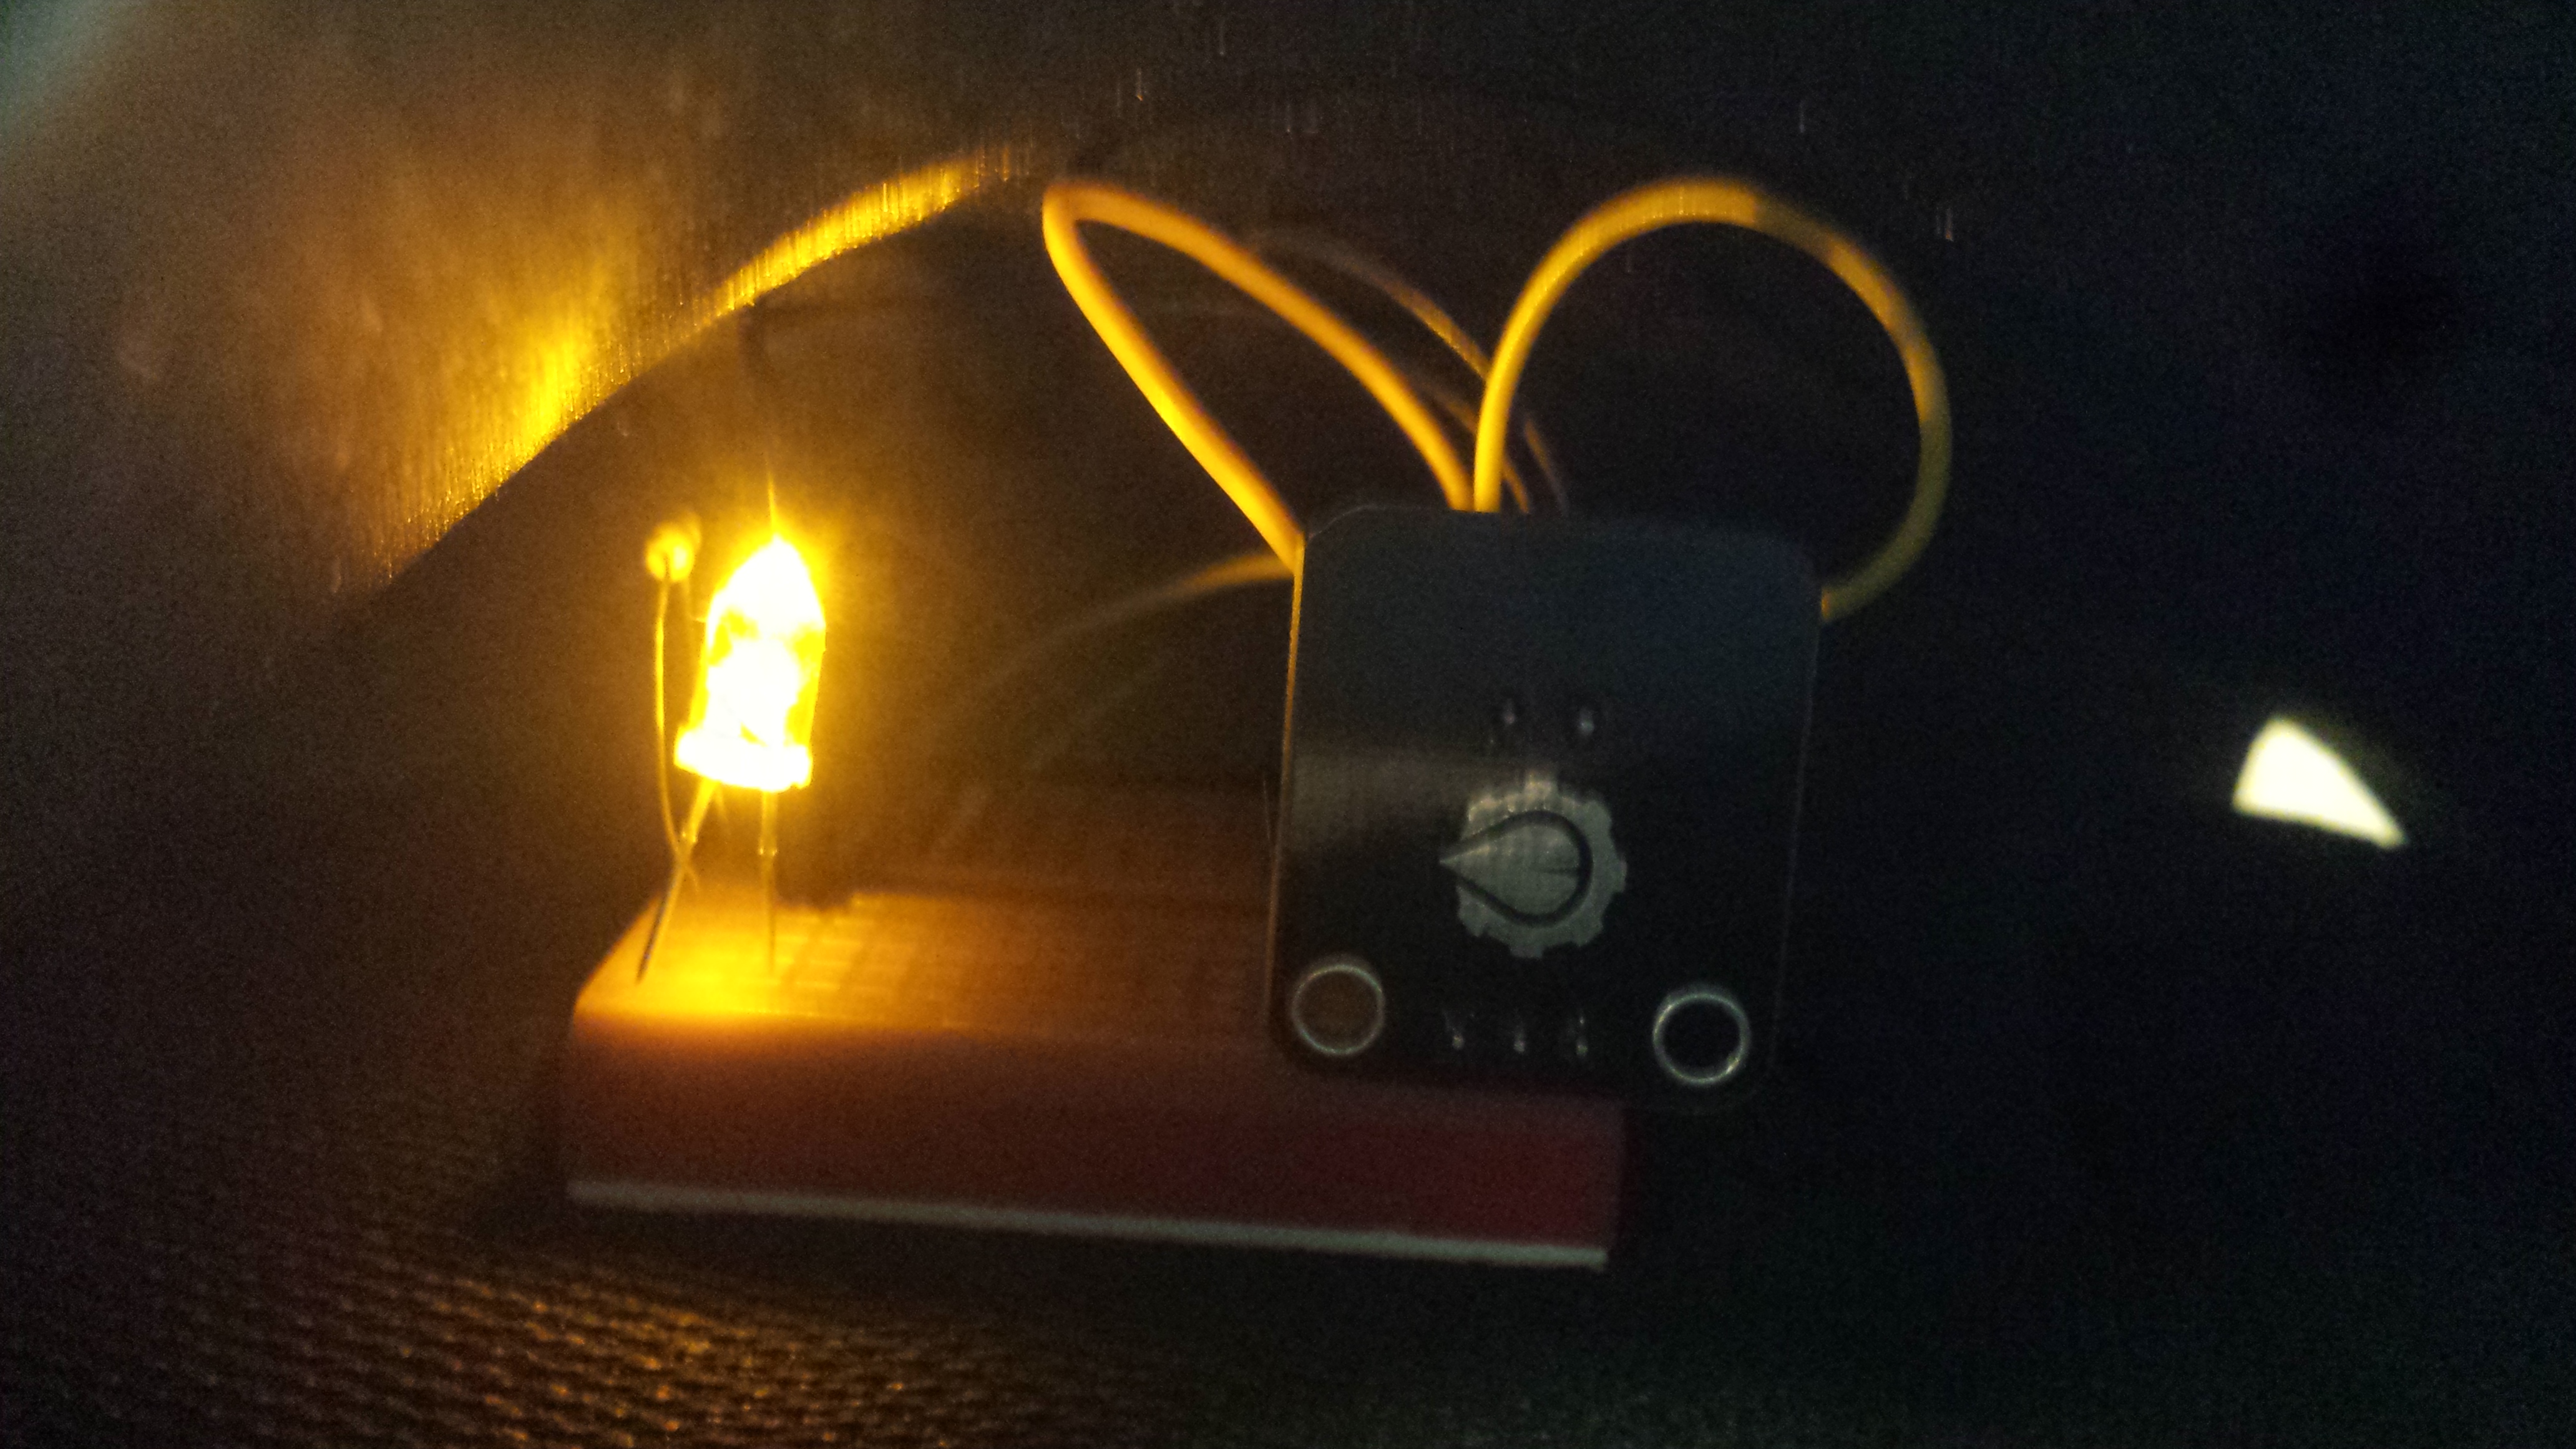
Photo Description: Laser Cutting & Making stickers

Experience: We learned to design and make our own stickers and customized notebook using InkScape and other softwares.                  @CU FabLab


Photo Description: Arduino

Experience: I learned to use Arduino and light sensor to make the LED light automatically light up in darkness. Arduino was very fun to play with, and I also integrated it as part of my final project.

图片1


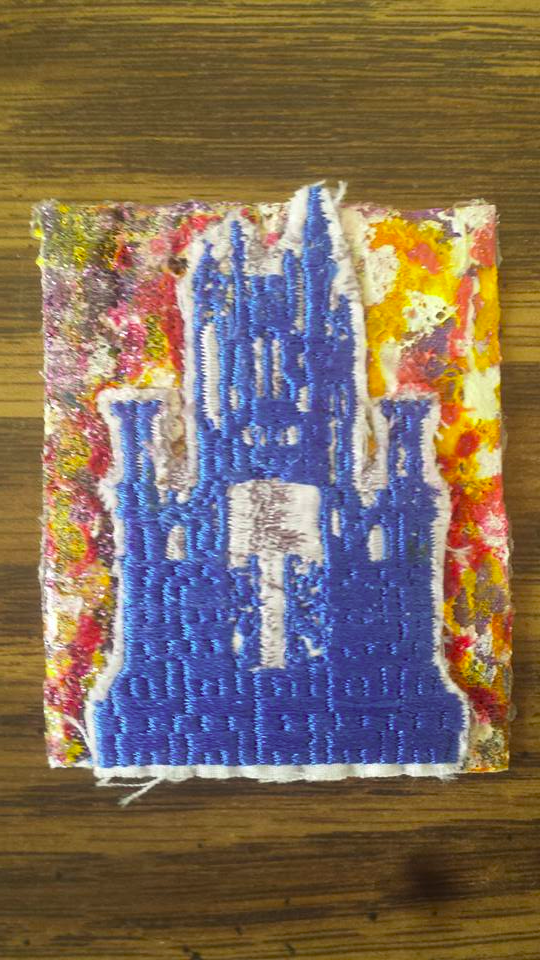
Photo Description: Electrical Embroidery             

Experience: I learned to make electrical embroidery in the FabLab. I downloaded this castle picture online and chose the color I wanted, and made this. You may notice that the background looks a little bit different- Because the machine somehow messed the background up, so I actually painted the background with nail polish of different colors to cover it up!


D. Integrating Semester Learning 

22590_350157275173053_6320667156423899742_n

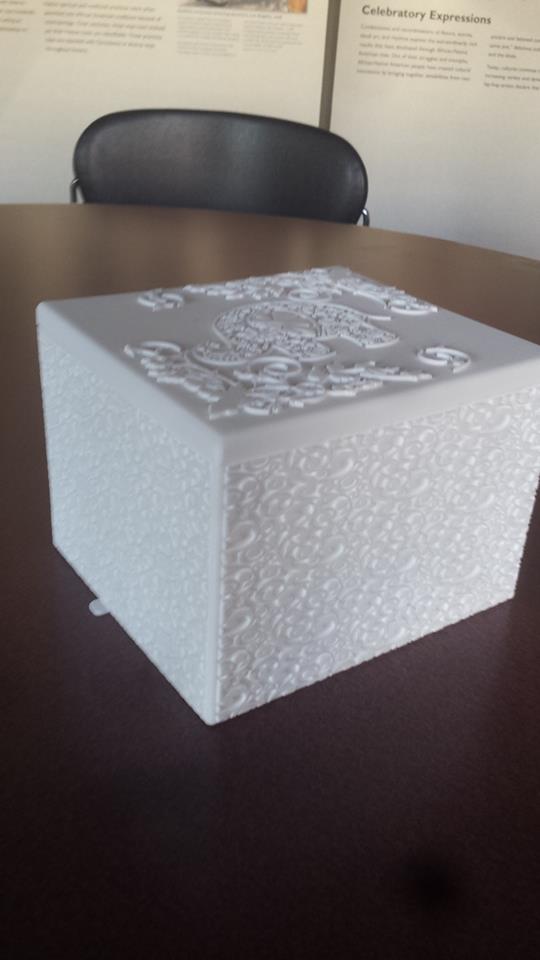
 Photo Description: Surprise Box (Final Project)

Experience: I made a box as my final project. It basically includes different things that I learned in the semester that gave me inspirations. I kept journals of it, and you can view them here:

Also, if you want to make a box like mine, you can download the parts to print from my thingiverse page:  http://www.thingiverse.com/thing:811267


This basically summarizes my experience in the class of this semester. I also created my own portfolio because of the class: http://jlu227.wix.com/kay-lu (Please feel free to view it and let me know if you have any thoughts of helping me to improve it! -Thank you.)


My “Surprise Box”Final Project – Journal 4: Project Meaning & Reflection

This is an overall summary and reflection of my final project. I “categorized” it into several parts, which I thought would make it more clear and easier to read.
Also, if you are interested, please visit the following website:
http://jlu227.wix.com/kay-lu      (My portfolio)
http://www.thingiverse.com/thing:811267   (Where you can download the parts and make the box)
The idea to create this: 
I like science and math; I like art and design; I like volunteering. These characteristics of myself kind of lead me to this project. I wanted to make something that integrates the beauty of math, some kind of “Math Art”, and I want to make something that’s beautiful and meaningful. Also, I enjoy making presents to my friends, so I want to make something that can surprise people or make people happy as well. 
And as this semester, I went on an environmental volunteering trip to Southern Appalachian in North Carolina, I was surprised by how ignorant people could be regarding the protection of the environment and how people may not realize that our actions actually can have influence on the environment. Therefore, I came up with the idea of making this box.  

The designing process & Meaning behind: 
The heart, flowers, and butterfly parts are modeled in Mathematica. This came from the idea of “Art Math”, showing the beauty of symmetry and pattern a function could give us.
The box is designed in such a way that I could hide the Arduino in the lower layer, and put the LED light in the heart. Also, the inside space that is created by a wall of hexagons is used to plant small plants, like grass or moss. 
The idea behind these designs is that: 
> The moss as background, which surrounds the heart, convey my idea that personally, I think plants have “hearts”, or their feelings as well. So when human hurt a tree, like cutting it, it can feel the pain as well. Also, the butterfly and the flowers on the heart symbolize the beauty that nature provides to all the livings in the world. They are beautiful and fragile, and they are something that while we human are enjoying, need to treasure and protect as well. 
> The Arduino part ( including a PIR sensor and a LED light) could make people surprised. When people open the box, the heart will be light up and looks pretty.
> The box is created using Fusion 360. However, the outside patterns of the box were not my work- I didn’t draw those images. I found them(the elephant, flower patterns) on google and use InkScape and Blender to extrude them and integrate them with my box. I wish I could have given credits to whoever designed those images, but I was not able to find the author names.
The box works like this: 
So you open the box, and the heart will be light up, surrounded by green moss, and you will be surprised.
The plant part is not finished yet though, as I am not very familiar with plants and am not able to find suitable plants yet. Therefore, right now I just put in some dry pine tree leaves instead.
Some afterthoughts:
This box symbolizes my idea about protecting the environment. And I also enjoyed myself a lot while doing it, because I love making people happy and I love 3D printing and different technologies. And this box is a combination of different things (3D printing, Arduino, “plants” idea) And as I am actually a Finance and Accountancy sophomore in the University of Illinois, I didn’t have as many chances to access high tech as engineering students, this project really give me the chance to try different ways possible to make an idea come true. 
I had a lot of crazy ideas when I was a kid. They were “crazy” at the time because I didn’t know how to realize them, in other words, I didn’t know the existing technologies possible to make them come true. The biggest afterthought of this project is that, how can the society make these new technologies more accessible to normal people, or more specifically, to children? I believe that if kids are able to have the chance to be introduced to different high technologies, they can really let their imagination fly and have fun and explore and learn a lot while making their “crazy” ideas come true.


My “Surprise Box”Final Project – Journal 3: Box Modeling & Arduino

11229411_349641835224597_4988407589898695507_n


Box Design


After finishing the most technical part of modeling the heart in Mathematica, I start to make my box.

I used Fusion 360 to model the box, as I was then able to control exactly what I want for different dimensions of the box.

The box also has a lower layer. It is used to hide Arduino and battery. I also make a hold at the bottom of the heart, in order for a LED light to go in.
The Arduino part of my project, I used a PIR sensor, so when people approach the box or when people open it, the heart will be light up.

Another thing is the “fence” that’s built inside the box by a wall of hexagons, which created an empty space inside, was supposed to be used for planting. My original idea was to plant some moss in the box as a background. However, I haven’t found moss to plant there yet, so I used some dry pine tree leaves instead.

After this, I put them all together and my project is done!

22590_350157275173053_6320667156423899742_n

To print out the parts and make this box, you can go to my thingiverse page here:      http://www.thingiverse.com/thing:811267

My “Surprise Box”Final Project – 
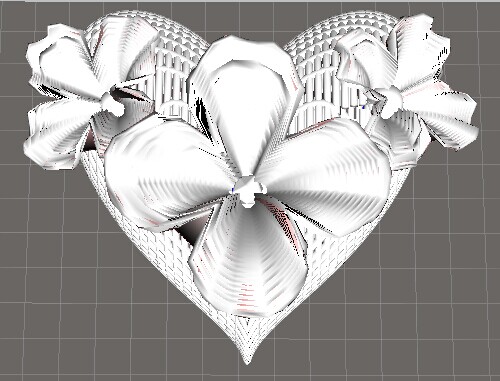
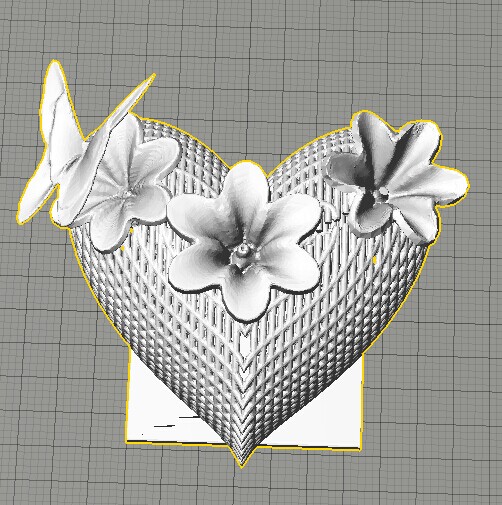
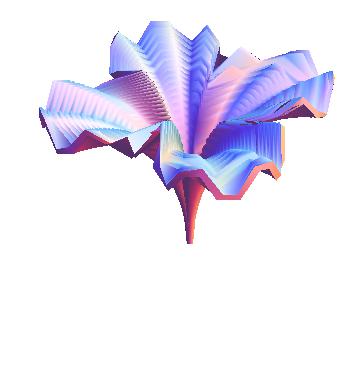
Journal 2: Flowery Heart Update with New Softwares Used
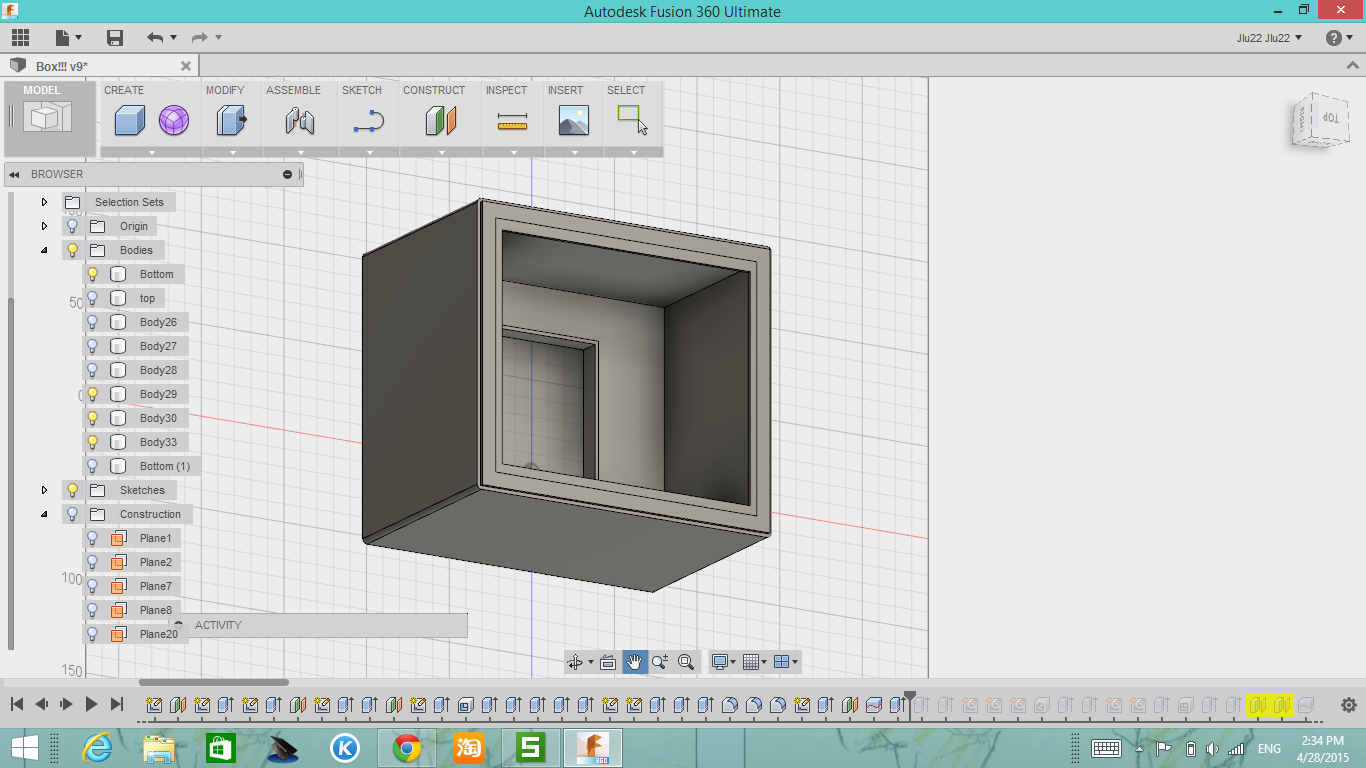
Heart and flowers modeled in Mathematica separately, then using MeshMixer to edit, scale and put them together.
This is also a part for my 3D printing project “Surprise Box”.

Update

1. The original file named “Flowery_Heart_Right_Size_2” is the basic concept of it, and although it looks nice, it is not printable on most of the 3D printers, because of several problems, like too many shells, the petals are too thin, etc.

2. The printable and updated version is named “ReallyFinally3stl_repariedsimplied”. This one has been cleaned, made solid, checked errors, strengthened and simplified. Therefore, this one is more suitable for printing. I will test it within a few days and put on the picture of the printed version here later.
Also, since the original flowers were not suitable for printing, I changed the numbers of the formulas on Mathematica a little bit, and get some different shapes of flowers. (PS. If you notice, all the three flowers are different.) It is also interesting to disco(ver that when I change the power of one of the formula, I will be able to generate something that looked like a butterfly! Therefore, I added the butterfly on the new version!     QQ图片20150415123952                                                            ( Original Version)

QQ图片20150416070808

(Second Version)

In the process of trying to fix the problems, I learned a lot, like using new softwares like “MeshMixer”, “MeshLab” and “NetFabb”. I found these three very useful in different aspects:

1. MeshMixer is a place where you can edit and change your STL file, just like TinkerCad. However, MeshMixer is much more powerful than TinkerCad. For example, I failed to complete my edition of the flowery heart on TinkerCad, because it may be too complicated for TinkerCad. But I can do so in MeshMixer. Also, MeshMixer allow you to dynamically change the surface of the object, and provide functions like “make solid”, , smoothing, uniform scaling, and a lot more, which TinkerCad is not able to provide.

2. MeshLab is very useful for remesh the object. At first my STL file was ridiculously big, like 650+MB, which was very inconvenient because it slowed down my computer and I am not able to printed a file that’s huge like this. And usually, this problem can be solved if I lower my density of meshes, in another words, have a smaller amount of meshes. MeshLab gives you a function where you can simplify the model and reduce the meshes. It also shows you how many vertices and faces you have in your model. And by looking at these numbers, I was able to monitor the process of reducing faces amount, and chose the right level I wanted. This helped me to reduce the size of my file hugely, and finally get to a printable file of about 11MB.

(PS. I have an interesting discovery about decreasing the size of your file as well- If you get your STL file from somewhere else, like TinkerCad, MeshMixer, or from MakerBot Software after scaling it there, if you import the file in Blender or MeshLab, and then export it out from there, they will give you the minimized size possible for your current file!)

3. NetFabb (Basic) is a very helpful software too. It can help you fix the errors that your file may have automatically. Therefore, it can help clear up the printing errors before you put them to print!

My “Surprise Box”Final Project – Journal 1: MMA Modeling

For my final project, I decided to integrate different interesting software and technologies to make a “Surprise Box”.

The idea is to make a box. And when people open the box, they will be surprised to find that there is a heart with some flowers in the box. Also, you can hang it on the wall and the “box” will then become a calendar or a task board. I want to make this because I like cute little things that make people happy, and I want to make it useful in life as well.

The original plan was to use Mathematica to model the heart. I was thinking combining two functions together, one is the original heart shape function, and another one would be some kind of function that could give my heart some special and pretty pattern/texture.

And I was thinking about buying a flower and scan it and then put it on my heart. However, I changed the plan a little bit and model both the heart and the flowers on Mathematica.

Here’s my current progress on this:

Flower!(Flower)

heart(Heart)

(PS. I researched some online sources to find the codes for them, especially the flower and how to make the “tube” texture one. And I derive my own heart shape function.)

(Comment to let me know if I should post the codes here!)

However, I was not able to eliminate the gap in the heart. Therefore, I put both of them in TinkerCad and edited them to make them look nicer.

Combination!!!

It took a very long time and some hard work to figure out the codes and the design, but in the end, it was all worthwhile! The moment when I finally finish putting them together, I felt proud of myself!

4/13/20115


Geomagic – Scan Cleaning (&Pizza)

This week, we got some hand-on experience on using Geomegic to clean up a scan of a clay object.


Original Scan of Sculpture

Original Scan of Sculpture


Cleaning up(right) and final image( left)

Cleaning up(right) and final image( left)

From the photos you can see my clean up process of the original scan of the clay object.

The problems facing the original scanned object are that their surfaces are usually pretty rough and uneven. Also, because of some errors there unavoidably are some holes on the surface that we want to fill up, for some flying parts outside the surface that we don’t want to keep.

And in today’s workshop we tried to use Fusion to do these kinds of simple cleaning-ups.

1. To delete the flying parts (errors), we simply need to select the parts that we don’t want and press delete on the keyboard.

2. To fill up the holes on the surface, we used the “fill holes” function under the “polygons” tab and this powerful function enables us to fill each single holes individually or fill all the holes of the whole object at the same time. Using the filling all the holes at the same time one may seems to be more convenient, because you don’t have to navigate by yourself to find individual holes, however, this is not as flexible because it may fill up some huge holes that you actually want to keep.

3. In Geomagic, we can also approximate the very organic shape to some geometric shapes, like cylinders, plane and cones. We used tools in the tab Parametric Surfaces. We first detect the regions, and this will give us different portions of the object, which are labeled with different colors. And then we will edit the contours to better segment the object based on its shape. After that, by selecting a specific region and then use “classify regions”, we are able to transform it into a close geometric shape, which helps us to smooth the surface and get a less complicated form of the object that is able to be imported into Cad.

These are some very basic things we learn about Geomagic today. We still have a lot to delve in about this software. Thanks to Geomagic master @Travis Ross from Beckman Institute for teaching us and being very helpful.

Later a couple students and me kind of think of how to import the thing we edited in Geomagic into Fusion, and do more work there. It would be a very interesting topic for us to develop, and it would be very useful for design if we could combine the using of Geomagic and Fusion together!

At the end of the class, Vishal brought us some very delicious pizza, and one of them is my favorite mushroom type pizza! A great ending of the class!

SHARE: 2D to 3D

There was a short period of time when a lot of my friends were having their birthdays. This “Birthday Season” drove me a little crazy because I really wanted to give them a present that make them feel surprised special.

And while I am taking this class about 3D Printing, and I am quite awed by this interesting technology, I thought, could I design a birthday card for them using 3D Printing? And finally I did. On the birthday cards, I wrote their name down on the paper first, and then put the image on the computer and convert them into 3D form and print their name down. This is because personally, I feel that it’s important to write down someone’s name in my own handwriting, rather than the fonts provided on the computer, to show my good wishes and sincerity by adding these kinds of “handmade” elements. Also, in one of my birthday wish card, I put my friend’s 3D half-face on it as well, which really gave her a surprise.

Here are some pictures of my birthday wish cards:

And in the process of making these birthday wish cards, I learned some interesting technique of how to convert 2D image into 3D forms (limited). I put them into two different categories here, one is adding “height” to your handwriting/ drawing lines, while another one is using some software to make the 3 dimensional face out of a 2D picture. The following steps will show you how to do so:


  A.Convert 2D lines to 3D form 

5

The basic idea here is to make the lines in the picture extrude out. We will first convert the lines in your picture to a .svg format using InkScape, and then convert your .svg lines to our familiar .stl format using Blender.

Software needed:

InkScape (free): https://inkscape.org/en/

Blender (free): http://www.blender.org/

6

Take  a picture of your handwriting. (Requirement: Dark-colored handwriting contradicting to a bright background. The lines in the picture are clear.) Before using the picture, you can consider editing it a little bit first to satisfy the requirement, by changing the comparison and lighting of the picture, etc.

> For detailed process please view my video demonstration here:

(I figured the best way to present the process clearly is to do the demonstration video and let you see it. 🙂 )


★★What are the other things we can do with the same technique?

7  8

If you like drawing, you can edit the picture of your drawing and make the lines of your drawing more clear, and the background lighter and more contradicting to your lines. And  you can make your drawing extrude and then print it out!


B. Make a 3D Face from a Picture

Software:

I. FaceMaker 6.0 by Pantomat (15 day free trail)

Download: http://facemaker.software.informer.com/6.0/

It is very easy to do this if you have the software: You just import the face image on the FaceMaker, and then follow the instruction by selecting different important points on the face and drawing different important lines on the  face as well.

There’s a very helpful Youtube tutorial video available here:


II. Faceworx (Totally free)

Download: http://www.looxis.de/looxis-faceworx-tool/

Tutorial is available here:


Both of the software are very easy to use, but they both have their shortages and strength

FaceMaker:

> It’s not free

> Only Coin-shape 3D face with “trail” text on the coin

> However, the photo used here can be very random photo with whatever angles to the face, and it only requires one picture

9a 9

Faceworx:

>It’s totally free

>Can shape the whole head

> However, it requires two pictures: The front picture and the side pictures, and both pictures have to be taken seriously from the right angle.

(I personally didn’t use this so I don’t have screenshots of examples for pictures here, but  you can see the examples on the Youtube video link I provided. 🙂 )


Lastly, this shows my wish card that combines two techniques:

10

(PS, on this model, my friend’s name Melissa and the cat drawing was created using the first technique – Making lines in an image extrude- and the head coin was made by using FaceMaker and a random picture of her. )


I hope that this article helps if you are interested in making a customized wish card for your friend! Thanks!

Beckman Institute Experience

This week we went on a “trip” to Beckman Institute. Beckman Institute is a very nice building, where business offices and science labs are combined. We went to two rooms in Beckman for our 3D printing class. One is on the fourth floor, where they are some big two-screened computers, which are said to have high-speed computational capacity. But our main reason to be there was to visit the scanners Beckman offers.

The one on the fourth floor is a small laser scanner. The good thing about laser scanner is that it can capture very precise dimensions of the objects and it can capture colors. For example, compared with the scanner we have in the MakerLab, the laser scanner here can get a more accurate shape of the object. However, the laser scanner works very slowly. The process for it to get prepared and then finish up scanning took about 20 minutes. But the one in the MakerLab is much faster. In the photo here, you can see the laser scanner at work. How it works is that it will have a video camera that capture the laser movement on the object, and the laser can detect the dimension of the object from different angels. And finally, the software program on the computer can align different sides of the object together.

4      5


There are also some other very cool and interesting 3D printed objects on the fourth floor. And we can see how 3D printing can be used in different fields. Here are some examples of its application:

1(1)

2(2)

3(3)


From (1), you can see that some 3D printing machines do offer changing color printing. The machine was in Beckman before, but they don’t have it any more. But yes, existing technology allows different color printing other than the single color ones.

From (2), you can see how 3D printing can be used in the business market. This is a fun object designed and developed by other students, and it can be put into production in the market as a fun thing to play with by kids.

From (3), if I remember it correctly, it is a micro-molecular model printed by students in the biology field. Actually, I also saw some other things, like a head skull printed by 3D printing there, and some kind of a virus model. Therefore, you can see how 3D printing can be applied in other areas of study to help with their modeling or teaching.

Some other exciting thing I discovered is that there are different materials available for 3D printing. or example, the fun object in the above picture feels dusty. It is because it was printed by some kind of powder, and the powder was shaped and contracted by the 3D printing machine. And it feels very different from the ones we printed in MakerLab, using the plastics. Actually, some mechanical engineering students printed different samples out of different materials in the lab, and we got to touch them and feel the texture. There are a lot of options out there and you need to pick what you need based on what you want to build. Some materials feel very smooth on the surface, some are rough, and some are dusty. But they are all very interesting and have their own use.

——————————————————————————————————————-

Later we went to the basement and see a bigger and more advanced scanner there.

6

This one is said to be very precise, and qualified to be used in the lab environment. The major parts of it are a camera, a plate that hold the object still, a projector, and a computer with required software on it.

This one is different from the laser scanner, it actually uses its camera to take pictures of the object from a lot of different angels and then put the pictures (More than 100  scans for a small object) together, align them and therefore, construct the object based on the pictures on the computer software.

——————————————————————————————————————

The Bechman Institute is a very cool place that expose me to a world with technology that I haven’t seen before. I really enjoy my experience there, and I think we should all take advantage of this month when we have access to it and have some work done there!


Week 5 & 6: Fusion

Fusion is a really cool software to use for designers (especially industrial designs) to make their design come true in a 3D dimension.

In the class, I am really happy that we students get to use it for free, because this just provides us students an easier access to learn a awesome software.

We learnt to make a lamp in first fusion workshop under instructions of the guest speakers, and after the class we tried to build our own work on fusion. I feel like the greatest function for fusion is that it allows you to make a very complex geometry quickly, and you can change the form of the object easily as well. Also, you will be able to change the dimensions accurately, by setting a specific height, width and length in it. The most important thing for beginners is to get ourselves used to the different tools in Fusion (In class, we learnt a lot about using “Sketch”). But for upper level users, the most important thing would be to have a great idea, and Fusion will be a tool to make that idea come true.

Currently I am watching tutorial videos online about the usage of different tools in Fusion, to get myself more familiar of how to use it. The problem of Fusion, though, is that it might be too big for lap-top, therefore, it is not always working on my lap-top. Other than that, it is an awesome tool for designs!


Week 2 Reflection

In week two, we first tried to use “tinkerlad” to model something that can be printed out on 3-D printer. Our group chose a design from Austin that contains different geometric shapes and our team name “Gold Team” on it. Later we explored different website in groups. I was focus on exploring a 3-D printing design sharing website called “shapedo.com”. This website allows people to upload and share their designs online with other people. And it allows other people to download designs from the website, and make some improvements on the original design, and share the new version with other people. On this website you can find some very cool design. My favorite one is the “Gear Clock” design.

QQ图片20150209123301

I like the “gear clock” a lot because this is a good example of how 3-D printing can be used to customize products and so to attract people. This “Gear Clock” is very artistic and unique. By 3-D printing, once you have the original digital model of it( as it is on the website), you are able to “print” the same clock out by yourself at home, and maybe add some modification of the design.

The website also categorizes different designs, which is user-friendly and allow you to find out what interests you easier.

QQ图片20150209123857


After exploring the websites, we listened to a talk from Kylie Peppler from Indiana University. She introduced to us a lot of events/ organizations that are working on promoting or developing new technologies. For example, “Make Faire” is one event where creative makers from all over the world can gather together and share their designs to other people.

New-maker-faire-Sept-2010-in-Queens-NYC

She also introduced the important idea behind DIY (Do It Yourself), which is that everyone can learn to do everything. Given the opportunities to learn and practice, people can make things come true. And she talked about some efforts on this that are focus on kids nowadays. For example, there are Make Labs all over the world, where they provide different materials to kids and encourage them to make something out of those materials. These movements were also proved to successfully encourage children to learn by making. By trying to make something out, kids are motivated to develop their knowledge and artisticity. For example, some kids who don’t have computer science background learned coding when they are doing their projects.

img_0548

At last, she mentioned the socio-cultural views of construction nowadays. An artifact is not only a representation of someone himself/herself, but also can represent a social group at some extent. Also, the gender inequality in engineering field nowadays does not exist in kids who are doing the making things projects. In my opinion, this in turn can reflect that if people are motivated to do something, they can do it well, regardless of gender. Also, it reflects how the stereotype of the society may influence and discourage some female to go onto the engineering career path.

In week two’s class, we gained some information on what’s some existing projects/events/websites designated to 3-D printing technology, and we learned about some current efforts that’s been putting into motivating people to be creative and make things by themselves, integrating with the use of technologies.