Welcome to the Media Commons’ weekly “Media Workflow Blog Post Series”, where we’ll walk you through the process of creating a video project, from your initial conception of the video to the moment you publish it online. Our post for week 1 will discuss how to gather the most effective technology to use for your project:
The first step to creating a quality video is selecting the right equipment. Here are some questions that will guide you during this process:
1. What kind of video am I making?
First, determine your main goal for the project. What do you want your viewers to learn and take away from your video? After you’ve thought about your main objectives and vision, determine the most effective presentation format for the video. Will it work best as an interview, testimonial, narrative, or something else entirely?
Next, create an outline or script of what you hope to accomplish and say in your video. This will help determine where you’ll shoot the video, who you’ll cast, and the equipment you’ll need. Creating an outline or script will also ensure that your video shoot is well-organized and efficient.
After you’ve created your outline, think about how many people will be on screen and speaking at once. Will you primarily have one person on screen speaking to the camera, or will you film your subjects interacting in a group setting? Lavaliers and handheld microphones are useful options for one-on-one interviews or testimonials, while a shotgun microphone works better in situations where multiple people will be on-screen and speaking at the same time. 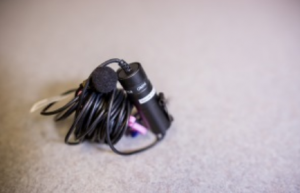 Lavalier Microphone
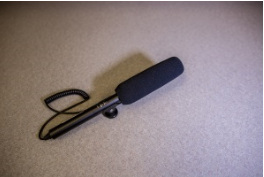 Shotgun Microphone
2. Where am I shooting?
The location of your video shoot will influence the type and amount of equipment you will need to use. Your lighting and audio equipment choices are two factors that will depend largely on your location.
Filming Indoors:
Lighting:
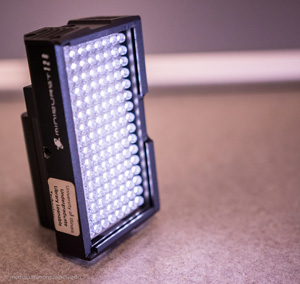
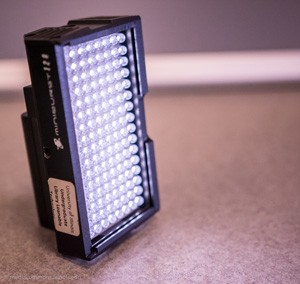
If you are shooting in a room without windows, you will need to use artificial lighting, which will create a more polished look in your video. Turn on overhead lights and utilize lamps to create a well-lit recording space. You can also check out artificial lighting like this Digital Juice Miniburst 128 Portable Light from the Undergrad Library: http://www.library.illinois.edu/ugl/mc/lt/ltcamequip.html
It is also important to be aware of intense backlighting when you shoot in a room with windows and natural light. Ideally, do not shoot with your subject in front of the window. If that positioning is necessary, adjust the blinds or curtains on your windows, and try to light the subject from the front to match the background light levels.
Audio:
There are generally less background sounds to worry about when recording audio indoors. However, you should still be aware of anything that will create distracting noises, such as air conditioning units or voices in the background. If using a shotgun mic, orient your subject so the microphone is pointing away from any source of noise (often outside noises from windows). If using a lavalier mic, you can use the subject’s body to block the noise by having them face their back to it.
Filming Outdoors:
Conditions are much less consistent when working outdoors, thanks to changing weather, lighting, and sounds. It is important to keep these variables under consideration and adapt to changing conditions while shooting outdoors.
Make sure your equipment is fully charged before beginning your outdoor shoot, as it is likely that you will have a difficult time finding a power source after you begin. It is also a good idea to bring extra charged batteries with you.
Lighting
It will be more difficult to control the lighting during outdoor shoots. Factors like the time of day, weather, and your location will play a role in how bright the light in your video is. Be aware of any glare or harsh shadows, which can be caused by shooting in direct sunlight. Filming on an overcast day or staying out of direct sunlight can help with these issues.
Audio
Be aware of any noise that could distract from your video, such as traffic, wind, birds, or people talking. Take time to scout your location before you shoot to make sure there are not any loud sources of noise nearby (busy road, HVAC units on building roofs, bus terminal, etc). Always test your audio setup before filming, and use a high quality microphone to generate clearer audio in these conditions. A shotgun mic held close to your speaker(s) is one option for outdoor shoots. You can also use a lavalier microphone.
3. Am I going to move the camera while filming or stay in one place?
Stationary camera:
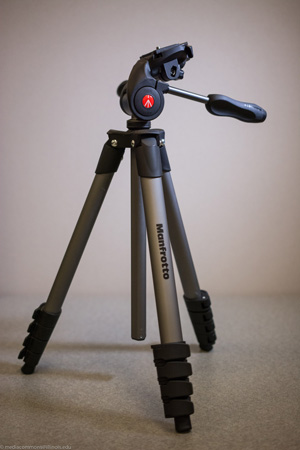
If you are shooting with a stationary camera, your best option is to place it on a tripod. This will stabilize your video and create a higher-quality shot. If you don’t have access to a tripod, you can check one out from the Circulation and Reserves desk in the Undergraduate Library. http://www.library.illinois.edu/ugl/mc/lt/ltcamequip.html

Moving camera:
Some video projects may call for the camera to move during the shoot. Holding the camera while shooting is an option, but it can produce shaky video footage. One helpful option to account for shaky footage is to utilize a shoulder rig. Some form of stabilization is recommended for shooting while moving to create a smooth, quality shot.
4. What equipment is available? Can I use what I already have?
Many people create videos using something as simple as a smartphone, so you might be able to use equipment you already have for your project. However, the Media Commons and Undergraduate Library also provide equipment and spaces to shoot your video. Let’s take a look at some equipment options:
Smartphones
If you choose to use your smartphone for your project, there are a few things you’ll need to keep in mind:
Stabilizing the video:
Avoid shaky cellphone video footage by using a cellphone-specific tripod or shoulder rig. If you don’t have this equipment handy, you can get creative and make a simple tripod using materials you already have handy, like cardboard: http://lifehacker.com/make-a-super-quick-phone-or-tablet-stand-out-of-cardboa-1512059509
Audio:
Cell phones are capable of recording audio, but like internal microphones on DSLR cameras, it is not the best quality. We recommend utilizing a shotgun microphone or external audio recorder to pick up higher quality audio.
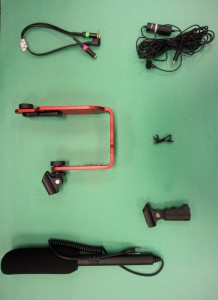
We also have a cellphone microphone kit available for check out:
Manual settings:
If you’d like more control over your smartphone camera settings, you’re in luck! There are many techniques and apps you can use to adjust the camera aperture, shutter speed, and exposure. Check out this article with more information: http://www.nytimes.com/2014/10/02/technology/personaltech/smartphone-photography-evolves-with-camera-apps-and-related-tools.html?_r=0
Loanable Technology
If you’d like to borrow high quality video production equipment for your project, stop by the loanable technology selection at the Undergraduate Library. We provide a wide range of loanable technology for UIUC students and faculty, which can be checked out from the Circulation and Reserves Desk. Our collection includes cameras, tripods, microphones, laptops, and much more. Additional information about our equipment and check-out policies can be found here: http://www.library.illinois.edu/ugl/mc/loanable.html#checkout
Media Commons Studios
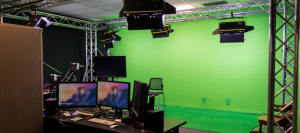
The Media Commons also maintains a video studio in the Undergraduate Library, which is available for reservations. Our studio is useful for projects that involve shooting an interview, testimonial, or something that requires a green screen. However, we also have a black screen backdrop available.
The studio works best for videos that will be shot in one location with stationary cameras. There are currently two stationary cameras in the studio that capture both wide range and close-up shots.
The video studio provides ample lighting and a quiet environment for audio. Utilizing the studio also provides the opportunity to learn more about the video production process for any future endeavors that may call upon it.
The more preparation you put in before shooting your video, the more organized and enjoyable your video shoot will be. Taking time to ask yourself these important questions will also ensure that you’re using the correct equipment and technology, which will in turn help you create a higher-quality video.