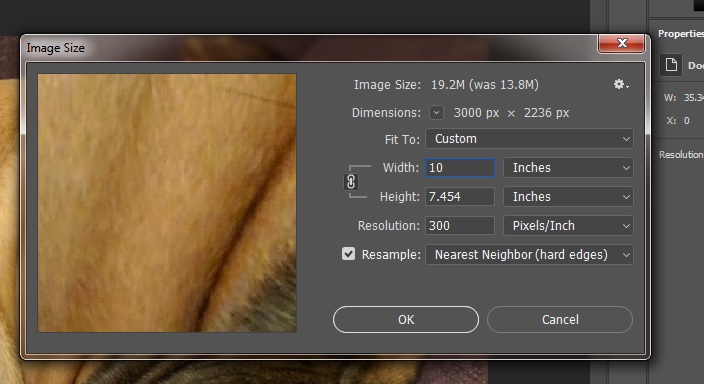
Your image needs a resolution of 300 PPI and a height or width of at least 10 inches. We ask for a higher PPI/larger size because the winning submissions are printed out as large posters and we wouldn’t want your image to be very pixelated in case it is displayed.
Here are some instructions for how to do this in Photoshop (available at computers in the Scholarly Commons, Room 220 Main Library):
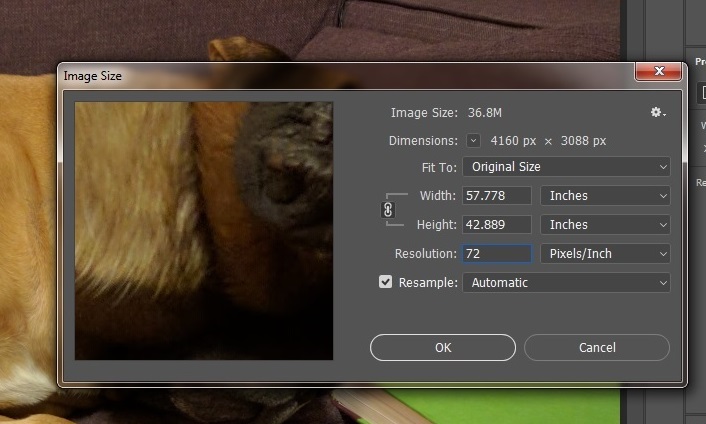
The basic issue you’re going to run into when increasing the quality of images is that the image will get smaller, because the amount of data in the image needs to stay the same. (higher PPI = smaller image in inches; larger image in inches = lower PPI.) Please make sure that when you change the PPI that the size of the photo does not go below 10 inches on the longest end of the image.
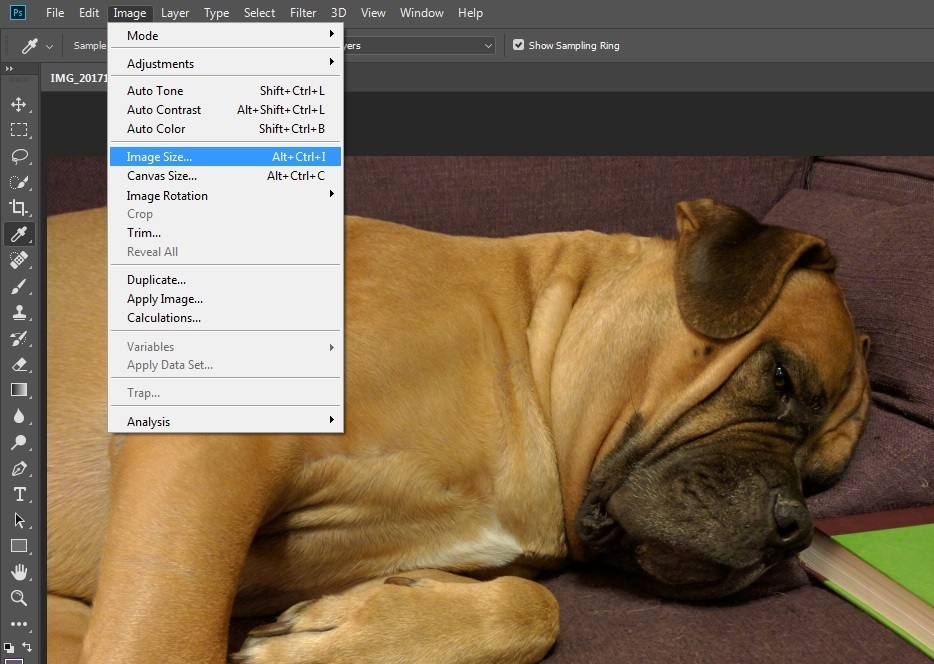
In order to change the size of the image, in Photoshop, go to the Image Size box (Image -> Image Size).
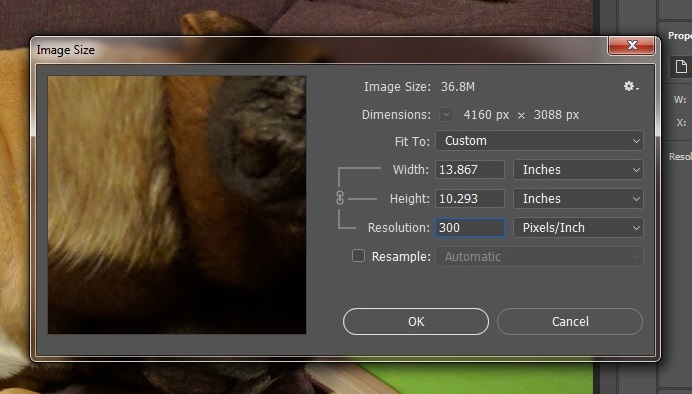
For most circumstances, deselect ‘Resample’ and then change the resolution to 300 Pixels/Inch.
If the image has a height or width of at least 10 inches, then you can save your image and you are finished!
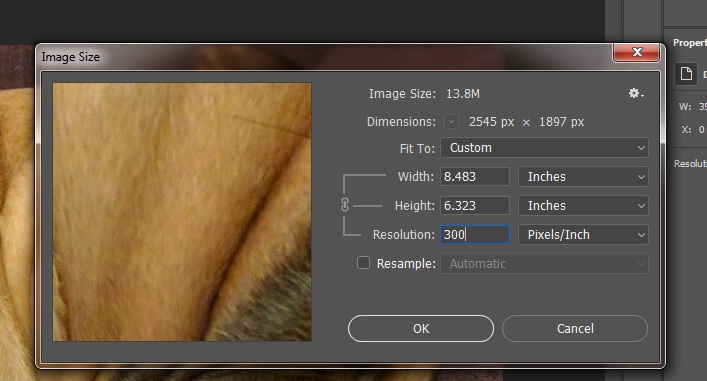
If, on the other hand, changing the PPI to 300 has shrunk your image below 10 inches on one side, you will need to resample the image.
Resampling the image, which will change the amount of data in the image, can get more complicated, because it’s actually adding or deleting data from the image, which can sometimes lead to some wacky-looking stuff.
Select ‘Resample’, change the longest side to 10 inches, and choose a method for resampling in the dropdown box. Start out with the ‘Nearest Neighbor’ method and see how it looks. If that looks bad, try the ‘Bicubic Smoother’ or ‘Bicubic Sharper’ method.
If you are trying to make the image considerably larger than the original, this process can get a little weird, and it’s best (if you can) to go back to the source photo and see if there’s any way to get it in a larger file size from the get-go.


