The medical uses of 3D printing have grown significantly in the past few years with advancements in the technologies available. Not only can exact versions of patient organs be printed using a variety of materials, but there have been advancements that have allowed for real organs to be printed to replace the originals. Also, stem cells, blood vessels, tissues, cartilage, bones, and cancer cells are being printed.
Biomedical imaging is the main source for the files needed to be able to print the organs, cells, tissues, etc. Some types of biomedical imaging include CT scans, MRIs, X-rays, and ultrasounds. Most of these produce DICOM (.dcm) files that can be viewed in OsiriX and edited in Meshlab, both free-to-download software that I used in my research.
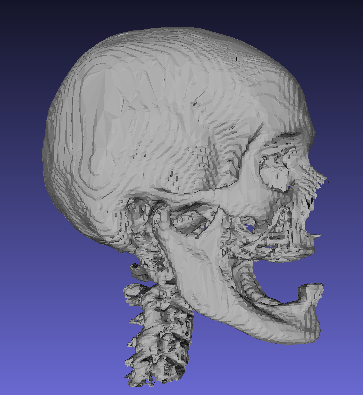
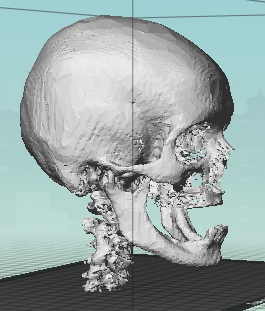
1st attempt: Human Skull
Very early on in my research, I learned that DICOM files are hard to find without patient permission and many of the files are hard to work with. My first type of file that I learned how to use the software with was a human skull.
I started in OsiriX and produced a 3D rendering that was very easy to work with since it had very little editing involved. Here is a progression of the file:
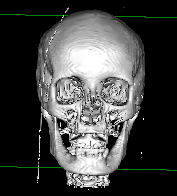
3D surface rendering in OsiriX
Edited file in Meshlab
Edited file in Maker software
I found out quickly that while the skull was easy to edit, it was not going to print without some major cuts and super glue.
2nd attempt: Human Heart
I decided to challenge myself to a more advanced file to learn more about the software and the world of biomedical 3D printing. I chose to work with a heart because I knew it was a little more interesting than a skull, but I was not prepared for all the challenges that comes with editing an organ file.
First of all, finding a heart file that rendered clean was pretty much impossible with the resources I had. Most files came up very messy or were not what I was looking for. Also, once I had a file, it was basically impossible to edit to a printable form. Here’s my attempt to edit a human heart:
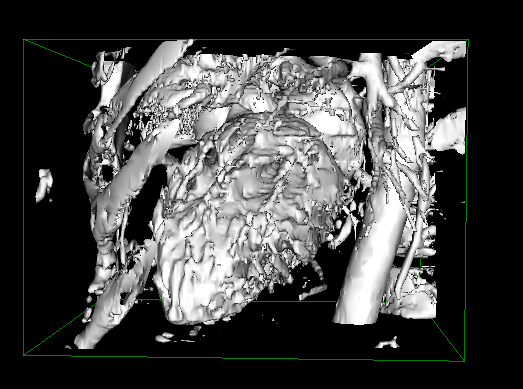
3D rendering in OsiriX
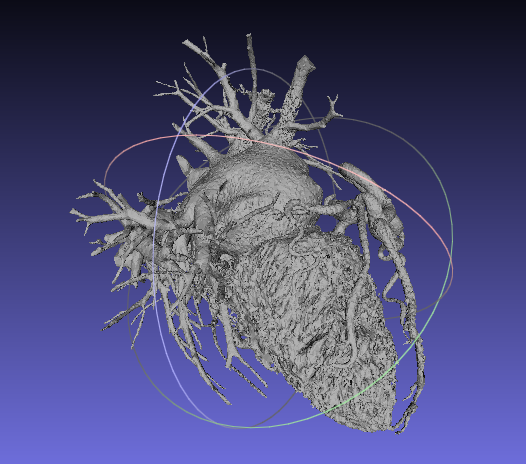
Edited version in Meshlab
Clearly, there was not much I could do with the file I had. There was too much to work with and I didn’t know enough about the file or the software to make it printable.
Final attempt: Human Brain
After a lot of frustration working with heart files, I talked with a good friend of mine from back home who is studying medicine at another university. She was very interested in my project and told me she had some MRI scans laying around from a few years ago. She was a pleomorphic liposarcoma patient and went through 2 surgeries in 2009. The files she gave me were from a check up in 2012.
Her cancer was below her cheek, so the MRI was from her neck up and cut off the very top of her head. This was semi-unfortunate for me, but I still wanted to work with her files because of the story behind it. She is now a 5 year cancer survivor and I was excited to see what I could do with her MRI. Here is a progression of the file:
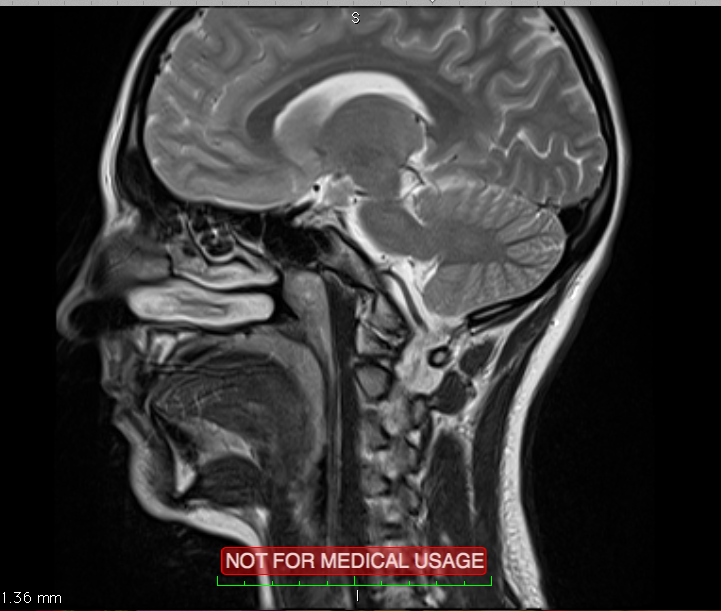
2D rendering without editing in OsiriX
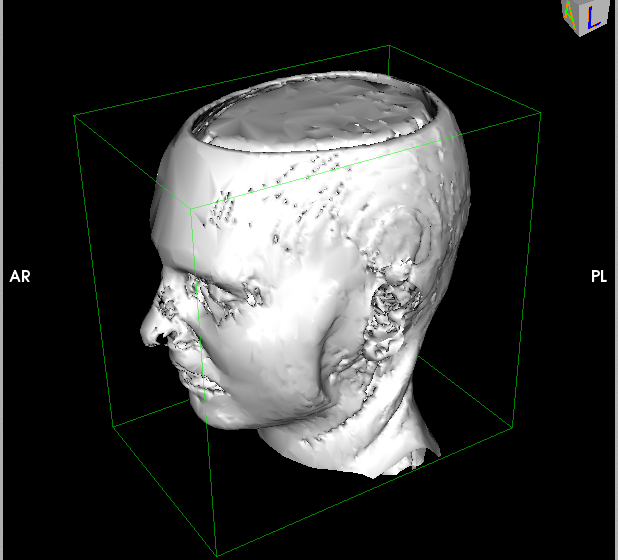
3D surface rendering in Osirix without editing

2D slice with individually edited out non-brain parts in OsiriX
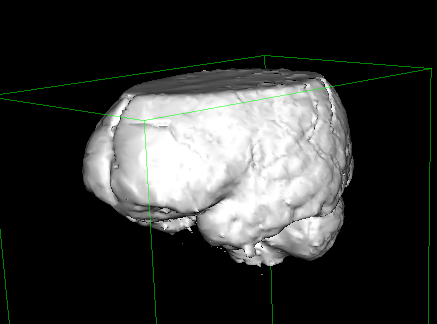
3D surface rendering of edited version in OsiriX
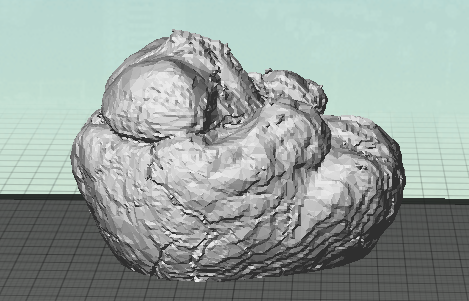
Ready-to-print file in Maker software

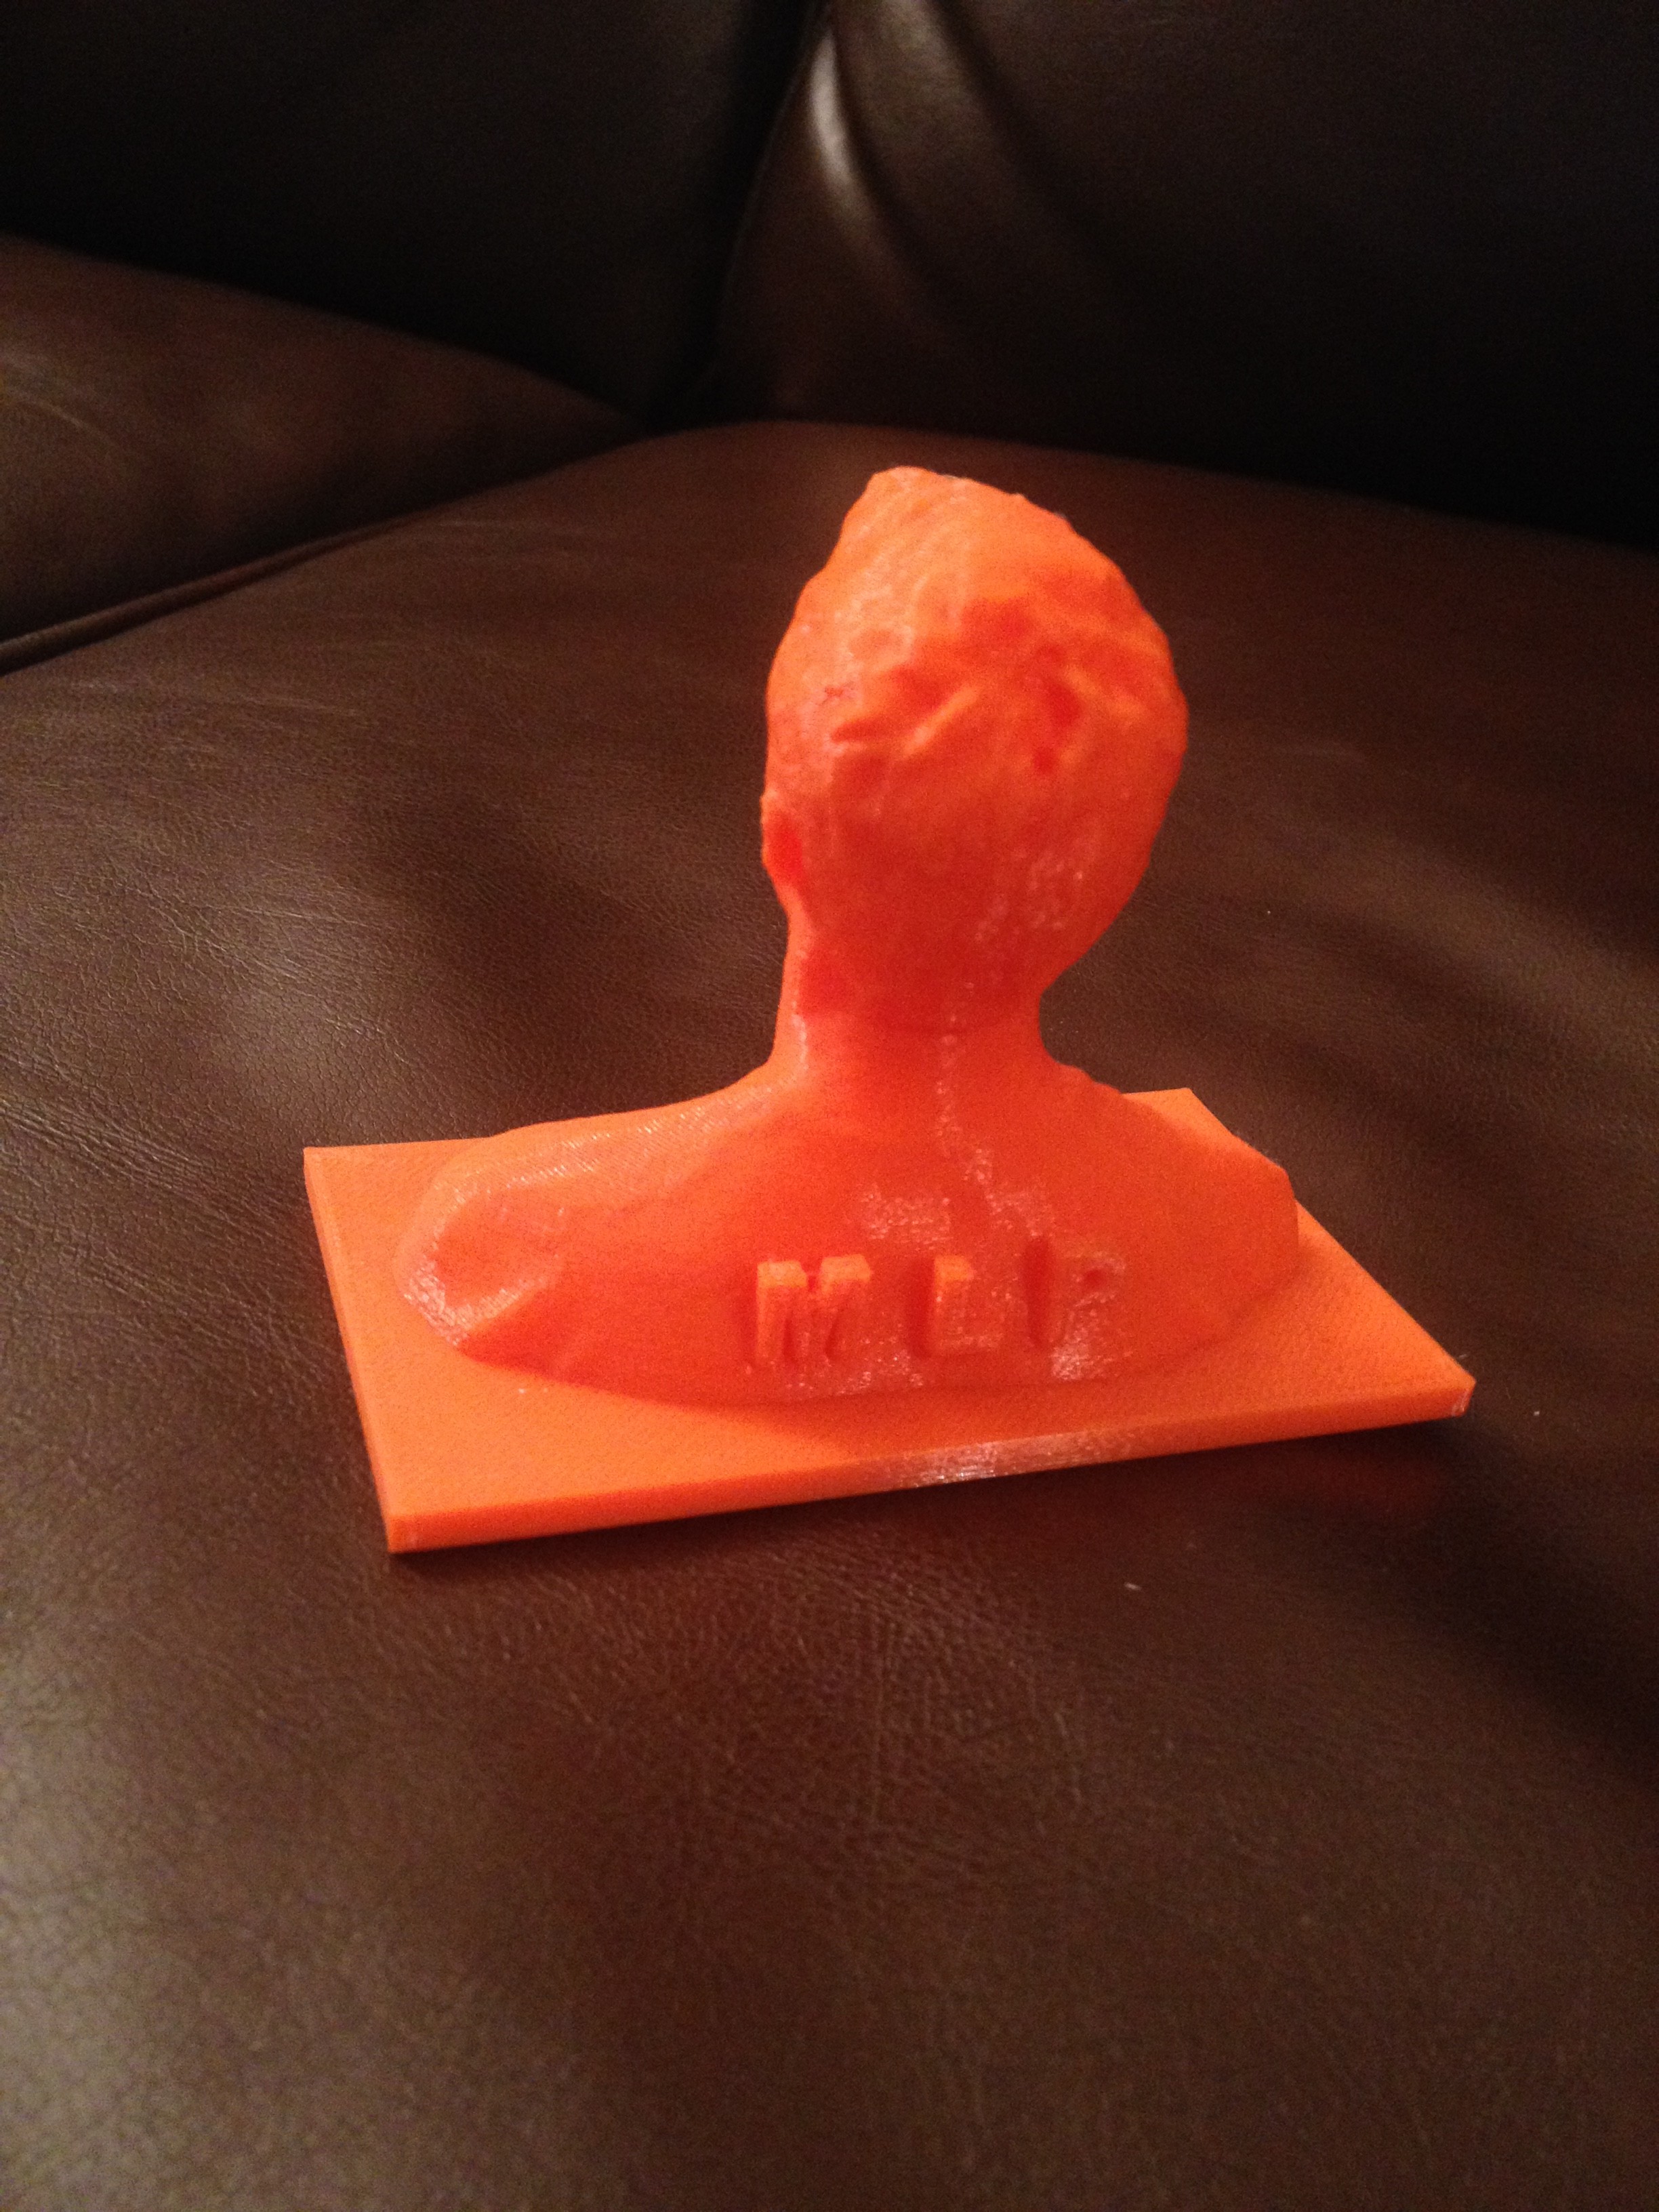
Successful print
The top of the file being cut off in the MRI was almost helpful with the actual print because it created a flat surface. I would have liked to have a complete brain, but what ended up printing was enough for me to be satisfied. Also, I learned that it is possible that I cut out too much while I was editing the individual slices, so more knowledge with MRI scans is encouraged before taking on this type of project. But, overall, I am thrilled with the results and I’m excited to give my friend a 3D print of her brain!
Biomedical 3D Printing Community
While there are not many resources to get the files necessary to 3D print organs and such, the small community that exists for this type of work is amazing. I found a great resource here: http://www.embodi3d.com. This resource includes blogs, forums to ask questions, and a source for files ready for printing. It’s great to see that there are people out there that want to teach what they know about 3D printing and making it useful in the biomedical field.
I am very interested to see where biomedical 3D printing goes in the coming years. I believe it will continue to grow and become even more popular as the technology advances.
I encourage anyone interested in the topic to explore the basic software and try out 3D printing at the Maker Lab or your local Makerspace. I’ve learned a lot from just messing around with the different functions in the software, and there are some tutorials that go step-by-step online that are pretty useful for beginners. If you are interested in hearing more about my research, feel free to contact me at arkowal2@illinois.edu or via twitter @ARoseK10.