Week 4: Learning from a Plastic Face

This week in digital making, we were focusing on scanning our faces to create OBJ & STL files that could be uploaded to, cleaned up, and edited in software like Tinkercad, and printed into our first real personal 3D prints for the class. I learned how to scan (and be scanned) using the portable iPad scanner in the lab, how to clean up and edit a 3D scan, and how to export files to be printed by the Makerbot. As we were asked to get creative with what we decided to do with our face scan, I decided to add a little loop to the top of my head and print out a mini-keychain of my face for my house keys. It took a few attempts to get the bottom to flatten out so it would print right, but finally toward the end of class I was able to get my print to start. It took about half an hour and looked awesome when it was done, but as soon as I tried putting a keyring through the hole, it cracked off. L Next time I need to either make the loop thicker or make a hole through my head so it will be more stable.

10868139_10153238760502150_8904677764183564097_n

Aside from the hands-on learning by doing we had happening with our face scanning process, the lab guru, Ryan, talked to us a bit about the science behind 3D scanning and modeling, which I found quite interesting. We were also lucky enough to have Professor Rindfleisch, the teacher of the Making Things course at the lab, come in and talk to us a little about what their class is doing as well as his research into 3D printing (particularly about how people perceive objects they’ve printed as being more valuable than objects they are just given.)

Our learning in the weeks class made me feel a lot more prepared to try printing and experimenting with stuff on my own and helped me learn a lot about how to make the printing process go more smoothly next time I want to try something out. It also helped give me a better idea of the science behind 3D printing and what might be in store for the future of the industry, particularly regarding what is possible as far as customization and running your own small business around 3D printing.

Now that I’ve finally had a chance to print something out on my own, I feel like I’m ready to spend some time on my own in the lab and continue to build my 3d modeling and printing skills. I’m looking forward to doing some cool stuff in the coming weeks!

Week 3: Design Thinking and Beyond

10982786_850033585042423_2094551759550255744_n

An artistic picture of our improving distracted driving interview results.

This week our class participated in a design thinking workshop put on by leaders of the Design for America club here at UIUC.   I’ve participated in a number of design thinking workshops in the past; once in my User Oriented Collaborative Design class, once through the Social Entrepreneurship Club on Semester at Sea, and once through the web design course I took at Designation.

Since I’ve already done it so many times, you might think I’m a design thinking workshopped out, however, I am far from it. It’s always useful (and fun) to have a refresher on design thinking, because I feel like each group I’ve done it with has approached it differently and taught me something new about the topic. This isn’t just because they have each applied design thinking to a different topic (in this case it was how we can improve the driving experience), but also because they all have used slightly different techniques and processes to get to the final solution. In this case, for example, we used “How Can We?”, a fill in the blank exercise kind of like Mad Libs to come up with problem statements to base our final prototype around. We also did a funny little exercise called “What’s in the Box” and a speed prototyping exercise where we had to come up with a prototype for the solution to another more goofy problem that we came up with by pulling design cards from a pile (our class pulled cards to make the problem how to help Girl Scouts at a playground fly) to “warm up” for the brainstorming and prototyping parts of the class. I thought this was particularly helpful in making me feel safe to bring up crazier ideas around my team and in preparing some of my classmates who had never gone through a process like this before for what was in store for them.

These games made it a lot easier for the student who might feel like they’re not creative or not really designers feel comfortable and excited about the design process, and I’m definitely going to suggest using them in any design thinking process I might be involved in in the future. I’m very glad we had a chance to learn more about design thinking in this class, because there is definitely a huge connection between solving problems on a personal level and the using the tools we are learning about in this class to make things. Being able to create products that are customized for personal use and considering a future where creating and developing products customized to individual needs is a lot more prevalent means design thinking is just going to become more and more important. I’m happy that we were able to spend a whole class on the topic and am looking forward to being able to bring up some of the concepts with the students I work on future projects with throughout this semester as well as seeing how my classmates apply design thinking in their individual work.

Learning to Make & Making to Learn: An Exploration of Maker Resources

One of the main topics of our class’s Skype session with Dr. Kylie Peppler, a professor at Indiana University and a leader in the digital making movement, was making to learn-the idea of using hands-on projects to teach students concepts and skills in a way they would actually remember. Pretty much all of us could relate to the idea that working on a real-world project was a way more fun and usually taught us a lot more than listening to a teacher lecture for an hour or reading about some concept in a book, and a few students even had a chance to share memories of some hands-on projects they had worked on. Engaging with the material we’re working on is the theme of the semester in Digital Making Seminar, and with that in mind I’ve come up with a list of some of the resources available to us to help us out on our journeys of learning to make.

Lucky for us, there are some great resources available in the local Champaign-Urbana area.

First up, our very own classroom, 3030 BIF, better known as the Illinois Maker Lab, which can be found online at http://makerlab.illinois.edu/, on Facebook , or on Twitter at @UIMakerLab. In the BIF Maker Lab, we not only find a room packed full Makerbot 3D printers, but also plenty of expert help from 3D printing gurus during the lab’s open hours. So make sure to spend some time hanging out there during the various lab hours throughout the week.

Next on the list, and just a few blocks off campus, is the Makerspace Urbana (on the web here: http://makerspaceurbana.org/ on Facebook , or via Twitter at @MakerSpaceCU), an awesome community lab inside Urbana-Champaign Independent Media Center, which puts on a variety of workshops (including the super-interesting glassblowing workshop I attended last week) and holds open hours where a diverse community of members can be found learning, teaching, tinkering, collaborating, sharing, innovating, socializing, and creating every Wednesday and Saturday.

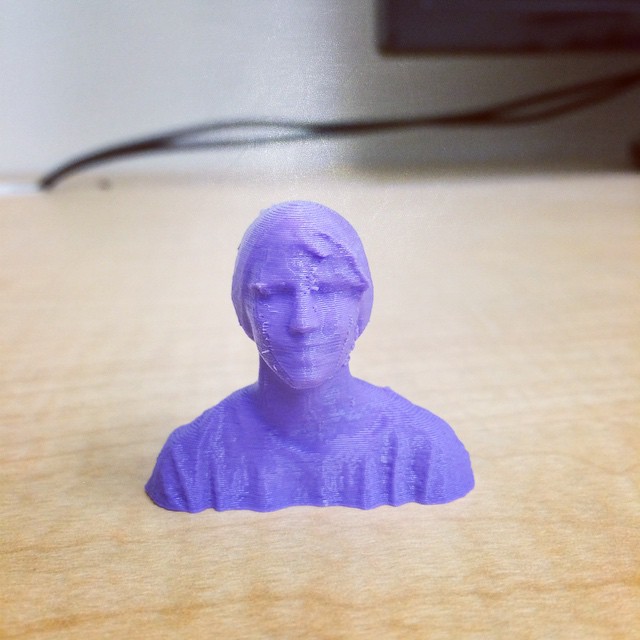
Finally, and probably most importantly, is the Champaign Urbana Community Fab Lab (online at http://cucfablab.org/, on Facebook , and on Twitter at @ChampaignFabLab), which provides access to a wide range of fabrication machines, including a laser engraver, CNC routers, 3D printers and scanners, electronic cutters, digital textile machines, small board electronics, graphic drawing tablets, advanced software and more during their weekly open hours. Their orientation sessions (held once or twice a week during the semester) are a great way to get familiar with machines and materials you’ve never used before. If you’re too busy (or more likely to lazy, since this happening fab lab holds events multiple times per week every week) their Wordpress page (http://cucfablab.org/sites/cucfablab.org/wordpress/?page_id=1196) is a great place to look to for inspiration and assistance. The CUC Fab Lab is an official member of the global network makerspaces connected to the Massachusetts Institute of Technology Center for Bits and Atoms, which means its constantly collaborating and exchanging ideas with other fab labs in the network, something you are reminded of when you see their fab cam which is constantly screening a live feed of the action happening at other fab labs across the globe. 

Going beyond Champaign-Urbana, there are plenty of options for engaging with making in the city most of us call home, Chicago. Some of the most important to know about include:

Pumping Station One (@pumpingstation1) which boasts tools for everything from brewing and woodworking to electronics and metals and holds a range of public events throughout the year

South Side Hackers Chicago (on Facebook  ) a 1000-foot maker space in Pilsen, which has lots of metalworking and woodworking tools for aspiring hackers, tinkerers, and hobbyists

Workshop 88 (@Workshop88 or on Facebook ) a makerspace in the Western suburb of Glen Ellyn that holds classes on everything from Cloud Computing to Arduino Music

The Wagner Family Fab Lab ( http://www.msichicago.org/whats-here/fab-lab/) a state-of-the-art computer based innovation, design, and fabrication workshop inside the Chicago Museum of Science and Industry

Chicago Public Library Makerspace (http://www.chipublib.org/maker-lab/) a popular makerspace located on the third floor of the Harold Washington Library, which holds various free to the public workshops and open hours throughout the week.

With all these awesome workshops across the Chicagoland area, there’s really no excuse to give up on making during winter and summer vacation and fall or spring break.

Getting in touch with these communities online and in-person, as well as using hashtags like #3D, #digitalmaking, #audurino, #printingandscanning, etc. while sharing our progress on social media, will help us to find partners and mentors whom we can share our experiences with and learn from on our making journeys and whom we can hopefully begin to help out ourselves as we further develop our making skills this semester and beyond.

Week 2: Printing Plans and Class in Review

So far in Digital Making Seminar, we have spent most of our time learning about 3D printing (or, as we learned from Senvol in week 1, additive manufacturing). Though I have a bit of experience in this area from working on 3D modeling projects in my GE 101: Engineering Graphics and Design course and from independent work in various maker lab workshops, our first two class sessions have taught me a lot about the reasons why we would want to use 3D printing (aside from the obvious “It’s super cool!” answer) and helped me connect with tons of online resources for finding ideas of things to print. Looking more deeply into the different online resources we explored in class has made me even more excited about what things I’m going to have a chance to make this semester and has helped me come up with more ideas for what I might be able to model. Some of my favorites, along with the modifications I would make to them (because customization is what 3D printings all about) include the following:

DSC04259_preview_featuredspeaker2_preview_featured

IPhone Stand + Speaker (http://www.thingiverse.com/thing:175454)

This stand and speaker set would be great to have around to use as a stylish and power free way to amplify music on my IPhone. Instead of using the original horn (which in my opinion is a bit plain) I’d love to use something more like this (http://www.thingiverse.com/thing:544525) that I could fit into the stand.

desktop-1411163272

IPad Stand (http://www.viralnova.com/crazy-3d-printing/)

Adding to my 3D printed stand collection, I’d love to have this little guy printed for my IPad to use when doing things like watching movies. Though this version looks super cool, I think I might turn the little half circle stand piece the man is holding into a longer bar to make the piece a bit more supportive.

cellularLamp_preview_featured

Cellular Lamp (http://www.thingiverse.com/thing:19104)

I originally saw this lamp in the BIF Maker Lab and then ran across it again while browsing Thingiverse. I like how they use it more like a statue in the Lab, but would probably use it for its lampshade purpose in my own room. I’d customize it by printing it a lot bigger than the model they have online so I could fit a light bulb inside it and have it reflect cool shadows all around my room.

IMG_5410

Stria Necklace (http://www.jennywulace.com/shop/stria-necklace)

This bold 3D printed necklace would be a great piece to wear out, and I’m sure would be a great conversation starter at tech related events. I wouldn’t change much about the actual design of this one, but I think it would be really cool to use the silver leafing process described in this instructable http://www.instructables.com/id/Silver-Leaf-a-3D-Print/ to make it really stand out. I might also consider designing a pair of 3D printed earrings to go with it as well.