Making 3D Printed Prosthetics with e-NABLING the Future

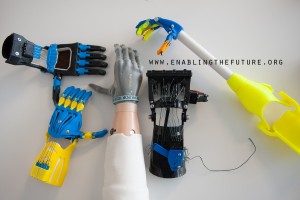
A selection of the hands available on e-NABLING the Future’s website

This semester Nora and I worked with Enabling the Future on designing and printing 3D prosthetics. Nora found the company and Vishal helped with getting in touch with the e-NABLE team at SXSW. From there we had our first assignment. In order to be certified by e-NABLE to make prosthetic devices for real people, we had to first print and assemble a prototype hand. The designs are premade so they just need to be printed. In some cases, the hands or fingers need to be resized to fit the end user. Our first hand was called the Raptor Reloaded, printed in black and blue filament. Printing the materials was quite easy compared to assembling the hand. The instructions were available online with detailed pictures and descriptions. The assembling process taught us a lot about how best to make the hand and what were some obstacles that we faced. For example, a lot of the parts needed to be filed down so that it would fit easily together. We also worked with the tensioning in the fingers so the hand would move properly and learned how to tie some pretty complicated sailor knots that the site suggested we use for the hand.

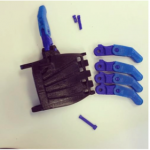
Our first Raptor Reloaded part-way through assembyl


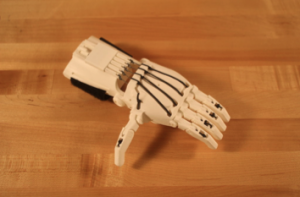
After the first hand was sent in, we decided to print another Raptor Reloaded to be used as a sample in the Maker Lab for future students that are interested in the project. The process was very similar to the first one except we didn’t have all of the assembling materials needed for the hand such as the strings, screws, and Velcro. Enabling the Future sells packages that cost around $25 for materials for the Raptor Reloaded. Instead of buying another package, we improvised with some of our own materials. Feel free to check out the hand in the Maker Lab during open hours!
Screen Shot 2015-05-11 at 7.19.20 PM

Our second Raptor Reloaded

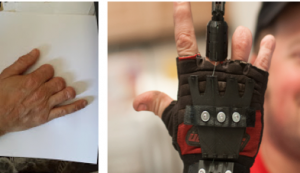
Towards the end of the semester, the e-NABLE team got back to us about a real recipient, his name is Bruce and he is a 53 year old male from North Carolina. He is missing three of his fingers on the right hand, so instead of making a prosthetic hand we were tasked with making replacement fingers. Some sizing needed to be done in the fingers, but other than that the prints were ready. The instructions for the Owen Replacement Finger were also available online; however, they were not as detailed as the Raptor hand. We also had to improvise on getting the necessary materials such as a glove, needle and thread, and elastic, which were not available in a pre-made kit for this type of hand.
Screen Shot 2015-05-11 at 7.19.34 PM

Our first recipient’s hand without a prosthetic and the Owen Replacement finger hand

One Door Closes, and Many More Open: Digital Making 2015

Time has flown by and the end of the semester is quickly approaching. Though this is a relief in some of my classes, in Digital Making it is a sad goodbye. I signed up for the class wanting to learn all I could about Digital Making, and am going to miss having three hours set aside every Tuesday afternoon to do just that.

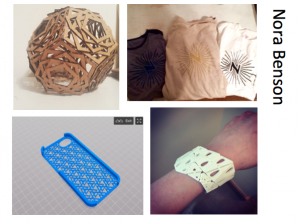
Some of the projects I worked on during my Digital Making semester.

This class has definitely been a journey for me and has taught me about a whole new world of resources (and people) out there that will be helpful to me as I continue my making journey here at UIUC and beyond. From gaining new knowledge about 3D modeling and printing through the BIF MakerLab classes and our session with Autodesk, to learning all about scanning and preparing them for printing in our sessions with the Beckman Lab, to discovering the plethora of resources-including digital embroidery machines, laser cutters, and Arduinos (to name a few)-available to us through the Champaign Urbana Community Fab lab, to learning all about the amazing organization that is e-NABLING the Future through my semester-long project, my Digital Making semester has truly been an eye opening experience. Its sad for me to see the semester ending feeling like there’s so much more to learn, but I definitely feel prepared to do so if I can get myself to set aside the time.

If there’s one key thing I took away from this semester it is not to be intimidated to try things out. Though the idea of building 3D printed prosthetic hands, or creating something with a laser cutter, or coding an Ardiuno to sense light levels would all have sounded super intimidating to me at the start of this spring, I’ve done all of these things in Digital Making and none of them were really that hard! Moving forward, I’m definitely going to have a much easier time taking on scary sounding projects and using the resources available to me to figure out how to make them a reality. One example of this is a project I’m thinking about taking on myself this summer: building a 3D printer from scratch. My department offers some small grants for students to take on research and projects over the summer, and as soon as I saw the email about the offer I thought, “There has to be some way I can use this to continue with Digital Making!.” Not long after Vishal posted something about building a $200 3D printer and immediately I thought, “This is perfect!”. I’m still waiting to hear back from my advisor about sponsorship, but I think this is a great example of how I’ve grown. Building a 3D printer would have sounded crazy to me before this class, but now I’m thinking of it as an adventure I could definitely figure out with some persistence.

And I see that as just the start. I still have three more semesters to spend time tinkering at the CU Fab Lab and now working at the BIF MakerLab and lots of projects I want to take on and tools I want to explore. This curiosity in combination with the people I’ve meet-both inside the class and outside of it-are a great starting point for me to take my making skills and knowledge to the next level. And its obvious I’m not the only one who feels that way. Through my classmates presentations in our last class reflecting on their semester long projects and their own journeys of learning and their own recent reflections, it seems pretty clear that I will not be the only one hanging out in the MakerLab next semester.

Its very exciting to see how everyone has grown and interpreted the class materials in their own unique way. From Kays project Making 3D art with Math to Arielle and Cos. project making wheelchair racing gloves with 3D printing and scanning, we’ve each brought making skills into our life in different (and awesome!) ways. For me personally this has been a great addition to my concentration in Product Design and a very interesting way to apply my engineering education to actually making real things (something that doesn’t happen very often in theoretically-focused undergraduate classed). Talking to additive manufacturing-focused companies and visiting Deloitte through this class has opened my eyes to the new areas of opportunity opening up to people with making knowledge and has helped encourage me to seek out and apply for opportunities in this area-like hackathons and additive manufacturing related jobs and internships. Already a number of doors have been opened to me, including the opportunity to attend hackathons at Stanford and NYU Abu Dhabi and the grant I mentioned earlier on, partially because of the new skills I’ve gained in this class. All in all, it has been a very productive semester and I am looking forward to all the making opportunities and projects the future holds for me.

Week 13: From Arduinos Making to the Deloitte Greenhouse

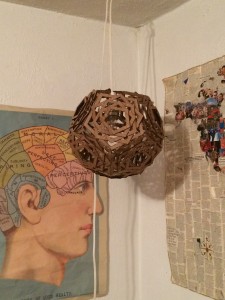
This week Digital Making started out with a sad event-our final session at the Fab Lab. I’ve learned so much there in the last few weeks and have had my eyes opened to tons of ne ideas for projects (as you can probably see from my ever growing Maker Movement Pinterest board) so I’m sad to see our time there coming to an end. I will definitely be back at some point on my own though! For our last rotation, my group was working with Aurduinos, something I knew about from my Intro to Electrical Engineering class, but that I haven’t really had a chance to mess around with on my own. We did a few basic activities, like programming the Aurduino to blink and then learning how to have it blink out and S.O.S. After that we got to use some of the sensors, which would allow us to add a bunch of cool stuff like light sensitivity or the ability to do something when the sensor senses a change in temperature or someone touches it to our projects. After that our instructor was helping people add specific things to their final projects, so I got started on a new project of my own, making a cardboard lamp out of a box I had just gotten a shipment of shoes in. I had seen this project on Instuctables a while back (here: http://www.instructables.com/id/Geometric-Cardboard-Lamp/), but cutting out all the pieces by hand seemed like a lot of hard work. Working with the laser cutter at the Fab Lab last time we were there, though, made me realize I might be able to make this lamp much more quickly-by using the laser cutter to do the cutting work for me! After checking with the Lab gurus if it was okay to cut cardboard, I got to work. Things went quite smoothly and after putting in a bit of work punching out the pieces and gluing, I had my very own cardboard lamp!

IMG_3633

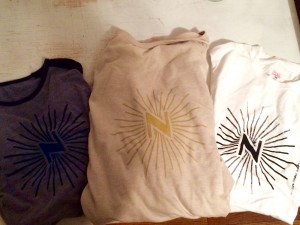
I got invited to dinner with the Fab Lab team (they were making pasta in the back room) and I still had some time to kill before it was done, so I started working on the screenprinting project I had started last week. In just about 15 minutes, I was able to successfully screenprint two more shirts with my logo in addition to the sweater I made last time. Lesson learned: screenprinting is pretty dang easy once you have the screen made!

FullSizeRender

Overall, my last week at the Fab Lab, was pretty productive, but the Digital Making fun wasn’t over for the week. We still had our Friday field trip to the Deloitte Greenhouse to look forward to. The trip ended up being well worth the wait. Once in Chicago and done with our awesome meal at Roti, we headed over to the Deloitte offices, where we, along with some of the Making Things students, were shown around the client innovation center aka “The Greenhouse.” There we learned about some of the newest technologies that are changing modern industry, including

Augmented Reality, Data Visualization, and of course 3D printing! After a getting an introduction to each of these technologies from some Deliotters who worked at The Greenhouse, we had opportunity to work in teams to solve a mini-case regarding incorporating these technologies into Ameren’s business. This aspect of the tour really showed us how Deloitte goes about trying to bring new technologies into client projects and what we might expect to see if we were to work at Deloitte one day (a definite possibility for me). To end the day, we got to talk to a panel of current Deloitte analysts about their jobs and life at Deloitte, which was quite interesting as well. I learned even more about the company and am looking forward to applying for an internship with them again next year. Hopefully, it works out better than this year, where I got to the final round of interviews but did not get an offer.

Week 12: Raptor Round 2

This week we were originally be going to do a collaborative showcase of our work with the Making Things class in the BIF, but last minute we decided to push our portion of the showcase back so we could have more time to prepare and show off more of what we’ve worked on in class by holding it at the end of the semester.   Instead of scrambling to get everything done for the showcase then, we had “free time” in the lab to work on our semester projects. Sam and I worked on assembling our second Raptor hand (an all white one this time) and looking for places we could source the materials from instead of having to buy a full kit each time.  Putting the hand together this time was a bit faster than the last since we knew what we were doing and had the tricks figured out for the tougher parts (file down the pieces if you can’t fit them together, use a safety pin to get the elastic through the holes, etc.)

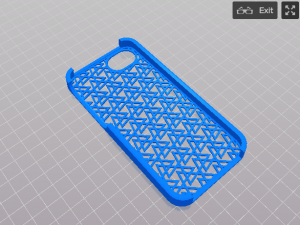
Since its hard to have two people work on the hand at once, Sam mostly worked on assembly, while I looked for places to buy the materials for future hands from. Most of the stuff was pretty easy to find on Amazon, except for the screws which I will probably look for at a local hardware store.  Since finding materials didn’t take too long, I had some time at the end of class to check out Thingiverse play around with 3D modeling and ended up using the MakerBot Customizer tool to design and print a new case for my iPhone. I printed it out in white plastic on the Generator and I’ve been enjoying showing it off to my friends the past few days.

Screen Shot 2015-04-15 at 9.19.03 PM

Week 11: Frustration at the FabLab

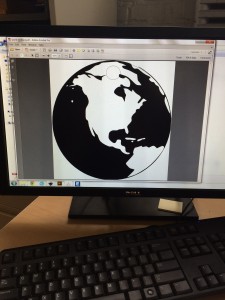
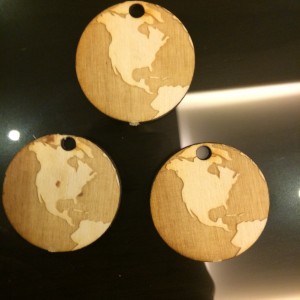
For our second week at the Fablab, I was placed in the group that was working with the laser cutter. For this workshop, we used Inkscape to create a vector file with specifics that detailed what to cut through and what to only cut lightly. We printed out designs on wood and plastic leftover from some of the bigger jobs people had worked on. For my first few jobs, I ended up cutting out three mini globes on wood and plan to use them to make a necklace and earring set.

IMG_3515 IMG_3551

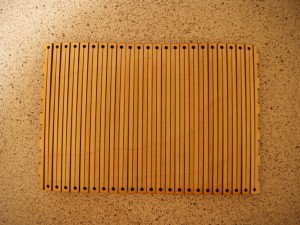
Next I cut my logo out onto wood. I also had the idea to print out a living hinge bracelet, which I tried on 1/8 inch wood and immediately had the bracelet break as soon as I tried to put it on.

DSC03307_preview_featured

Living Hinge Bracelet

I figured it might be because the wood was too thick, so I tried a ¼ inch piece but I realized too late that the laser didn’t completely cut through it. L I went into the office to buy a new ¼ inch board since there were no scraps that would fit my design and started talking to one of the volunteers about what I was about to print. After a bit of discussion and showing her my broken first attempt, we came to the conclusion it was not actually the wood’s thickness that was the problem but the fact I was stretching the bracelet out too much when I put it on. I had to make the design longer to make it work! I tried a 7 inch long bracelet and it worked better but was still delicate, so I tried a 9 inch one but that was too big. By that time it was almost 8 o’clock so I decided to call it a night (I had homework to do still!), but I will definitely be coming back to figure out the just right version of this design.   Time really flies when you’re making!

Week 10: FabLab Fun

IMG_3514

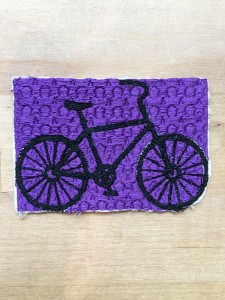
My embroidered purple bike patch!


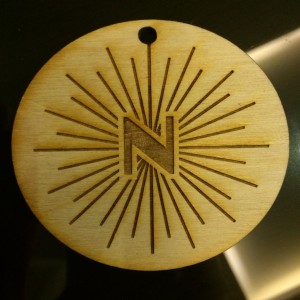
This week class was held at the FabLab where we were divided into smaller groups for workshops. My group in particular got to work with the embroidery machines where we picked out icons to embroider onto a patch. I picked out a bike to embroider onto a purple star background. It took a bit of time to get used to working the machine, but in the end the patch turned out super cool! I also got a chance to start playing with the laser cutter and printed out a wood necklace pendant with my logo on it. It was very cool to finally get a chance to use some of the machines I had been looking forward to trying out for the past few weeks and I am excited to see what other fun projects come out of my upcoming weeks at the lab.

IMG_3553

The results of my first attempt with the laser cutter

.

Week 9: Assembling the Raptor Reloaded

raptor hand

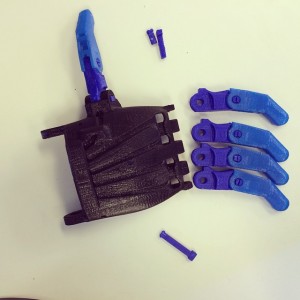
Raptor Reloaded (and a broken pin piece) from our first attempt at assembly


Week 9 was a very open to anything style class, where each of our groups was supposed to be working on moving forward with our semester project. Since all the pieces for the Raptor hand were finally printed out and we had the hand making kit in the lab, me and Sam worked on putting together our very first Raptor hand.   This turned out to be quite a bit more difficult than I had expected. First off, getting the pieces (especially the fingers) to fit together was not super easy. Some of the joints had to be filed down a bit to fit into each other and it ended up taking almost the whole class period for us to finally get the hand together. Then we had to add on elastic and fishing wire to allow the hand to open and close. These took a while to get through the holes (using a safety pin ended up helping a lot) and then getting the tension correct so the had would open and close when the user bent their wrist up and down also took some effort. All in all the final assembly of the hand took a few hours, but seeing the hand complete was well worth it!

Weeks 7 & 8: Scanning and Geomagic

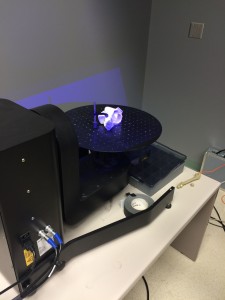
The past two weeks we have been working with Travis, a researcher at the Beckman Center on learning how to use high-resolution 3D scanners.   The specific project my group used as an example was Arielle’s wheelchair racing glove. This was a great choice for showing the capabilities of what a 3d scanner could do. Her racing gloves were custom fit to her hand, and usually took hours to mold to fit perfectly, so it was awesome for her to copy them exactly using a scanner and print them out at the maker lab. Because of our visit, she now has a file of her favorite pair of racing gloves and can print them out again whenever she wants!

Wheelchair glove scan

Scanning Arielle’s Wheelchair Racing Glove

I had come to the class with something I wanted to scan as well, a rocky necklace I thought it would be really cool to try to scan and 3d print, since the geometry was pretty complicated and it would take a while to model if I wanted to start from scratch making it. This idea was not as successful as Arielle’s though. I knew printing out an exact copy of the necklace wouldn’t work because it would be too rigid for me to wear if I wanted to print it out again, but talking to Travis also made me realize using the platform scanner at Beckman would cause us to miss a whole side of the necklace-so that project was a no go. I might try scanning it in some way similar to the way we scanned our heads on the first day of class, by having someone hold the necklace in the air as I move around it and see how that turns out during one of our sessions in the next few weeks.

Screen Shot 2015-04-15 at 6.38.15 PM

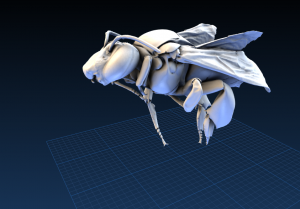
Smithsonian X 3D Bee!

For week 7, we were back in the BIF maker lab again and Travis came in to teach us about cleaning up our 3d scans with a program called Geo-magic. Since I didn’t have any specific scan I made during my time at Beckman, Travis suggested I go on the Smithsonian X 3D site (here: http://3d.si.edu/), which had a bunch of 3D scans of things in the Smithsonian collections. I downloaded this huge 3D bee file (FYI: you don’t have to download the high resolution scans), which slowed down the computers in the lab a lot, but gave me a little taste of what Geomagic was all about. I’m definitely happy to have found a new resource for 3D files and looking forward to putting my new scanning skills to good use in the next few weeks

Lending a 3D Helping Hand

For our semester long project, Sam and I will be exploring one of the most interesting uses of 3D printing, creating affordable custom prosthetics. Specifically, we will be working with an organization called Enabling the Future that creates custom prosthetic hands from 3D printed parts.   This project can be broken down into two phases. First, we need print out a test hand from e-NABLES’s open source 3D part files (We will be printing the Raptor Reloaded model.) and send it into Enable’s headquarters to get approved as e-NABLE certified makers. We started printing out the parts for this first build over this week, and we hope to be finished with the hand and have it sent off before spring break. After we get approval from the e-NABLE organization, we can then be matched with a child in need of a prosthetic hand. From there, we will be able to scale the parts to create a hand fit to their arm and will get to work on printing and assembling a hand that someone will actually be using by the end of the semester! Its pretty exciting to me that we can go from having just a little bit of knowledge about the 3D printing process at the beginning of the semester, to printing out an actual working hand by the end of the 16 weeks, and I am very much looking forward to learning from this project.

A video that shows some of the build process and the people currently using e-NABLE prosthetic devices.

Weeks 5 & 6: Fun with Fusion

For the past two weeks we have focused on working with a program called Fusion 360 to model objects that we can then 3D print.

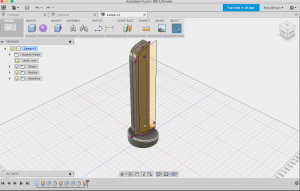
Screen Shot 2015-03-01 at 6.18.14 PM

Working on the base of a lamp in Week 5’s Fusion 360 class

During our Week 5 session, we were lucky enough to have two gentlemen from Autodesk come in and help us learn how to use the software. After spending a bit of time discussing what it is like to work as a industrial designer in industry, we started working Fusion 360 lamp modeling tutorial. Fusion is quite an interesting modeling program because it integrates the whole product development process-from design, to engineering, to fabrication-into one cloud-based tool. It’s a pretty new product (first launched ~2 years ago when I was a course aide with the GE 101 class) and is a really good software to use for creating non-linear geometries and to working on modeling projects with teams. Even though it was developed by the same people, it’s quite a bit different than Inventor and involves what is called “direct modeling”-pushing and pulling on the model to create details and form shapes- instead of the traditional parametric feature based modeling approach. This workflow took a bit of getting used to, since I was pretty comfortable with the Inventor way of doing things, but was definitely helpful to learn more about, because Fusion 360 allows users to create certain geometries that would be difficult, if not impossible to create in Inventor in a matter of minutes.

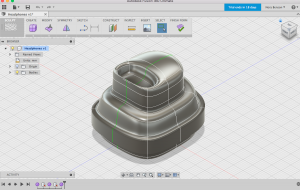
Screen Shot 2015-03-01 at 5.57.41 PM

Fusion 360 Headphone Earpiece

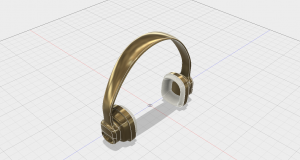
A great case in point is the set of headphones I worked on modeling over the course of the week after our introduction to Fusion 360 with the Autodesk guys. The ear pieces in particular, which involved a lot of more rounded geometries took me only about 15 minutes to create in 360 (and this was me using Fusion for pretty much the first time, it probably would have taken a whole lot less time if I had been more familiar with the program,) where in Inventor getting something that complex could easily have taken a few hours or more.

Untitled

My finished Fusion 360 headphones

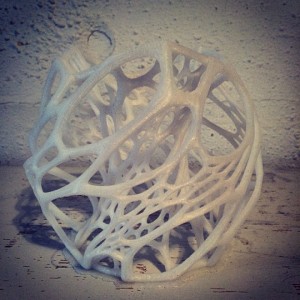
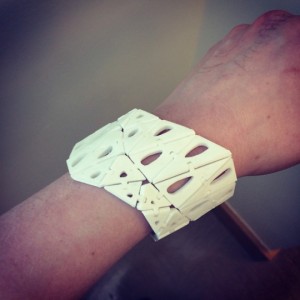
During class the 6th week, we worked on finishing up the tutorials we had done over the course of the week and had a chance to get a free print of something we had worked on. I completed my headphones, but decided to instead print out this open-sourced shelled torus lamp by Massachusetts-based Design Studio Nervous System. I also came back later in the week and printed a few more things, including a 3D bracelet from the Nervous System bracelet generator, another version of my head with a larger keyring hole on top (it worked a lot better the second time around!), a iPhone speaker amplifier (I forgot to use, so this didn’t turn out perfect, but it still functional), and an iPhone case from the MakerBot generator (sadly it turned out a tiny bit too small so I’m going to have to try that one again). The last couple weeks have left me feeling a lot more comfortable using the MakerBots in the BIF lab and I’m looking forward to expanding my capabilities with our upcoming classes at the Beckman scanning facilitates and at the Fab Lab in Urbana.

tumblr_nkclzhx4991tt4io8o1_540

tumblr_nkg0caoNZv1tt4io8o1_540 Nervous System Cellular Lamp and Kinetics Bracelet