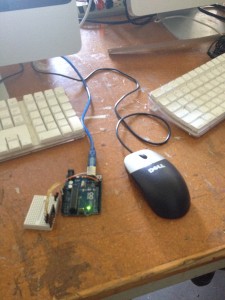
Our last week at the FabLab! I have already been introduced to lazer cutting and stitch printing. This week it was time for arduino work. Fortunately, I have already practiced using adruinos in the MakerLab earlier in the semester so I was able to skip some of the beginner work (making a light blink at different frequencies, to be specific) and go to use some of the cooler arduino addons.
The lab expert in arduinos had a few different activities for us depending on where we each were at in terms of our abilities. Since I had already gone through the arduino equivalent of the classic programming “Hello World”, I jumped right into using some addons. It was a bit daunting at first because arduinos do require code commands if they are to do anything and I had zero idea how to code on the arduino-one terminal to make a piece of hardware such as an echolocation sensor work. Fortunately for me, my instructor encouraged cheating! By cheating I am referring to using Google to jack other people’s code. If I learned anything from my CS major roommate, the best programmers steal. So I have no shame! Using some code found on the internet and some tinkering with the wiring between my arduino and the bread board, I was able to work a sensor that recorded the distance of the object in front of it using echolocation and a sensor that recorded the relative brightness of the object in front of it. With both of those sensors I went a step up and took recordings that followed certain parameters. For instance, I set it where a light would only blink if the distance from the sensor was under a certain distance. It really gave me a good concept of how these electronics imbedded in things that I use all the time (idk a coffee maker, for instance) have motherboards that respond to commands. And now I was using it on my own!


