
About Chat
The chat activity module enables participants to have text-based, real-time synchronous discussions.
The chat may be a one-time activity or it may be repeated at the same time each day or each week. Chat sessions are saved and can be made available for everyone to view or restricted to users with the capability to view chat session logs.
Chats are especially useful when the group chatting is not able to meet face-to-face, such as
- Regular meetings of students participating in online courses to enable them to share experiences with others in the same course but in a different location
- A student temporarily unable to attend in person chatting with their teacher to catch up with work
- Students out on work experience getting together to discuss their experiences with each other and their teacher
- A question and answer session with an invited speaker in a different location
- Sessions to help students prepare for tests where the teacher, or other students, would pose sample questions
Please note: For more features than simple text, please consider using a Blackboard Collaborate session.
Adding and Editing Chat
Adding Chat
- Go to your course front page and turn editing on.
- Go to a section of your course and press “add an activity or resource”.
- Select Chat.
![]()
Editing Chat
Option 1
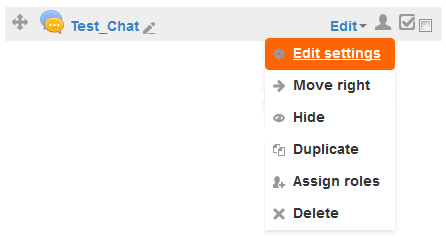
- Go to your course front page and turn editing on.
- Find an existing Chat module, and click on Edit at the end of the same row. Click the Edit Setting icon (looks like a gear) from the drop-down menu to edit.
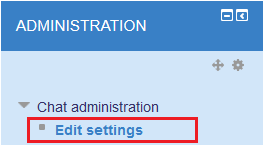
Option 2
- Click on an existing chat.
- Go to the ADMINISTRATION block -> Chat administration -> Edit settings.
Settings
General Settings
Name of this chat room
Give your chat a name. Be sure to give each chat room a different name to prevent confusion.
Description
The clearer the description, the fewer questions you will receive from students.
Consider including:
- purpose of the chat
- who has access to each chat
- links to any other tools involved in the assignment
- open dates
Clicking “display description on course page” will display the entire description on the main page. This is not recommended in most cases as it clutters the main page.
Next chat time
Next time the chat session will open
Repeat sessions
Choose from:
- don’t publish any chat times
- no repeats – publish the specified time only
- at the same time every week
- at the same time every day
Save past entries
Choose to never delete sessions or to save the sessions for a specific number of days.
Everyone can view past sessions
If set to no, only instructors can view past sessions.
Common module settings
Group mode
This setting has 3 options:
- No groups – There are no sub groups, everyone is part of one big community
- Separate groups – Each group member can only see their own group, others are invisible
- Visible groups – Each group member works in their own group, but can also see other groups
The group mode defined at course level is the default mode for all activities within the course. Each activity that supports groups can also define its own group mode, though if the group mode is forced at course level, the group mode setting for each activity is ignored.
Visible
Show or hide this activity to students
ID number
Setting an ID number provides a way of identifying the activity for grade calculation purposes. If the activity is not included in any grade calculation then the ID number field may be left blank. The ID number can also be set in the gradebook, though it can only be edited on the activity settings page.
Restrict access settings
- Activity completion
- Date
- Grade
- Group
- Grouping
- User profile
- Restriction set
Require students to complete (or not complete) another activity.
Prevent access until (or from) a specified date and time.
Require students to achieve a specified grade.
Allow only students who belong to a specified group, or all groups.
Allow only students who belong to a group within a specified grouping.
Control access based on fields within the student’s profile.
Add a set of nested restrictions to apply complex logic.
Using Chat
After completing the initial set up, the chat will appear on your main course page. Click on the chat module to open it in a new page.
- Click on Click here to enter the chat now to join the chatroom.
- Once in the chatroom, enter text in the textbox located at the very bottom left of the screen.
- Send messages by clicking on Send or by pressing the Enter key on the keyboard.
![]()
Please Note: If you close the chat window, when you return you may be UNABLE to see the entire conversation thread. Only the most recent messages will appear.