The file module enables a teacher to provide a file as a course resource. Where possible, the file will be displayed within the course interface; otherwise students will be prompted to download it. The file may include supporting files, for example an HTML page may have embedded images or Flash objects.
Note: students need to have the appropriate software on their computers in order to open the file.
A file may be used
- To share presentations given in class
- To include a mini website as a course resource
- To provide draft files of certain software programs (eg Photoshop .psd) so students can edit and submit them for assessment
- To add a file module to your course, begin by clicking the “Turn editing on” button in the upper right of the page in the course you want to add the module to.
- Next, click the “Add an activity or resource” in the section you would like to add the file module.
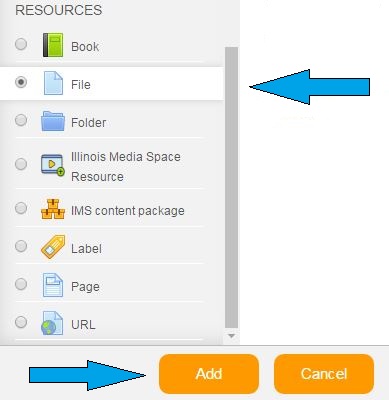
- Scroll down to the Resources section and click “File” and then click “Add.”
- This will take you to the “Adding a new file” screen. Under the “General” section, you are required to name the file, you can provide a description if desired, and also choose whether to display that description on the course page.
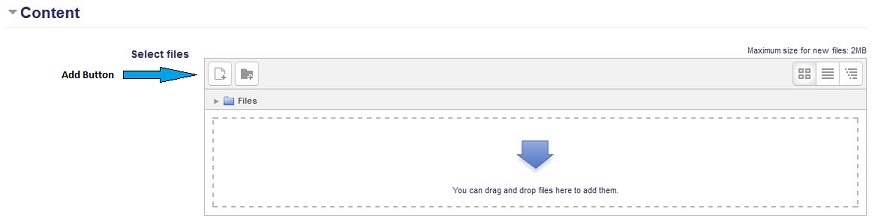
- The content section is where the files(s) or folder is added. There are various display options to choose. There are also two ways to add content, either by dragging and dropping the content of by clicking the Add icon in the upper left of the dialog box.
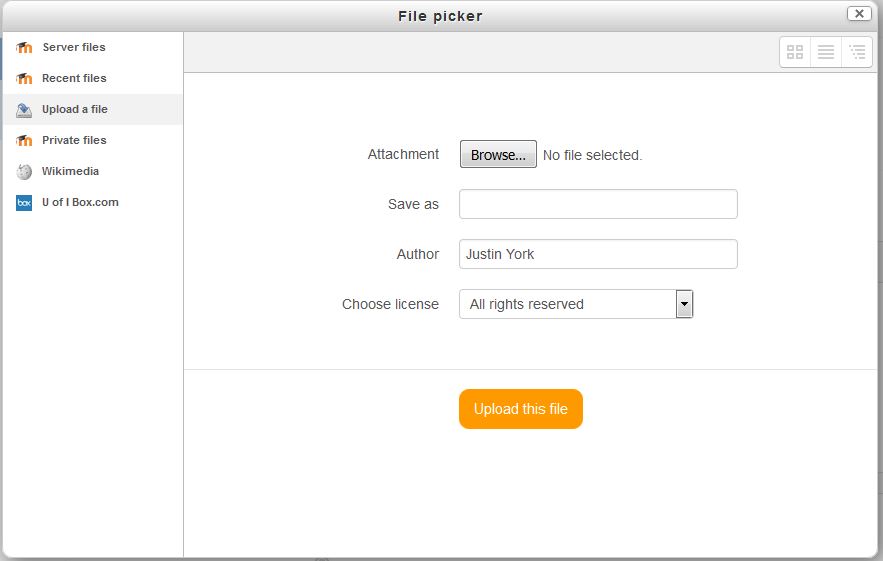
- If this method is chosen, the “File picker” window will launch where content can be added from various repositories or from the instructors computer.
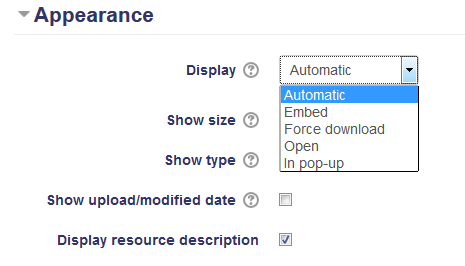
- In the “Appearance” section, how the content is displayed is chosen, as well as other display options.
- In the “Common module settings” section, choose whether to show or hide the module. Ignore the “Restrict access” section unless specific access restrictions are desired.
- Click “Save and display” at the bottom of the page once finished.
![]()