Like the Feedback and Survey activities, Questionnaire allows you to ask students questions and gather data.
Questionnaire Settings
› General
› Timing
› Response Options
› Content options
› Common Module Settings
› Restrict Access
› Activity Completion
Questionnaire Advanced Settings
The advanced settings can be accessed in the Administration menu on the left.
› Content Options
› Submission Options
› Feedback Options
Questionnaire Module
› Add Questions
› Working With Rate (Scale 1..5) Questions
› Move, Edit, Copy and Delete Questions
› Show or Hide Questions Depending on Answers to Other Questions
› Preview the Questionnaire
› Remind Students to Answer Questions
› Score Students and Give Them Feedback Based on Their Responses
› View and Download Student Responses
General
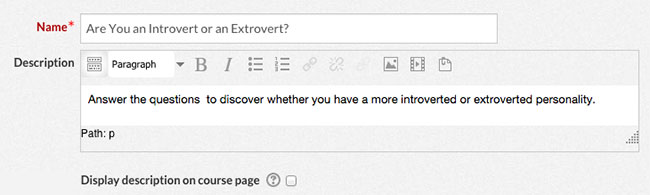
- Type a name for the questionnaire in the “Name” text box.
- Type instructions for completing the questionnaire in the “Description” Content Manager. The information you add here will be displayed to students before they begin answering questions.
- If you would like the instructions to also be displayed on the front page of your course site, check the “Display description on course page” box.
Timing

- To prevent students from answering the questionnaire before a certain date, check the “Use Open Date” box and use the dropdown lists to select the date and time you want the questionnaire to open.
- To prevent students from answering the questionnaire after a certain date, check the “Use Close Date” box and use the dropdown lists to select the date and time you want the questionnaire to close.
Response Options

- Use the “Type” dropdown list to determine how often a student will be allowed to answer the questionnaire.
- Use the “Respondent Type” dropdown list to select whether or not you want the questionnaire to record students’ names or make their responses anonymous.
- Use the “Students can view ALL responses” list to determine when students are allowed to see all responses to the questionnaire.
- Use the “Save/Resume answers” dropdown list to allow or disallow students from saving their progress in the questionnaire and returning to it later.
- Use the “Allow branching questions” dropdown list to determine whether or not you will be able to show or hide questions depending on answers to other questions.
- Use the “Auto numbering” dropdown list to select whether questions and/or pages are automatically numbered. If you have allowed branching questions, you may not want to automatically number pages since the results can be confusing.
- Use the “Submission grade” dropdown list if you want the submission of a questionnaire to provide a grade for the student in the gradebook.
Content options
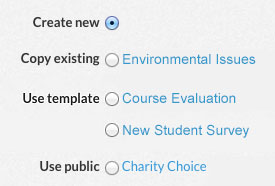
Use the content options to choose whether you want to create a new questionnaire, copy a questionnaire that already exists on your course site or select a publicly available, previously created questionnaire.
Common Module Settings
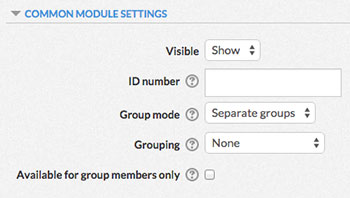 Choose whether or not to hide or show the Assignment module using the “Visible” dropdown box.
- If desired, type a number into the “ID number” text box. Setting an ID number provides a way of identifying the activity for grade calculation purposes.
- Choose a group mode for the activity. The different group modes are described below:
No groups – Students will not be separated into groups for the activity. In interactive activities, students will see the contributions of every class member.
Separate groups – Students will be separated into groups for the activity. In interactive activities, students can only contribute to their group and only view their group’s contributions.
Visible groups – Students will be separated into groups for the activity. In interactive activities, students will see the contributions of every class member, but they can only contribute to their group. - Use the “Grouping” dropdown list to determine the grouping for the activity. See Groups and Groupings for more information.
- To only make the activity available to students assigned to groups within the selected grouping, check the “Available for group members only” box. See Groups and Groupings for more information.
Restrict Access
Use the restrict Access settings to control when and how students can use the activity. See Restricting Access to Content for more information.
Activity Completion
Use the Activity Completion settings to track the completion of the activity. For more information, see Activity Completion.
Content Options
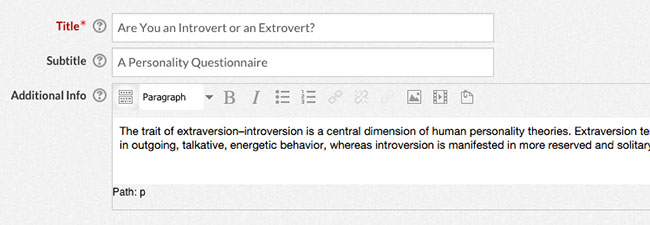
- Type a title for the questionnaire in the “Title” text box. The title will appear at the top of every page of questions. By default, the questionnaire title is the same as the questionnaire name, but you have the option to change this.
- Type a subtitle for the questionnaire in the “Subtitle” text box. The subtitle will appear below the title.
- Type additional information into the “Additional Info” content manager. This information will appear below the subtitle.
Submission Options
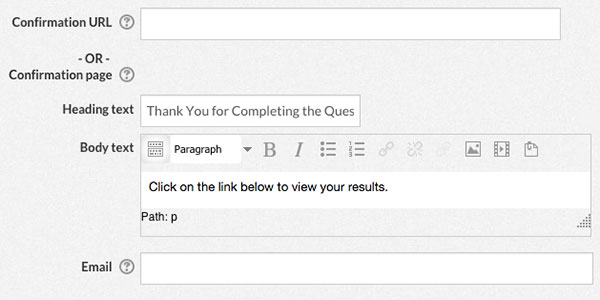
- If you would like the student to be taken to a specific web page after completing the questionnaire, type the URL for the web page into the “Confirmation URL” text box.
- If you want to create your own confirmation page for the student to see after completing questionnaire, type a heading for the page in the “Heading text” text box and content for the page in the “Body text” content manager.
- To receive an e-mail each time someone completes the questionnaire, type an e-mail address into the “Email” text box. Multiple addresses can be used when separated by commas.
Feedback Options

Feedback options allow you to calculate and display “scores” based on student responses. The feedback is organized in a tabular format. See Score Students and Give Them Feedback Based on Their Responses for instructions on using Feedback Options.
Add Questions
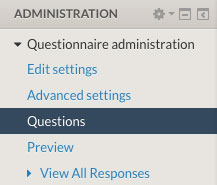
- Select “Questions” from the “Questionnaire administration” list on the left.
-
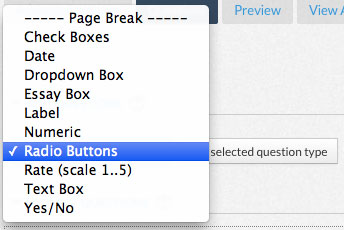 Choose a question type from the dropdown list and press the “Add selection question type” button. The question types are described below:
Page Break – Allows you to break your questions up into separate pages.
Check Boxes – The student can choose multiple answers from a list of choices with check boxes. You can specify the minimum and maximum number of boxes they are required to check.
Date – The student is given a text box to type a date and instructions for the date format. The student will get an error message if their answer is not in the correct format.
Dropdown Box – The student can only choose one answer from a dropdown list.
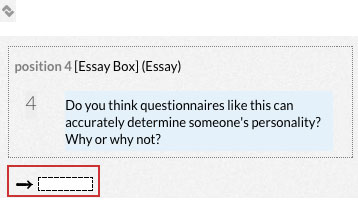
Essay Box – You can choose to provide the student with a content editor or a plain text box to type in an answer. You can also select how large the text box will be.
Label – Allows you to add a line of text, like a headline, to introduce or categorize questions.
Numeric – The student is given a text box to type a number. The student will get an error message if their answer is not a number. You can specify the maximum number of digits allowed along with the number of decimal digits.
Radio Buttons – The student can only choose one answer from a list of choices with radio buttons. You can choose whether they are aligned vertically or horizontally.
Rate (Scale 1..5) – Allows students to provide answers on a rated scale. See Working With Rate (Scale 1..5) Questions for more information.
Text Box – Provides a text box that allows the student to submit a short, typed response. You can specify the length of the text box.
Yes/No – Provides the student with two radio buttons they can use to answer the question: Yes and No. - Type a name for the question in the “Question Name” text box. The question name is only used when you export responses to CSV/Excel format, though it is also required for Feedback Options.
- Select whether or not students are required to answer the question using the “Response is required” radio buttons.
- If the “Allow branching questions” Response Option is enabled, you will be able to choose a parent question. See Show or Hide Questions Depending on Answers to Other Questions for detailed instructions.
- Type the question into the “Question Text” content manager.
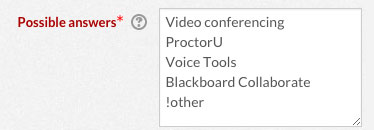
- If using the Check Boxes, Dropdown Box, Essay Box, Radio Buttons or Rate (Scale 1..5), type the answers for the student to choose from in the “Possible answers” text box. Make sure each answer is on a separate line. You can also provide an answer called “other” and give the student an opportunity to type in their own response. Do this by typing “!other” in the “Possible answers” text box, as shown below:


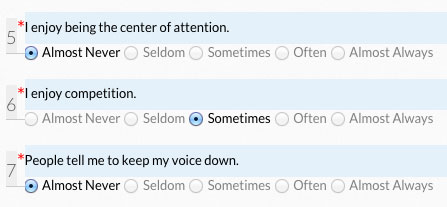
Working With Rate (Scale 1..5) Questions
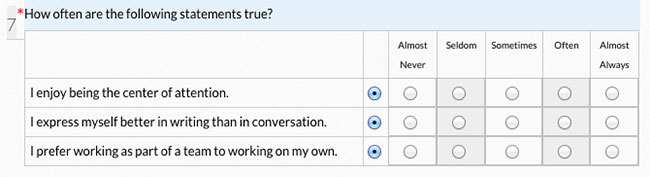
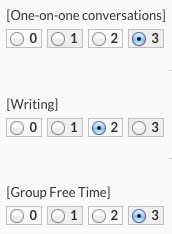
- You can use rate questions to display answers on a rated scale, such as the one shown below:
- Use the “Nb of scale items” text box to specify the number of items that will be used in the scale.
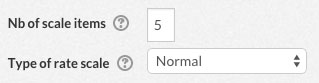
- Use the “Type of rate scale” dropdown list to select the type of scale you want to use. The scale types are described below:
Normal – Provides a standard rating scale with no special features.
N/A column – A normal scale with an “N/A” column added to the right of your other columns.
No duplicate choices – Forces students to choose a different rating for each item.
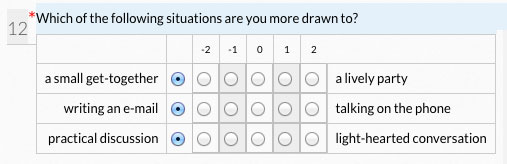
Osgood – Provides a scale based Osgood’s Semantic Differential. Osgood scales have bipolar adjectives at each end, such as the one shown below:
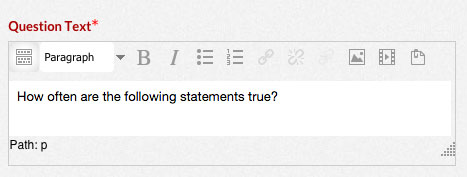
- Type the question and/or scale instructions in the “Question Text” content manager.
 .
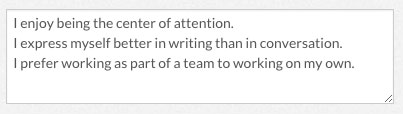
. - Type the items to be rated on separate lines in the “Possible answers” text box.
- By default, the student is given a numerical scale to rate each item. You can change the numerical ratings to something else using the “Possible Answers” text box. Type the number, followed by the equal (=) sign and the word or phrase you want to use for that rating. For example, Possible Answers that look like this:
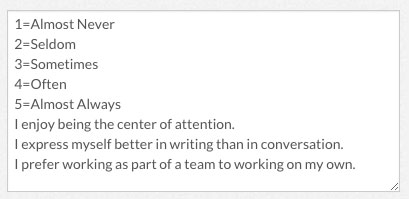
Will create a scale in the questionnaire that looks like this:
- When using an Osgood scale, set the bipolar adjectives on either side by typing the pairs with a pipe (|) between them. For example, Possible Answers that look like this:
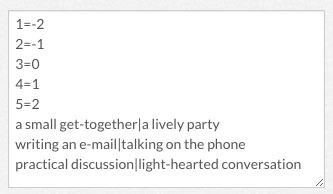
Will create an Osgood scale in the questionnaire that looks like this:
Move, Edit, Copy and Delete Questions
- Select “Questions” from the “Questionnaire administration” list on the left.
- Click the up and down arrows icon to move a question to a different place in the questionnaire. All questions will be displayed with a white box and black arrow between them. Click on one of the white boxes to move your question to that position in the questionnaire.
- Click the gear icon to edit a question.

- To copy a question, click the gear icon to edit it, make your changes, and then click the “Save as New Question” button at the bottom.

- Click the “X” icon to delete a question.

- All questions that students are required to answer will have a red dot next to them. Questions that are optional will have a green dot next to them. To make an optional question required or vice versa, click the green or red dot next to the question.

Show or Hide Questions Depending on Answers to Other Questions
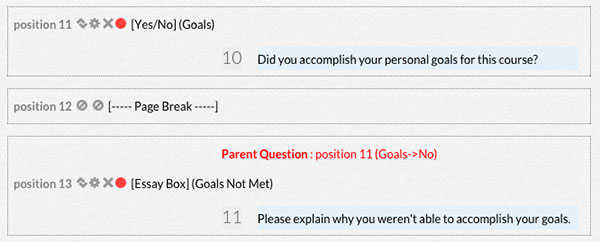
At some point, you may only want to show questions if a student gives a particular answer to another question. For example, let’s say you have a question that asks “Did you accomplish your personal goals for this course?” to which the student can answer “yes” or “no”. If the student answers “no”, you want to give them a text box to explain in more detail why they weren’t able to accomplish their goals. If the student answers “yes”, you want them to simply move on to the next question.
- The first question in the example above, “Did you accomplish your personal goals for this course?” is called the parent question. Create your parent question the same way you would any other question. See Add Questions for more details.
- Next, create another question that will be shown or hidden depending on how the student answers your parent question. This is called the child question.
- Now you need to assign the parent question to the child question. Click on the gear icon next to the child question to edit it.
- Click on the “Parent Question” dropdown list. A list of all possible parent questions will be displayed along with all possible answers to each question. Find the parent question you just created and select the answer to it that will make the child question appear.

- Click the “Save changes” button.

- Red text will now appear above the child question to let you know it has a parent question. You will also notice that a page break has been added. All child questions are preceded by a page break.
Preview the Questionnaire
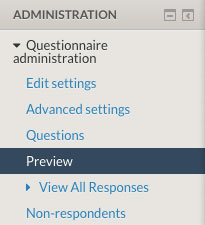
- Select “Preview” from the “Questionnaire administration” list on the left.
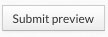
- You will be shown the questionnaire as it will be displayed for students. You can test the functionality of the questionnaire by filling out the questions and clicking the “Submit preview” button.
 Previewing the questionnaire only allows you to test the questions themselves. It does not allow you to test the introduction, confirmation page and scoring. To test those aspects of the questionnaire, you will need to switch to a student role. See Roles and Permissions for more information.
Remind Students to Answer Questions
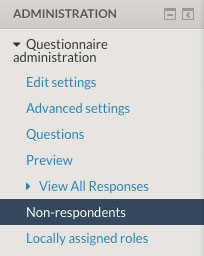
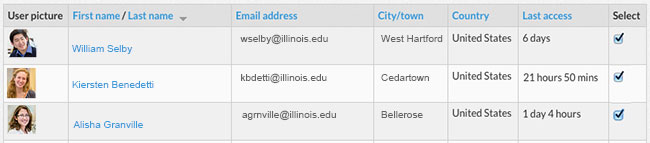
- Select “Non-respondents” from the “Questionnaire administration” list on the left.
- A list of students who haven’t taken the questionnaire will be displayed. To send them a reminder message, check the box next to each student you want to send a message too. Alternatively, you can use the “Select all” and “Deselect all” buttons at the bottom.
- Scroll down to the bottom of the page and type in a subject for your message in the “Subject” text box.

- Use the “Message body” content manager to type your message.
- Press the “Send” button.
Score Students and Give Them Feedback Based on Their Responses
- In order to calculate a coherent score based on student responses, use the Radio Button, Dropdown Box and Rate (Scale 1..5) question types when creating your questionnaire. See Add Questions for detailed information on these question types.
- In the “Possible answers” text box for your questions, make sure that each answer choice begins with a value and an equal (=) sign. The values attributed to the various choices must be carefully considered because they will be added up to calculate the feedback score.

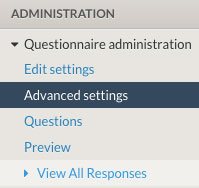
- Once you’ve finished adding questions, select “Advanced Settings” from the “Questionnaire administration” list on the left.
- Scroll down and click on “Feedback Options”.
- Use the “Feedback options” dropdown list to select a format for your feedback to be displayed. The formats are described below:
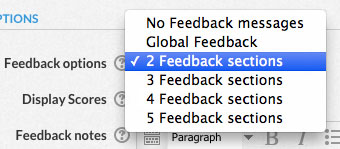
No Feedback messages – Only use this format when you are not providing feedback.
Global Feedback – If you do not want to divide your questions up into categories and want to use a single score for the entire questionnaire, choose this format.
2 or more Feedback Sections – Allows you to divide all of your questions into separate categories or “sections”. The students will be given a separate score for each section. - Use the “Display Scores” dropdown list to determine whether the student’s numeric score will be displayed on the feedback page.
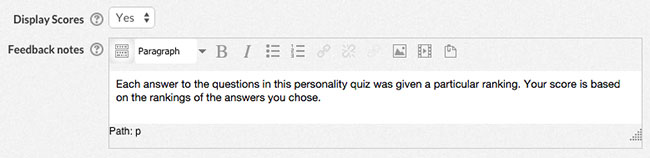
- If desired, type an explanation of how the questionnaire answers are scored in the “Feedback notes” content manager. This information will be displayed at the bottom of the feedback page.
- Click the “Save settings and edit Feedback Sections” button.

- If you selected “Global Feedback” for the Feedback option, you will see a page beginning with “Global Feedback Heading”. If you picked a different Feedback option, Skip to step 14.
- Type a label that will be used when viewing response reports into the “Label” text box.
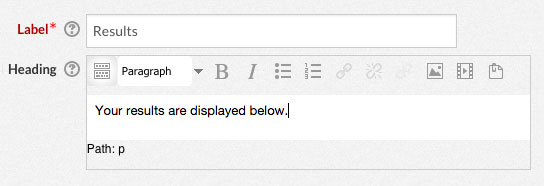
- Type a general feedback heading or description in to the “Heading” content manager. This information will appear at the top of the feedback report.
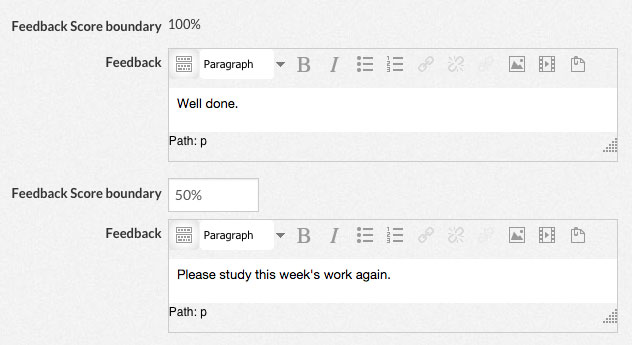
- Under “Global Feedback Messages” you will see several boxes for “Feedback Score boundary” and “Feedback”. These boxes allow you to display customized messages based on the score the student receives. The highest score boundary is 100%. You have the option of creating other score boundaries and typing in feedback messages for each boundary. In the example below, students who score between 100% and 50% will see the “Well done” message, and those who score between 49.99% and 0% will see “Please study this week’s work again”.
- If you need more score boundaries than are available, click the “Add 2 more feedback fields” button at the bottom.

- If you selected 2 or more Feedback Sections for the Feedback option, you will see a page with all your questions listed. To the left of each question are a set of radio buttons. Use the radio buttons to categorize each of your questions into the section they belong to.
- Click the “Save Sections settings and edit Feedback Messages” button.

- The next page you see will pertain only to section 1. All the questions you categorized in to this section will be displayed at the top. Type a label that will be used when viewing response reports for this section into the “Label” text box.
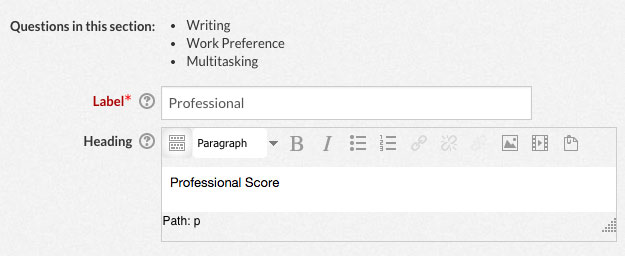
- Type a general heading or and/or description for this section into the “Heading” content manager.
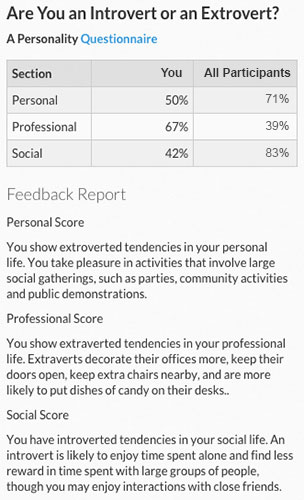
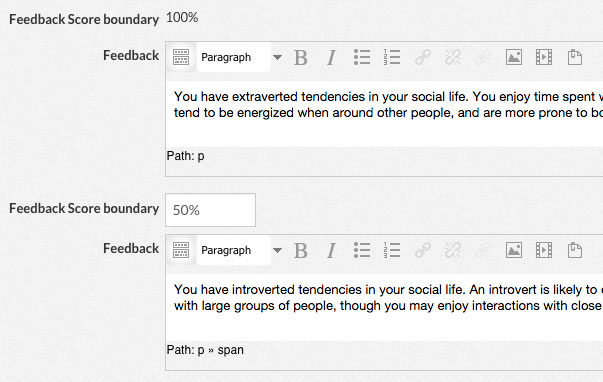
- Under “Feedback Messages For Section…” you will see several boxes for “Feedback Score boundary” and “Feedback”. These boxes allow you to display customized messages based on the score the student receives. The highest score boundary is 100%. You have the option of creating other score boundaries and typing in feedback messages for each boundary. In the example below, students who score between 100% and 50% will see the “extraverted” message, and those who score between 49.99% and 0% will see the “introverted” message.
- If you need more score boundaries than are available, click the “Add 2 more feedback fields” button at the bottom.
- Click the green “Next section…” button at the bottom. Repeat steps x through x until you have completed all feedback section pages.

- Click the “Save settings” button at the bottom.
View and Download Student Responses
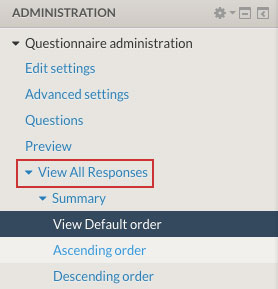
- Select “View All Responses” from the “Questionnaire administration” list on the left.
- Statistics for student responses are displayed for each question (and, if using Feedback options with sections, they are displayed for each section.)
- Select “Ascending order” or “Descending order” from the “Questionnaire administration” list on the left to order the answers to questions by the number of responses they received.
This only applies to Check Boxes, Dropdown Box, Radio Buttons and Rate (Scale 1..5) question types.
- Select “Download in text format” from the “Questionnaire administration” list on the left to download responses as a CSV file.
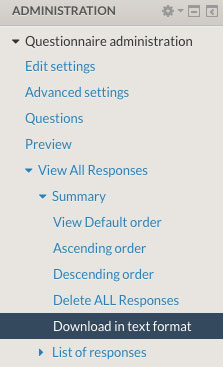
- Select “List of responses” from the “Questionnaire administration” list on the left to see a list of all students who completed the questionnaire. Click on a student’s name to see their individual answers to each question.