
 A Lesson is a powerful activity that you can use to create interactive teaching presentations. Lessons generally include a series of pages that the student will navigate through using buttons. You can also ask questions, and then provide different types of feedback depending on the students’ answers.
Lesson Settings
› General
› Appearance
› Availability
› Prerequisite Lesson
› Flow Control
› Grade
› Common Module Settings
› Restrict Access
› Activity Completion
Lesson Module
› Getting Started
› Create Content Pages
› Create Question Pages
› Using Multichoice Questions
› Using Matching Questions
› Using Numerical Questions
› Using Short Answer Questions
› Using True/False Questions
› Create a Group of Questions Displayed in Random Order
› Re-order, Edit, Preview and Delete Pages
› View Pages in a Detailed or Concise Format
› View Student Progress and Class Statistics
› Import Questions
Appearance
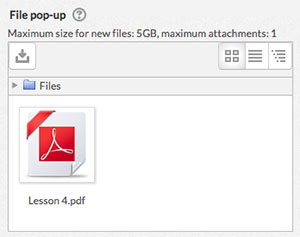
- If you have key information that you want students to be able to access at any point during the lesson, save the information as a PDF file and upload it using the “File pop-up” file uploader. The pdf will be linked on the left side of your course site, above the administration menu.
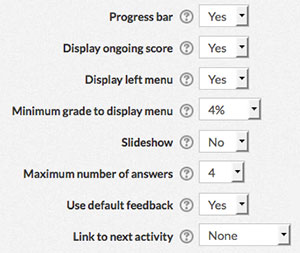 To add a progress bar that shows students how much of the lesson they’ve completed, select “Yes” from the “Progress bar” dropdown list.
- If you plan to score students’ answers to questions during the lesson and want them to view their score at any time, select “Yes” from the “Display ongoing score” dropdown list.
- Use the “Display left menu” dropdown list to determine whether or not you want to display a menu on the left side of the course site, above the administration menu, that links to all of the lesson pages.
- When enabling the “Display left menu” option, use the “Minimum grade to display menu” dropdown list to determine whether a student must obtain a certain grade before viewing the left menu. This forces the student to go through the entire lesson on their first attempt, then after obtaining the required grade they can use the left menu for review.
- If you want your lesson to be displayed in slideshow format with a fixed width and height, select “Yes” from the “Slideshow” dropdown menu.
- Use the “Maximum number of answers” dropdown list to determine the maximum number of answer choices for questions that are asked in the lesson.
- Select “Yes” from the “Use default feedback” dropdown list if you want messages that read “That’s the correct answer” or “That’s the wrong answer” to be displayed each time a student answers a question for which you have not already provided a specific feedback message.
- To provide a link at the end of the lesson to another activity in the course, select the activity from the “Link to next activity” dropdown list.
Availability
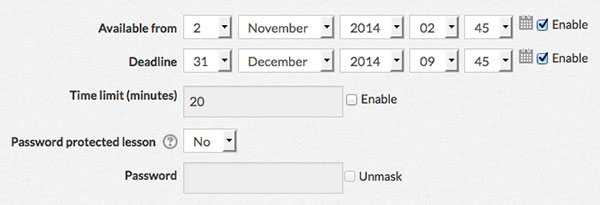
- To prevent students from viewing the lesson before a certain date, check the “Enable” box for “Available from”. Use the dropdown lists or calendar tool to pick the earliest date that the students can view the lesson.
- To add a lesson deadline, check the “Enable” box for “Deadline”. Use the dropdown lists or calendar tool to pick the deadline for the lesson.
- To require students to complete the lesson within a certain time limit, check the “Enable” box for “Time limit (minutes)” and type the maximum number of minutes students can spend on the lesson in the text box.
- If you want to require students to type in a password before having access to the lesson, choose “Yes” from the “Password protected lesson” dropdown list and type the Password into the “Password” text box.
Prerequisite Lesson
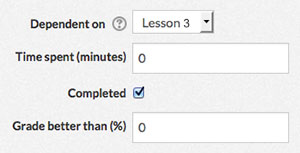 To prevent students from accessing the lesson until they’ve met certain criteria with another lesson, choose the other lesson from the “Dependent on” dropdown list.
- To require students to spend a certain period of time on the prerequisite lesson, type the minimum number of minutes into the “Time spent (minutes)” text box.
- To require students to complete the prerequisite lesson, check the “Completed” check box.
- To require students to obtain a certain grade in the prerequisite lesson, enter the minimum grade into the “Grade better than (%)” text box.
Flow Control
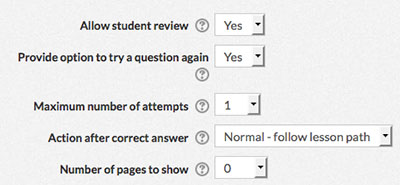 To allow students to navigate through the lesson from the beginning more than once, select “Yes” from the “allow student review” dropdown list.
- If you want students to have another chance at answering a question when they get it wrong, select “Yes” from the “Provide option to try a question again”.
Students will not be given points for their second answer.
- When enabling the “Provide option to try a question again” setting, use the “Maximum number of attempts” dropdown list to determine how many chances students get to answer the question.
- Use the “Action after correct answer” dropdown list to determine how the lesson proceeds once a student answers a question correctly. The options are described below:
Normal – The next page in the lesson path is displayed.
Show an unseen page – Pages are shown in a random order with no page shown twice.
Show an unanswered page – Pages are shown in a random order with pages containing unanswered questions shown again. - When selecting the “Show an unseen page” or “Show an unanswered page” from the “Action after correct answer” dropdown list, specify the number of pages shown in a lesson using the “Number of pages to show” dropdown list. When zero is selected, all pages are shown.
Grade
Use the “Grade category” dropdown list to choose the grade book category for this activity. See Grading Activities for more information.
Common Module Settings
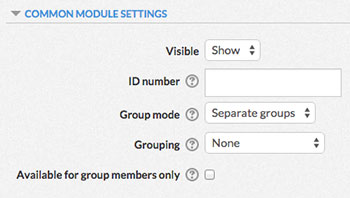 Choose whether or not to hide or show the Assignment module using the “Visible” dropdown box.
- If desired, type a number into the “ID number” text box. Setting an ID number provides a way of identifying the activity for grade calculation purposes.
- Choose a group mode for the activity. The different group modes are described below:
No groups – Students will not be separated into groups for the activity. In interactive activities, students will see the contributions of every class member.
Separate groups – Students will be separated into groups for the activity. In interactive activities, students can only contribute to their group and only view their group’s contributions.
Visible groups – Students will be separated into groups for the activity. In interactive activities, students will see the contributions of every class member, but they can only contribute to their group. - Use the “Grouping” dropdown list to determine the grouping for the activity. See Groups and Groupings for more information.
- To only make the activity available to students assigned to groups within the selected grouping, check the “Available for group members only” box. See Groups and Groupings for more information.
Restrict Access
Use the restrict Access settings to control when and how students can use the activity. See Restricting Access to Content for more information.
Activity Completion
Use the Activity Completion settings to track the completion of the activity. For more information, see Activity Completion.
Getting Started
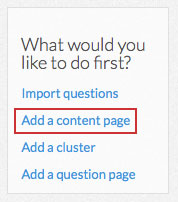 When you first create a lesson activity, the module will provide you with several choices for getting started. If this is your first time using lessons, we suggest you click on the “Add a content page” link and follow the instructions, starting with step 3, under Create Content Pages.
Create Content Pages
- Click the “Edit” button at the top of the module.

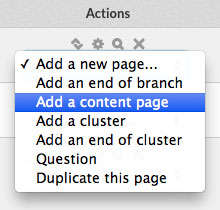
- In the “Actions” column, select “Add a content page” from the “Add a new page…” dropdown list.
- Type a title for your page in the “Page title” text box.
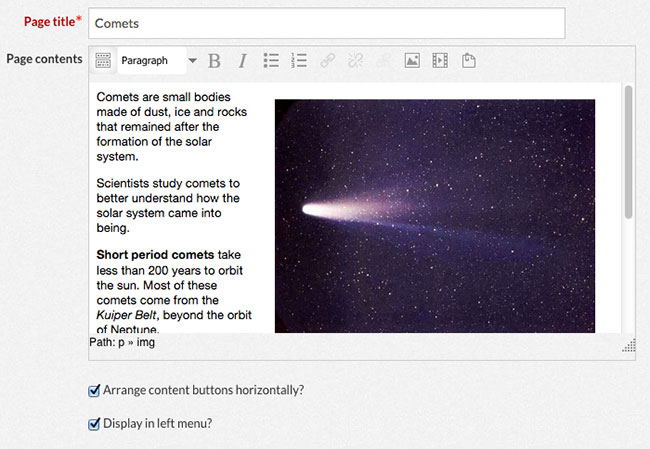
- Use the “Page contents” content manager to add content to your lesson page. See Content Manager for more information.
- Check the “Arrange content buttons horizontally?” checkbox to display the buttons in horizontal format at the bottom of the page. If you prefer to display the buttons vertically, uncheck this box.
- Check or uncheck the “Display in left menu?” box to determine whether this page will display in the navigation menu on the left.
This option depends on the selections you made for the “Display left menu” choices in the Appearance settings.
- Type the names of the navigation buttons at the bottom of your page in the “Description” text box under “Content 1”, “Content 2”, etc.
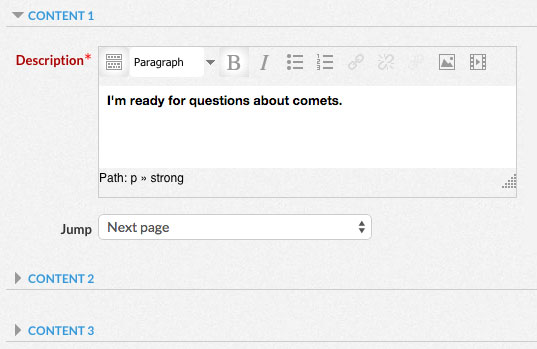
- Use the “Jump” dropdown list to determine where in your lesson students will go when they click on the button. The options are described below:
Next Page – The button takes the student to the next page in the lesson.
Previous Page – The button takes the student to the previous page in the lesson.
End of Page – The button takes the student to the end of the lesson.
Unseen question within a content page – The button takes the student to a question they haven’t yet seen.
Random question within a content page – The button takes the student to a random question.
Random content page – The button takes the student to a randomly chosen content page within the lesson.
Other pages – You can choose for the button to take the student to any of the other pages in your lesson. They are listed underneath the other “Jump” options. - Click the “Save page” button.

Create Question Pages
- Click the “Edit” button at the top of the module.

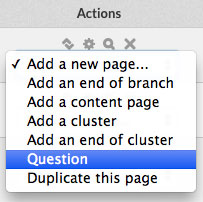
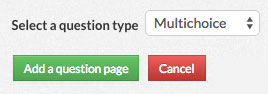
- In the “Actions” column, select “Question” from the “Add a new page…” dropdown list.
- Choose the type of question you would like to create from the “Select a question type” dropdown box. The options are described below:
Matching – This allows you to set up lists of words or phrases which must be matched against other lists. The student must make all matches correctly to receive a score.
Multichoice – The student is given a question and a list of answers. The answer list will be shuffled every time the question is viewed by a student.
Numerical – This requires a number as an answer.
Short Answer – A student must provide a single word or short phrase answer.
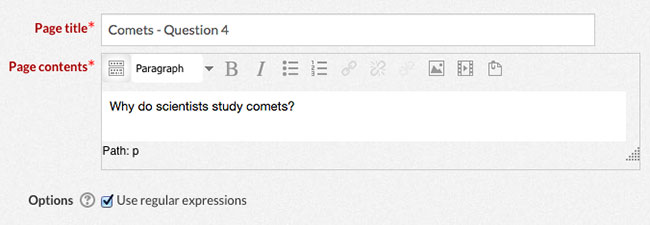
True / False – The student is given a sentence and must decide if it is true or false.Due to incompatibilities with the gradebook, we highly recommend that you do NOT use essay questions in the Lesson activity. - Type a page title in the “Page title” text box. This is the title that will display in the “Page title” column of the main module page.
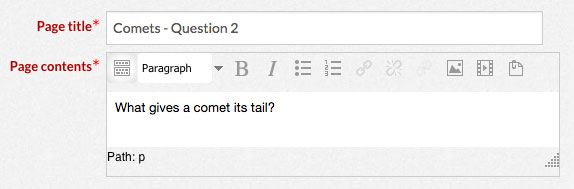
- Type your question along with any details or instructions into the “Page contents” Content Editor.
Using Multichoice Questions
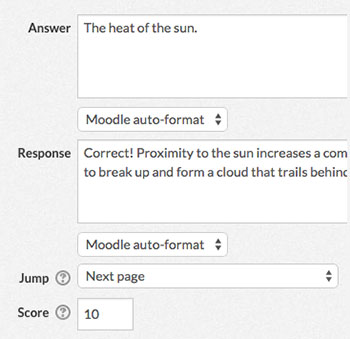
- Type each choice in the “Answer” text boxes. The number of answer boxes available depends on the “Maximum number of answers” option in the Appearance Settings.
- Type the response you want the student to receive when they choose each answer in the “Response” text boxes.
- Use the “Jump” dropdown lists to determine what page the student will be taken to when they choose each answer.
- Type the number of points the student will be awarded for each answer in the “Score” text boxes.
- Click the “Save page” button.
Using Matching Questions
- Type the response you want the student to receive when they match all elements correctly or incorrectly into the “Correct response” and “Wrong response” text boxes.
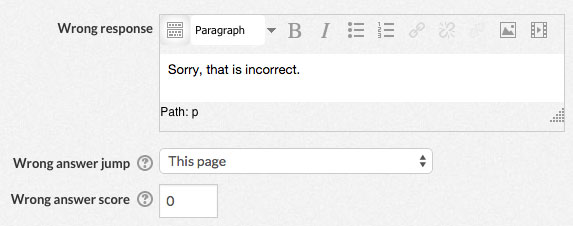
- Use the “Correct answer jump” and “Wrong answer jump” dropdown lists to determine what page the student will be taken to when they answer correctly or incorrectly.
- Type the number of points the student will be awarded for each answer in the “Correct answer score” and “Wrong answer score” text boxes.
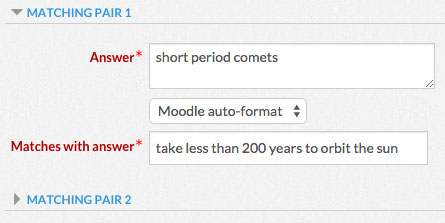
- Type each matching pair in the “Answer” and “Matches with answer” text boxes. The number of matching pairs available depends on the “Maximum number of answers” option in the Appearance Settings.
- Click the “Save page” button.

Using Numerical Questions
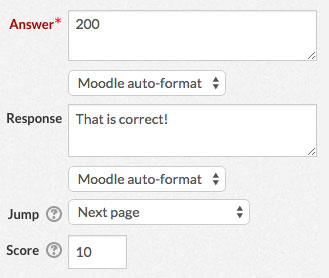
- Type the correct numerical response in the the “Answer 1” text box.
- Type the response you want the student to receive when they answer correctly into the “Response” text box.
- Use the “Jump” dropdown list to determine what page the student will be taken to when they answer correctly.
- Type the number of points the student will be awarded for the correct answer in the “Score” text box.
- You can use the remaining answers to allow for multiple correct answers, provide partial credit to certain answers, or predict incorrect answers that will receive tailored responses. The number of answers available depends on the “Maximum number of answers” option in the Appearance Settings.
- Click the “Save page” button.
Using Short Answer Questions
- If desired, you can use a special markup language to analyze student answers for short answer questions. To do so, check the “use regular expressions” box. Click here for more information on Regular Expressions.
- Type the correct response in the the “Answer 1” text box. Students will NOT need to match the capitalization of this answer in order to be awarded a score.

- If you want to make sure students use certain words in their answer but aren’t concerned with how they phrase their answer overall, use asterisks (*) as wildcards. The asterisk represents any number of characters, including no characters at all. For example, typing in “long*” will provide a correct response for “longer” and “longest”. However, it will also allow “longing”, “longitude” etc.
- Type the response you want the student to receive when they answer correctly into the “Response” text box.
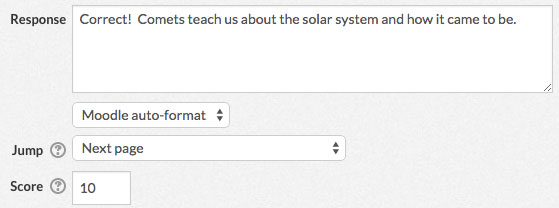
- Use the “Jump” dropdown list to determine what page the student will be taken to when they answer correctly.
- Type the number of points the student will be awarded for the correct answer in the “Score” text box.
- You can use the remaining answers to allow for multiple correct answers, provide partial credit to certain answers, or predict incorrect answers that will receive tailored responses. The number of answers available depends on the “Maximum number of answers” option in the Appearance Settings.
- Click the “Save page” button.

Using True/False Questions
- Type “True” or “False” into the “Correct response” and “Wrong response” text boxes.
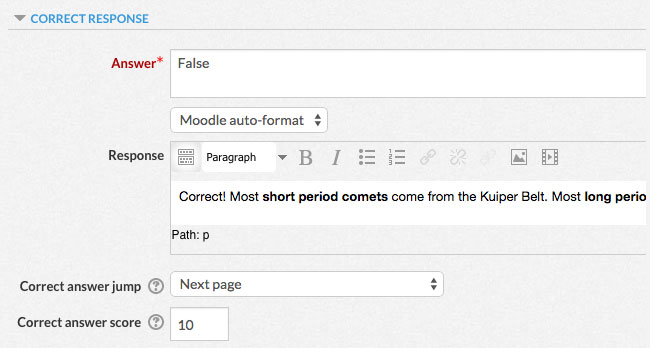
- Type the response you want the student to receive when they answer correctly or incorrectly into the “Response” text boxes.
- Use the “Correct answer jump” and “Wrong answer jump” dropdown lists to determine what page the student will be taken to when they answer correctly or incorrectly.
- Type the number of points the student will be awarded for the correct answer and wrong answer in the “Correct answer score” and “Wrong answer score” text boxes.
- Click the “Save page” button.
Create a Group of Questions Displayed in Random Order
A group of randomly ordered questions is called a “cluster”.
- Click the “Edit” button at the top of the module.
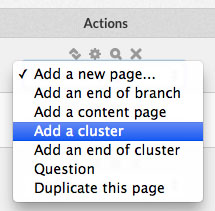
- Mark the start of your cluster. In the “Actions” column, select “Add a cluster” from the “Add a new page…” dropdown list.
- Create the questions that will go inside your cluster. Follow the instructions under Create Question Pages. You can add as many questions as you like.
- Mark the end of your cluster. In the “Actions” column, select “Add an end of cluster” from the “Add a new page…” dropdown list.

- The questions between your “Cluster” and “End of cluster” pages will now be asked randomly.
Re-order, Edit, Preview and Delete Pages
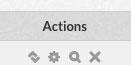
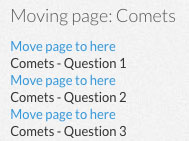
- Click the on the up and down arrows icon in the “Actions” column to re-order a page. At the spot where you want to move the page, click the “Move page to here” link.
- Click on the gear icon in the “Actions” column to edit a page.
- Click on the magnifying glass icon in the “Actions” column to preview a page.
- Click on the X icon in the “Actions” column to delete a page.
- To preview the lesson from the beginning click the “Preview” button at the top of the module.

View Pages in a Detailed or Concise Format
- Click on the “Edit” button at the top of the module.
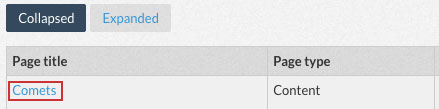
- To view details for all of the pages, click the “Expanded” button under the “Edit” button.

- To view all of the pages in a concise, tabled format, click the “Collapsed” button under the “Edit” button.

- To view the details of a single page, click on the “Collapsed” button and then click on the title of that page in the “Page title” column.
View Student Progress
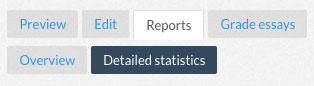
- Click the “Reports” button at the top of the module.

- Click the “Overview” button.
- Each student will be listed in table format with a column for their individual attempts at completing the lesson and a column for their highest score.
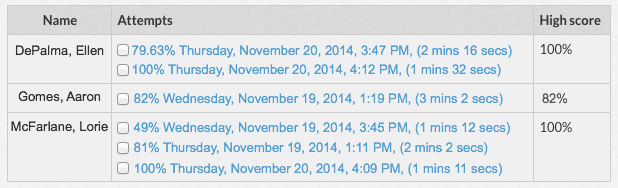
- To see how a particular student answered specific questions, click on an attempt link in the “Attempts” column.
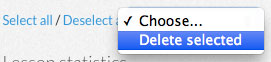
- To remove attempt from the report, click on the checkbox next to the attempt. Alternatively, you can use the “Select all” and “Deselect all” links at the bottom of the table. Then, choose “Delete selected” from the dropdown list at the bottom of the table.
- Class statistics are displayed below the list of students. To see how the class answered specific questions, click the “Detailed statistics” at the top of the module.
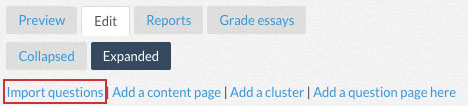
Import Questions
- You will have the option of importing questions when you first create a lesson activity. To import questions at a later time, click on the “Edit” button and then the “Expanded” button at the top of the module. Click on the “Import questions” link.
- Use the “File format” dropdown list to choose which type of file you will be importing.
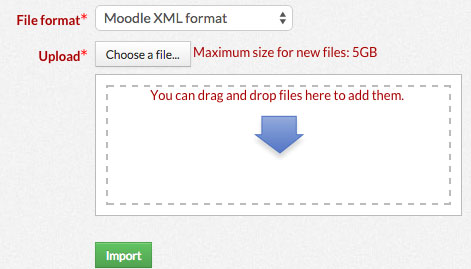
- Upload your file using the file uploader.
Working with Activities and Resources
› Add an Activity or Resource
› Move or Arrange an Activity or Resource
› Rename an Activity or Resource
› Edit the Settings of an Activity or Resource
› Hide or Show an Activity or Resource
› Copy an Activity or Resource
› Allow a Specific User Certain Permissions When Using an Activity or Resource
› Delete an Activity or Resource
› Change the Group Mode of an Activity or Resource
Add an Activity or Resource
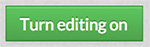
- In the upper right, click on the green button that says “Turn editing on”.
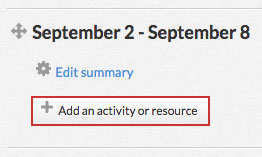
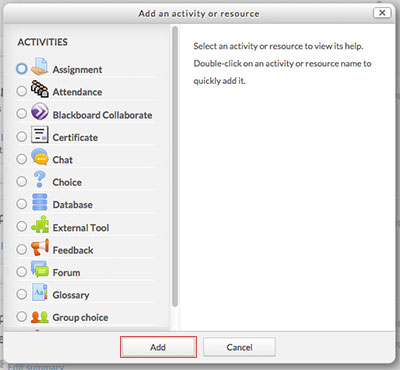
- Locate the section where you want to add an activity or resource. At the bottom of the section, click on the button that says “Add an activity or resource”
- A window will pop up with a list of activities and resources. When you click on one of the items in the left column, a description will appear in the right column. Choose the activity or resource you want and click the “Add” button.
Move or Arrange an Activity or Resource
To rearrange the order of an activity or resource:
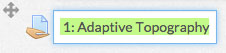
- Click on the compass arrows icon next to the title of the activity or resource you want to move and hold down the mouse button.

- Drag the section up or down to move it to a new location.
- Release the mouse button.
To add or remove an indentation to an activity or resource:
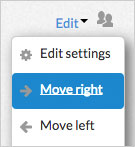
- Click on the “Edit” button to the left of the activity or resource.
- From the drop-down list, choose “Move right” or “Move left” next to the arrow icons.
Rename an Activity or Resource
- Click on the pen icon to the right of the activity or resource’s name.

- Type in a new name for the activity or resource
- Press enter to save or escape to cancel.
Edit the Settings of an Activity or Resource
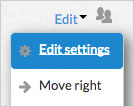
- Click on the “Edit” button to the right of the activity or resource.
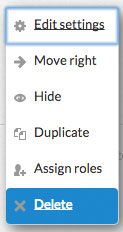
- From the dropdown list, choose “Edit settings” next to the gear icon to hide the activity or resource.
Hide or Show an Activity or Resource
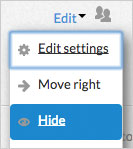
- Click on the “Edit” button to the right of the activity or resource.
- From the dropdown list, choose “Hide” next to the eye icon to hide the activity or resource.
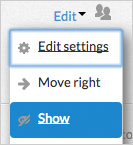
- Once the activity or resource has been hidden, return to the “Edit” menu and choose “Show” to show it again.
Copy an Activity or Resource
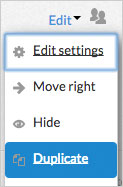
- Click on the “Edit” button to the right of the activity or resource.
- From the dropdown list, choose “Duplicate” next to the pages icon.
Allow a Specific User Certain Permissions When Using an Activity or Resource
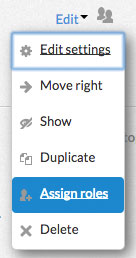
- Click on the “Edit” button to the right of the activity or resource.

- From the dropdown list, choose “Assign roles” next to the user icon.
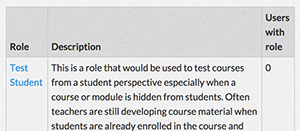
- Choose the type of role you want to assign to a specific user. The details of that role are listed in the “Description” column.
- Choose the specific user from your list of potential users on the right. Click the arrow buttons to add or remove them to the “Existing Users” list on the left. You can also use the search boxes at the bottom to find a specific user.

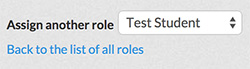
- The names in the “Existing Users” list will be assigned the role you chose on the previous page. When you’re finished, you can choose another roll to add from the drop-down list at the bottom, or you can return to the previous page by clicking on “Back to the list of all roles”.
Delete an Activity or Resource
- Click on the “Edit” button to the right of the activity or resource.
- From the dropdown list, choose “Delete” next to the X icon.
Change the Group Mode of an Activity or Resource
- Click on the user icon next to the “Edit” button of the activity or resource.

- Every time you click, the icon will change. Each icon represents a different group mode. The different group modes are described below:
 No groups – Students will not be separated into groups for the activity. In interactive activities, students will see the contributions of every class member.
 Separate groups – Students will be separated into groups for the activity. In interactive activities, students can only contribute to their group and only view their group’s contributions.
 Visible groups – Students will be separated into groups for the activity. In interactive activities, students will see the contributions of every class member, but they can only contribute to their group.